Are you looking to create a garden near your house or building but don't know where to start? If that's the case, this guide is for you.
This article provides a step-by-step guide for creating a practical, picture-perfect garden plan.
Steps to Create a Garden Floor Plan with Edraw.AI
Step 1: Open Blank Canvas and Basic Set Up
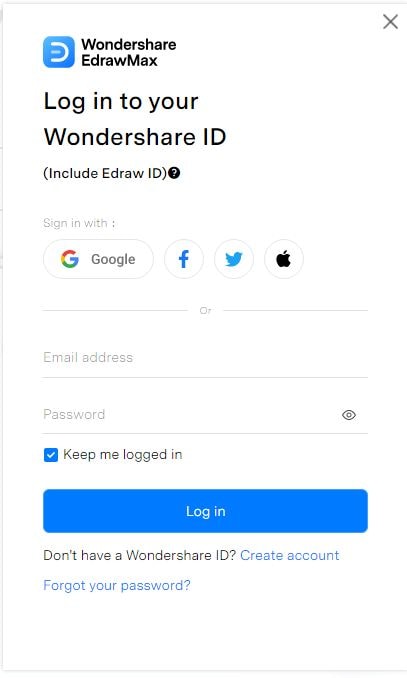
- Open Edraw.AI, create your account with your email or a Google account, so you can start using the features and tools.
- After signing up, click on the New button in the top left corner of the screen above the home button.
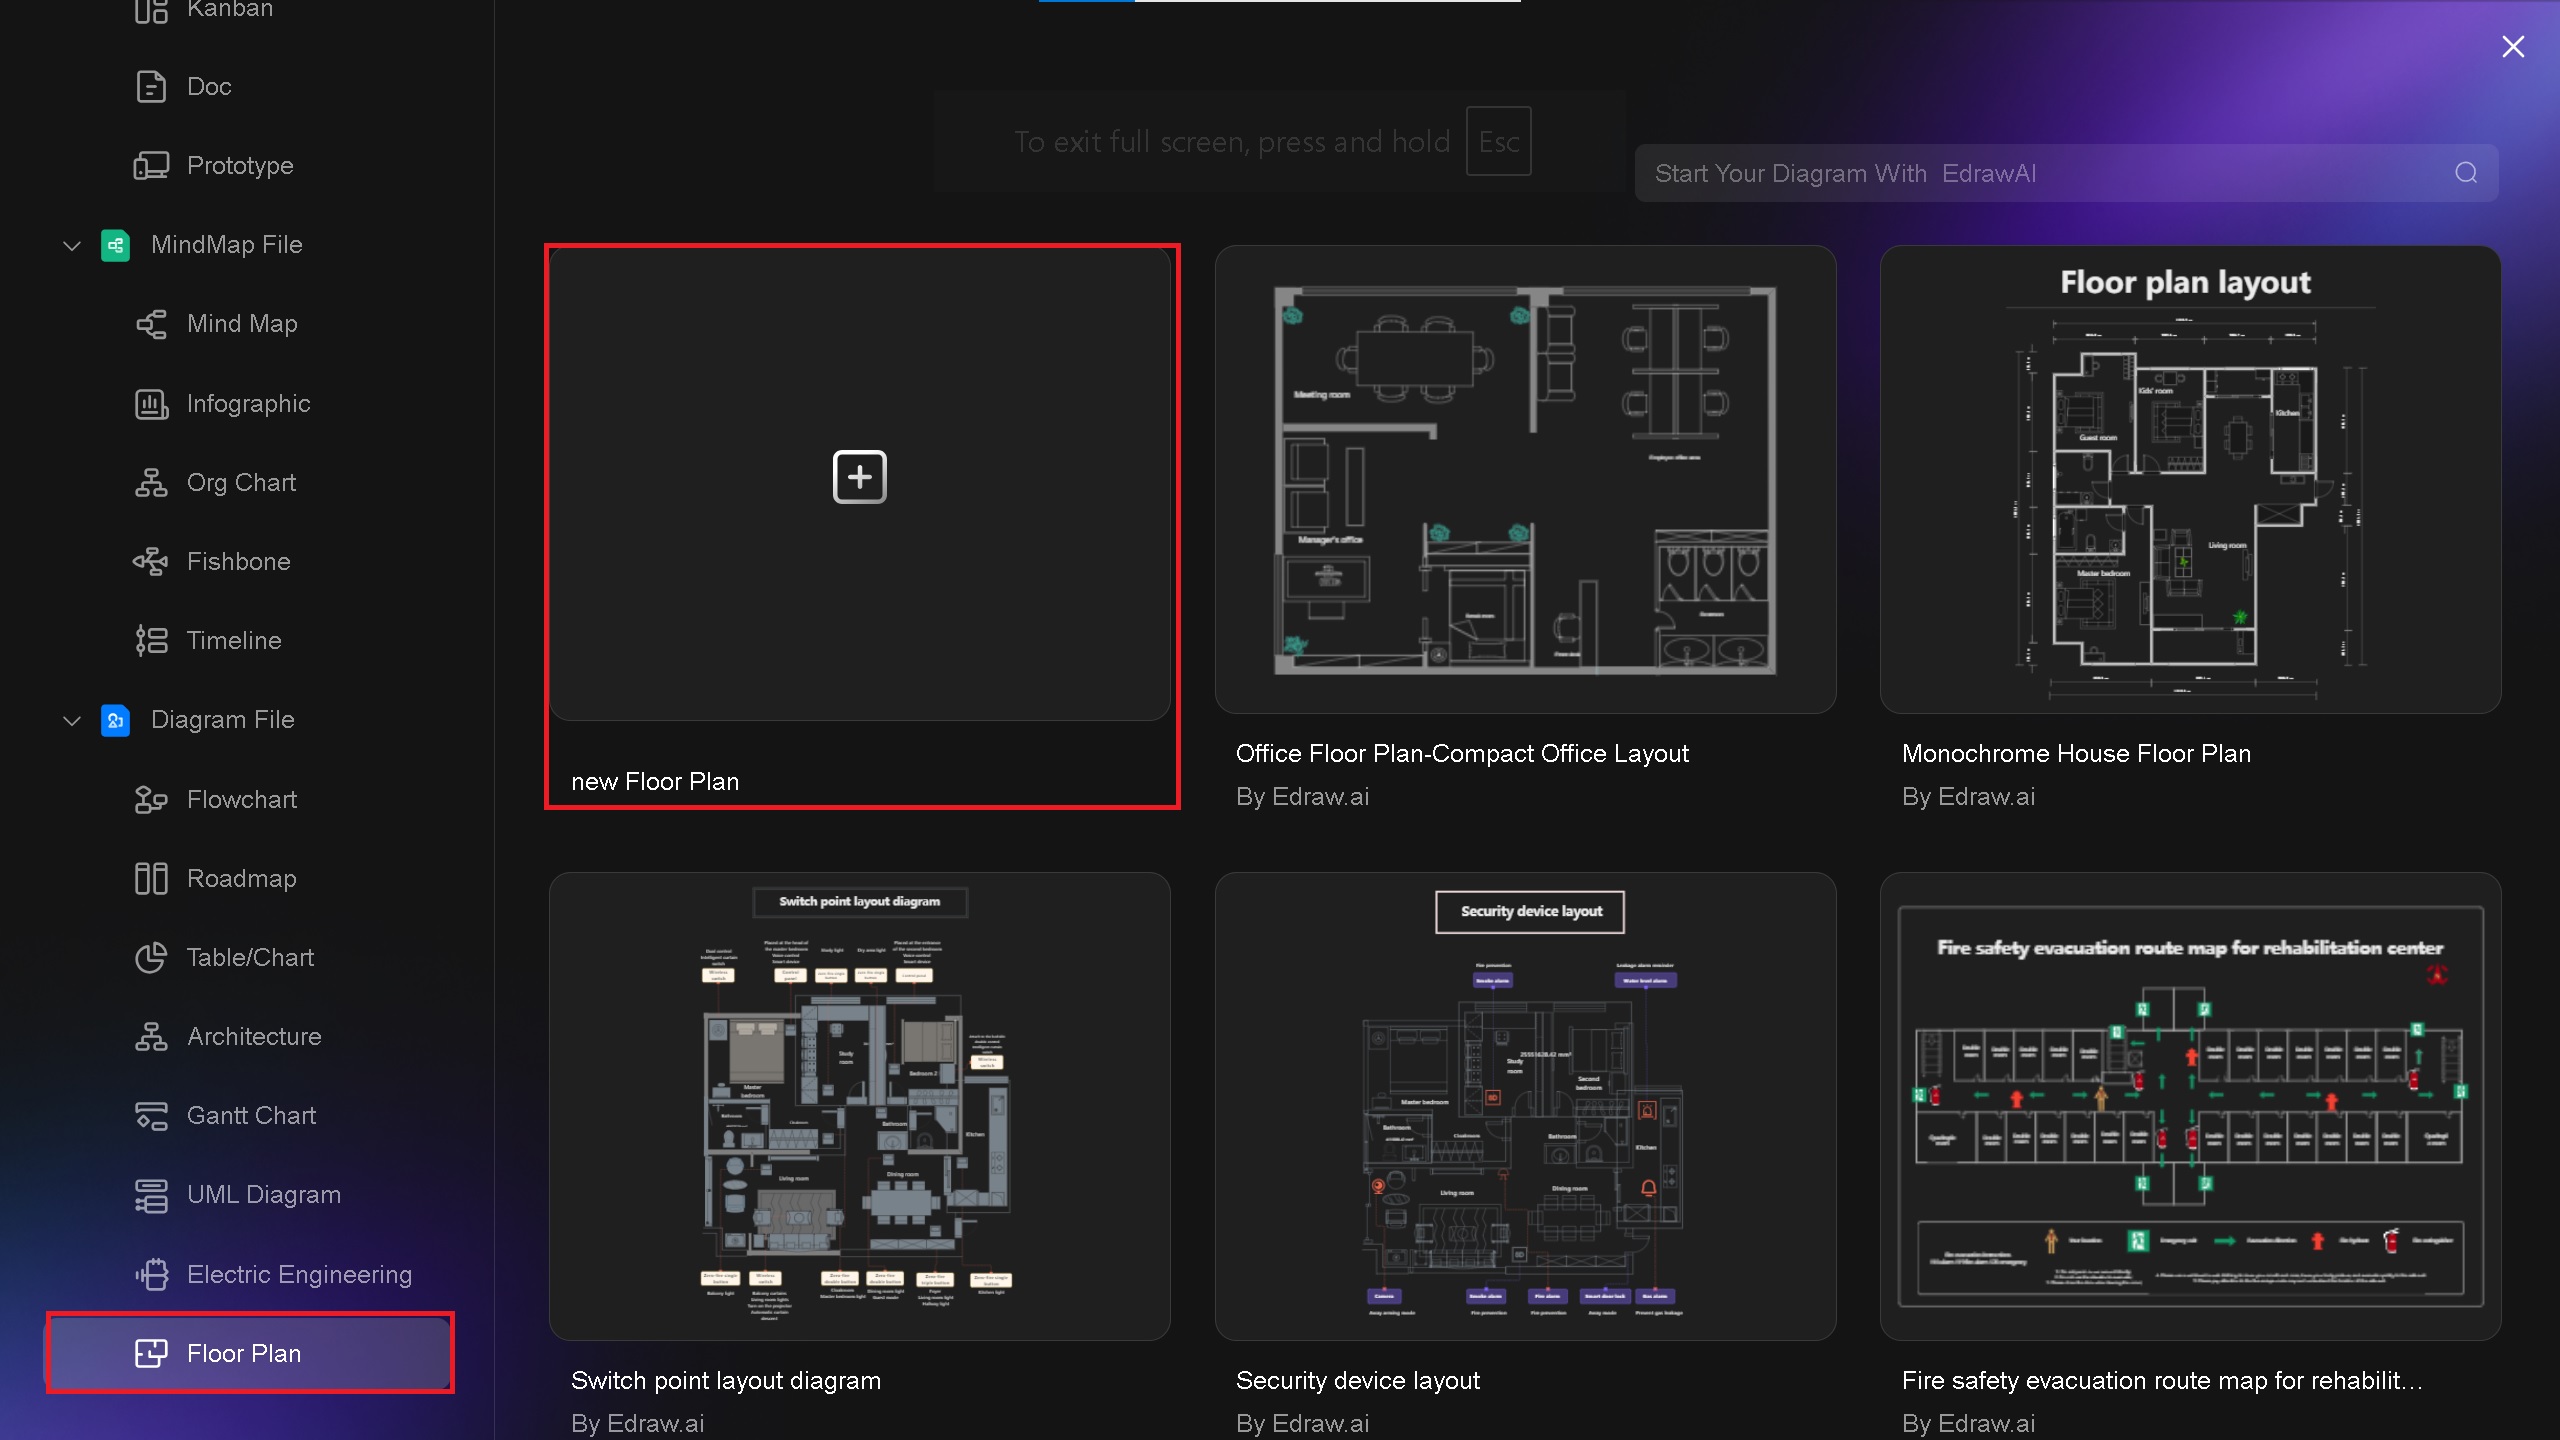
- You will see different canvas options. Scroll down and select Floor plan > New Floor plan to open a blank canvas related to the floor plan. After clicking it, a new blank canvas will be opened in a new tab, where you can create your garden plan.
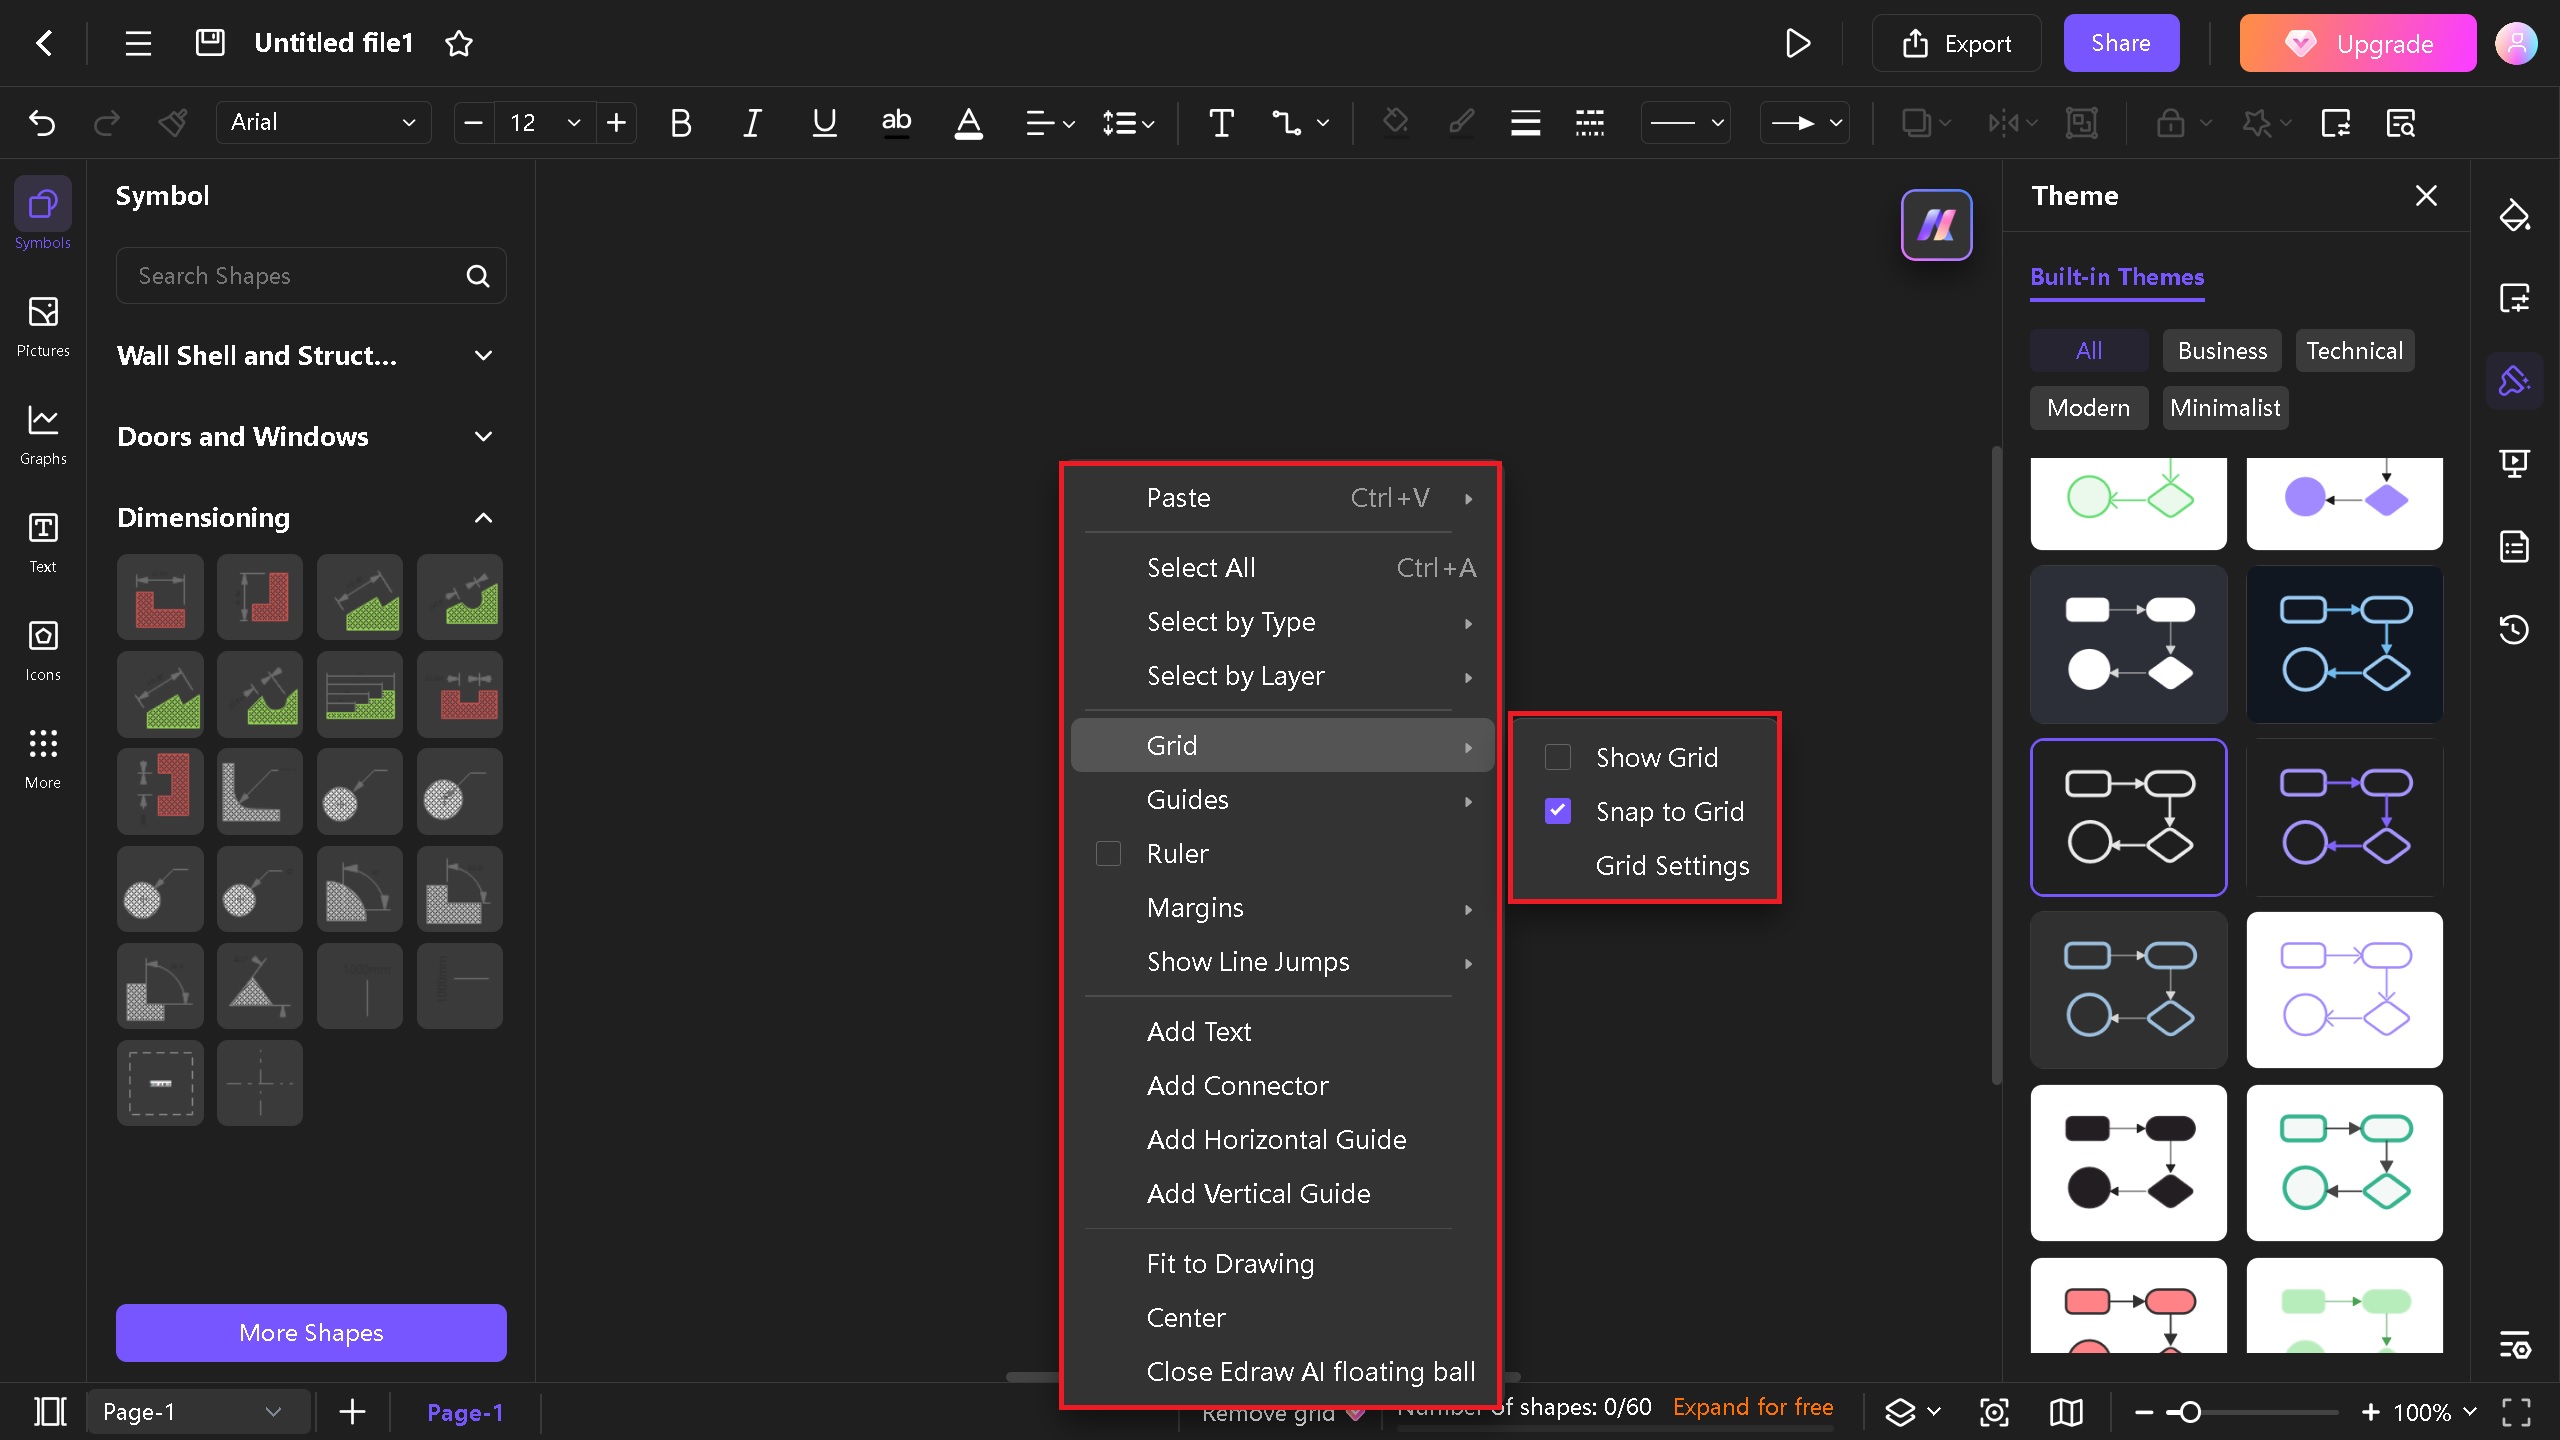
- After the canvas layout appears, you cannot see the grid lines. Therefore, right-click on the canvas > Grid > Show Grid.
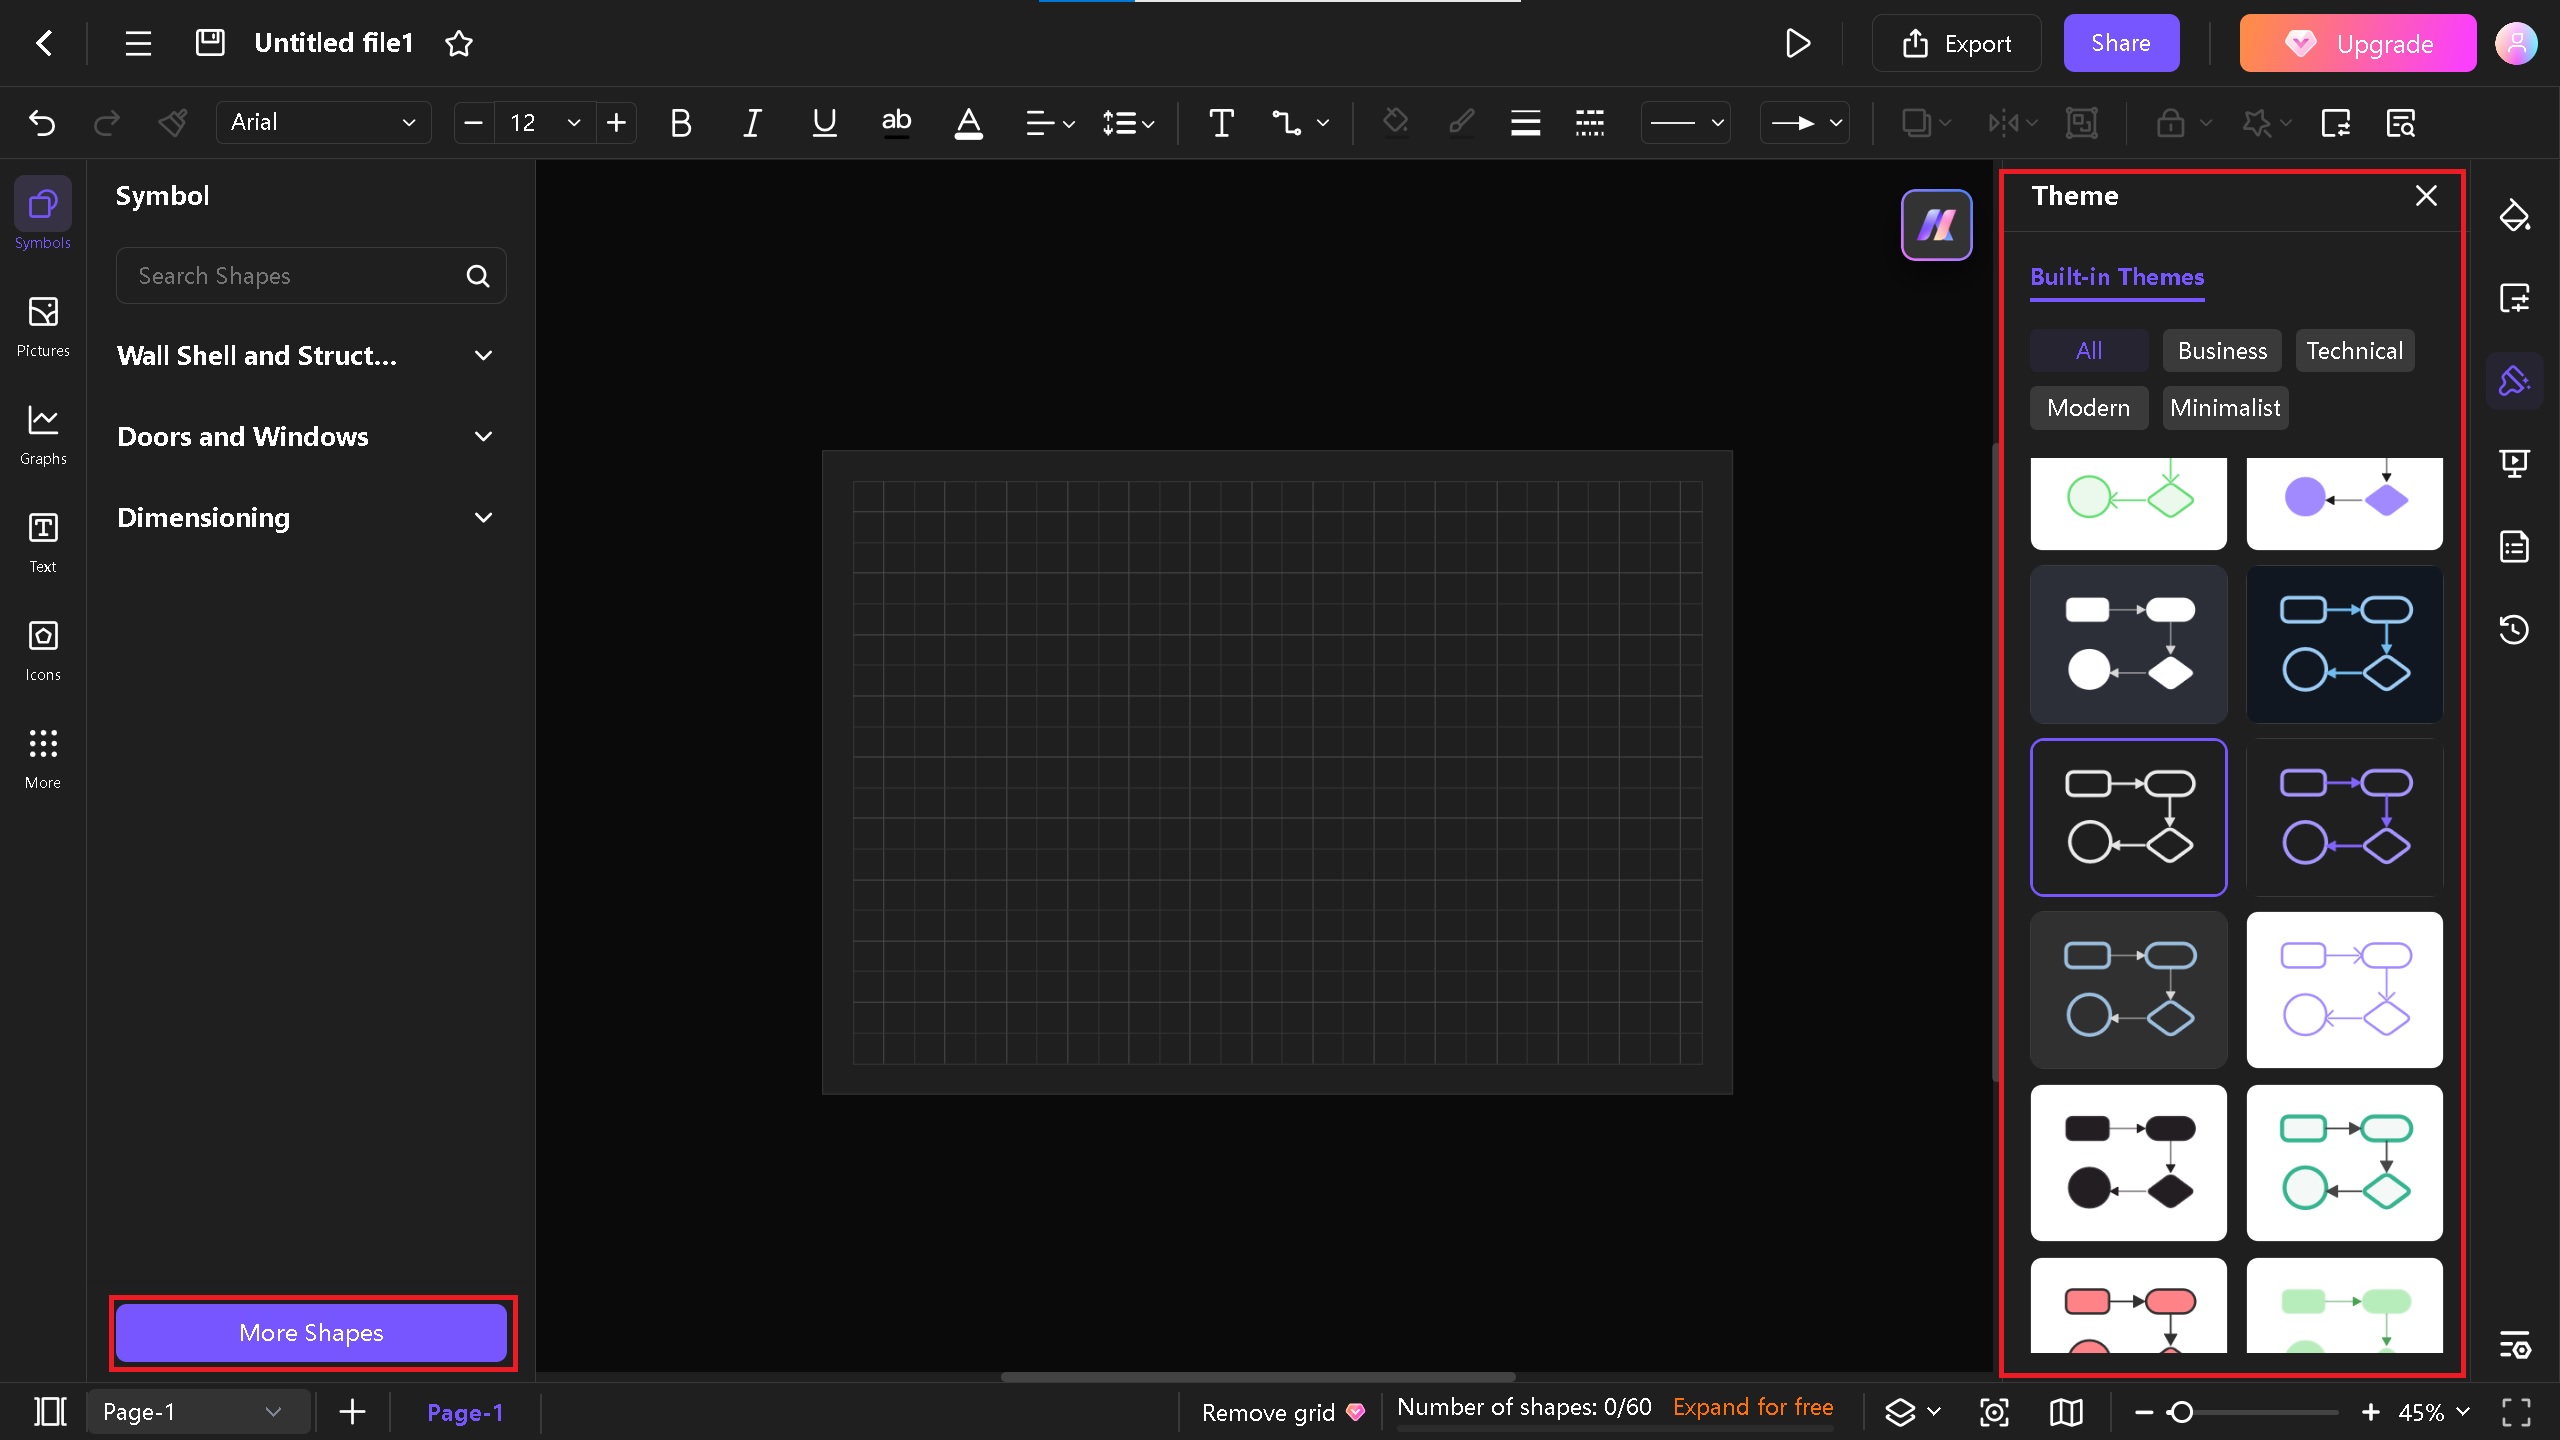
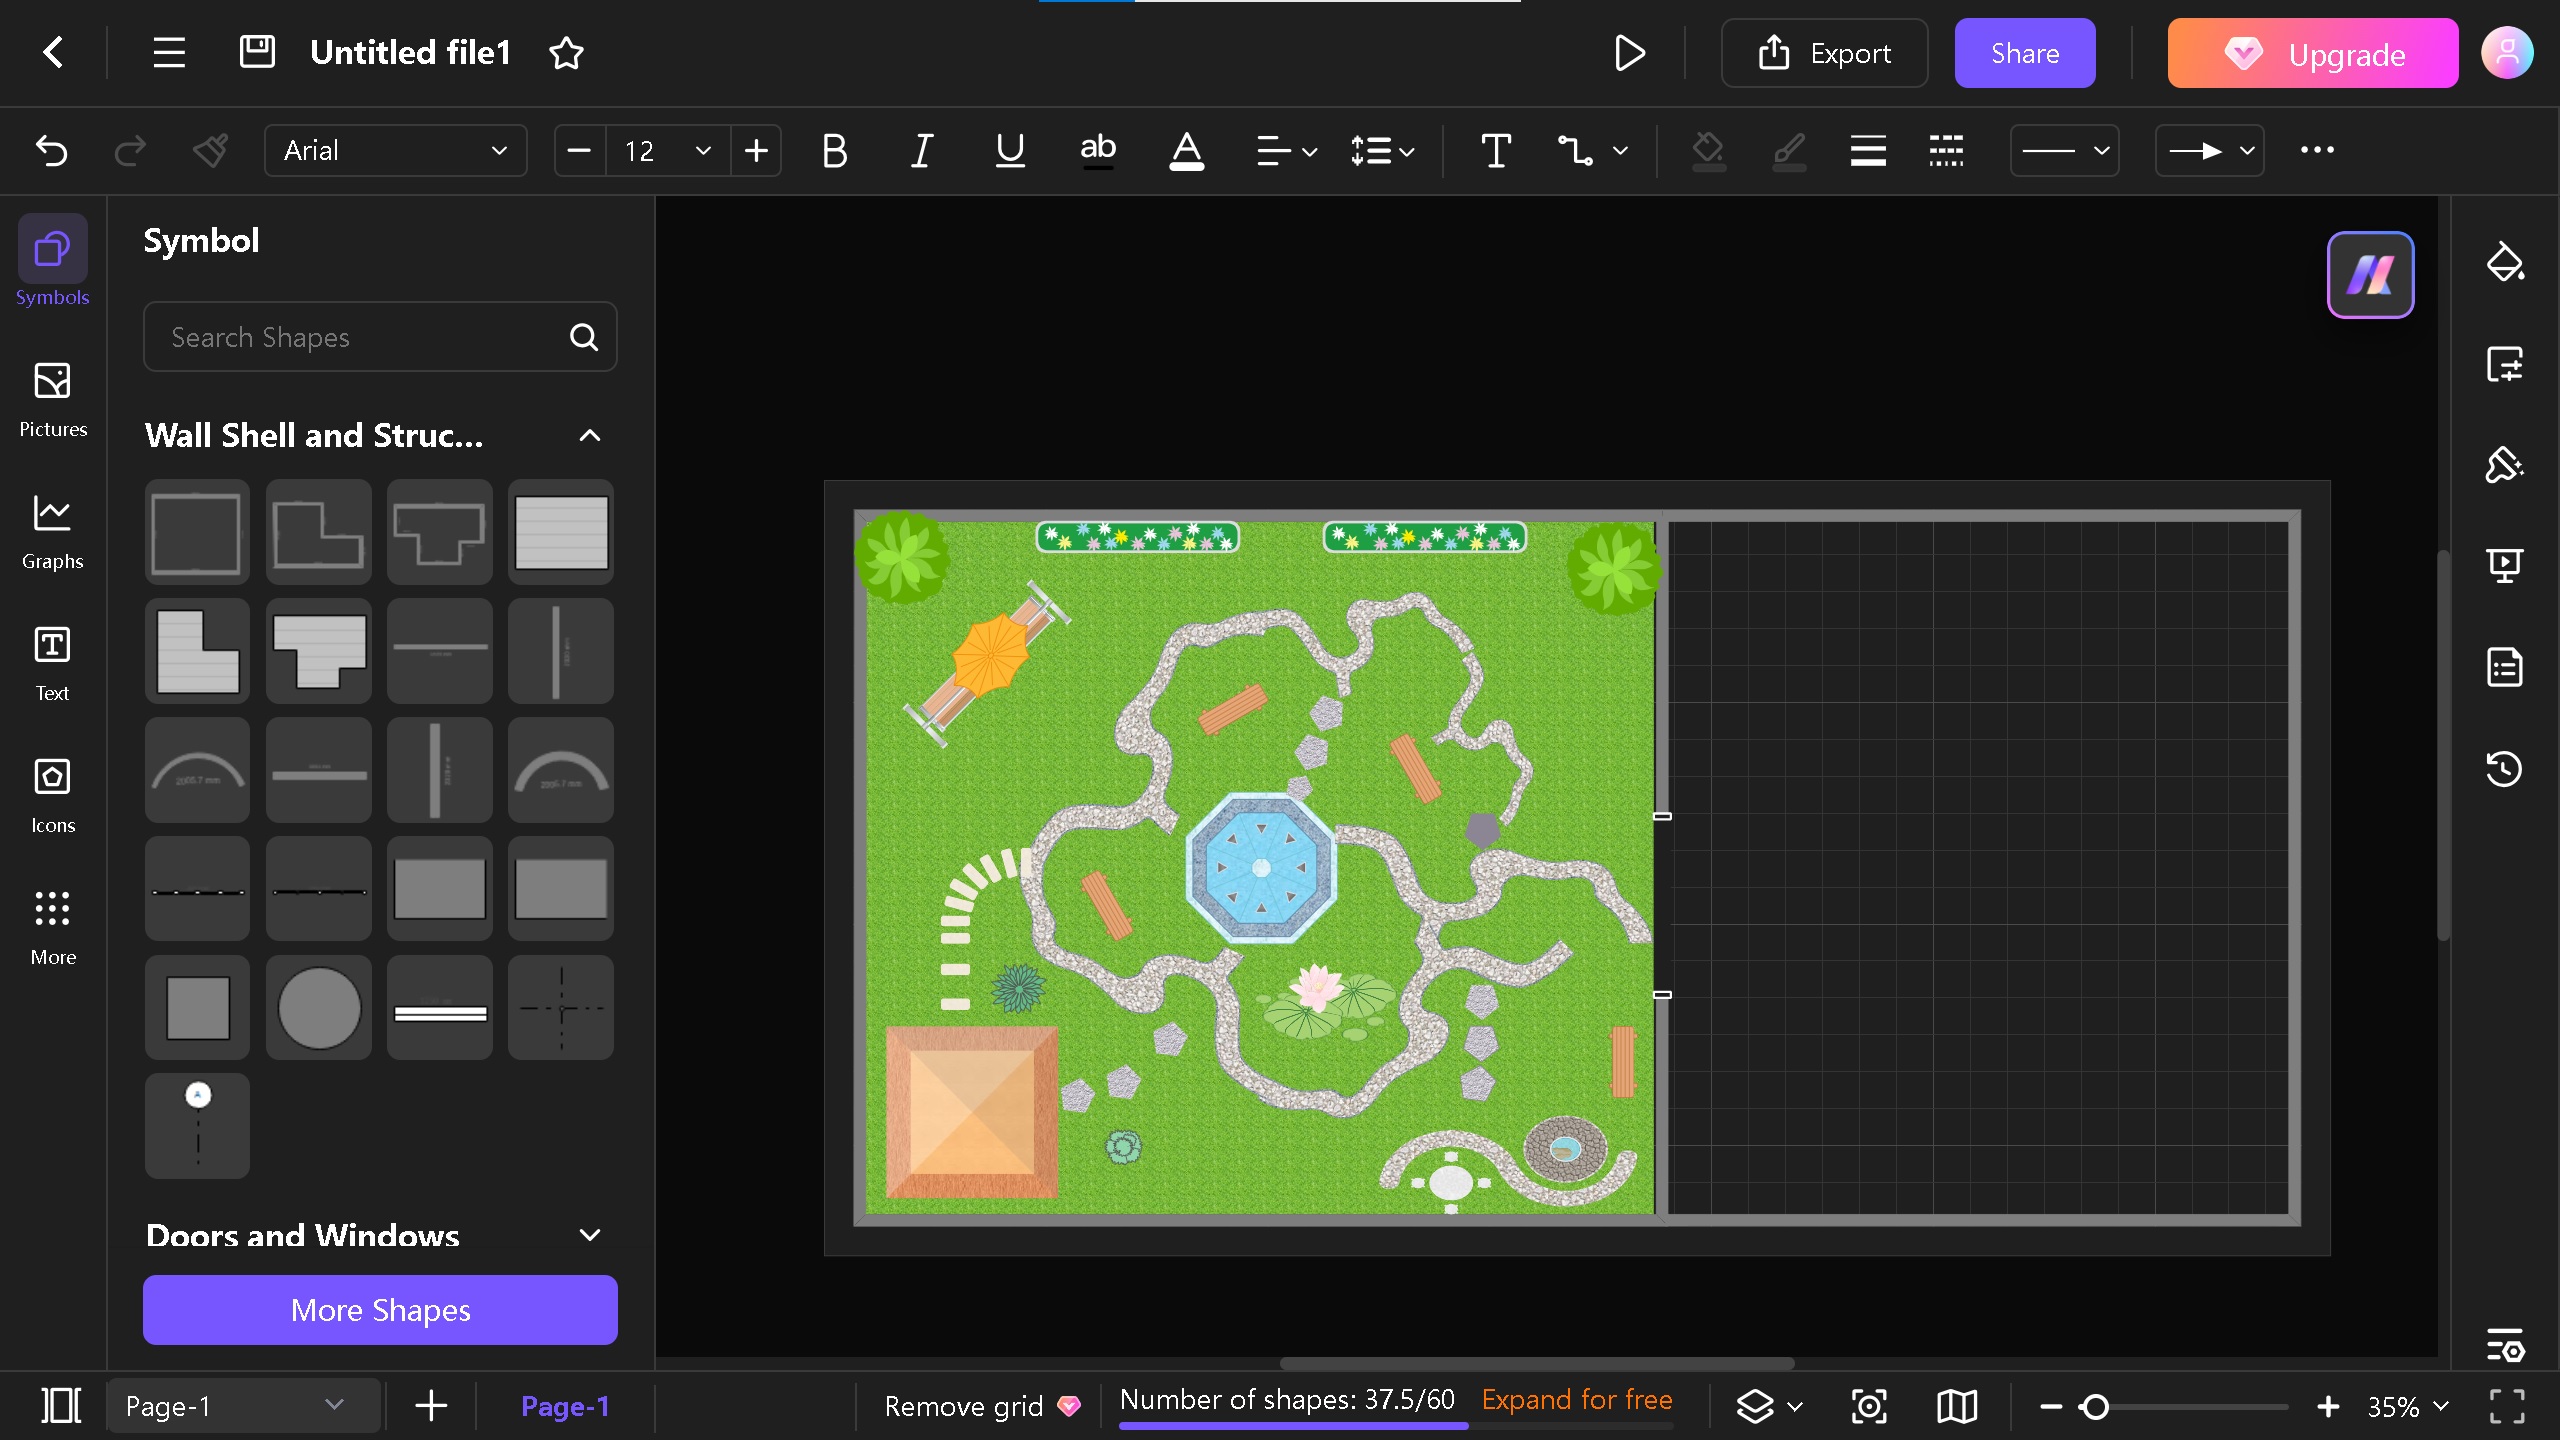
- On the left side, you see symbols, pictures, graphs, icons, and text. You can also change the style and theme from the right side. In addition, you can also add more symbols by clicking on More Shapes.
Step 2: Create a Base Layout of the Garden
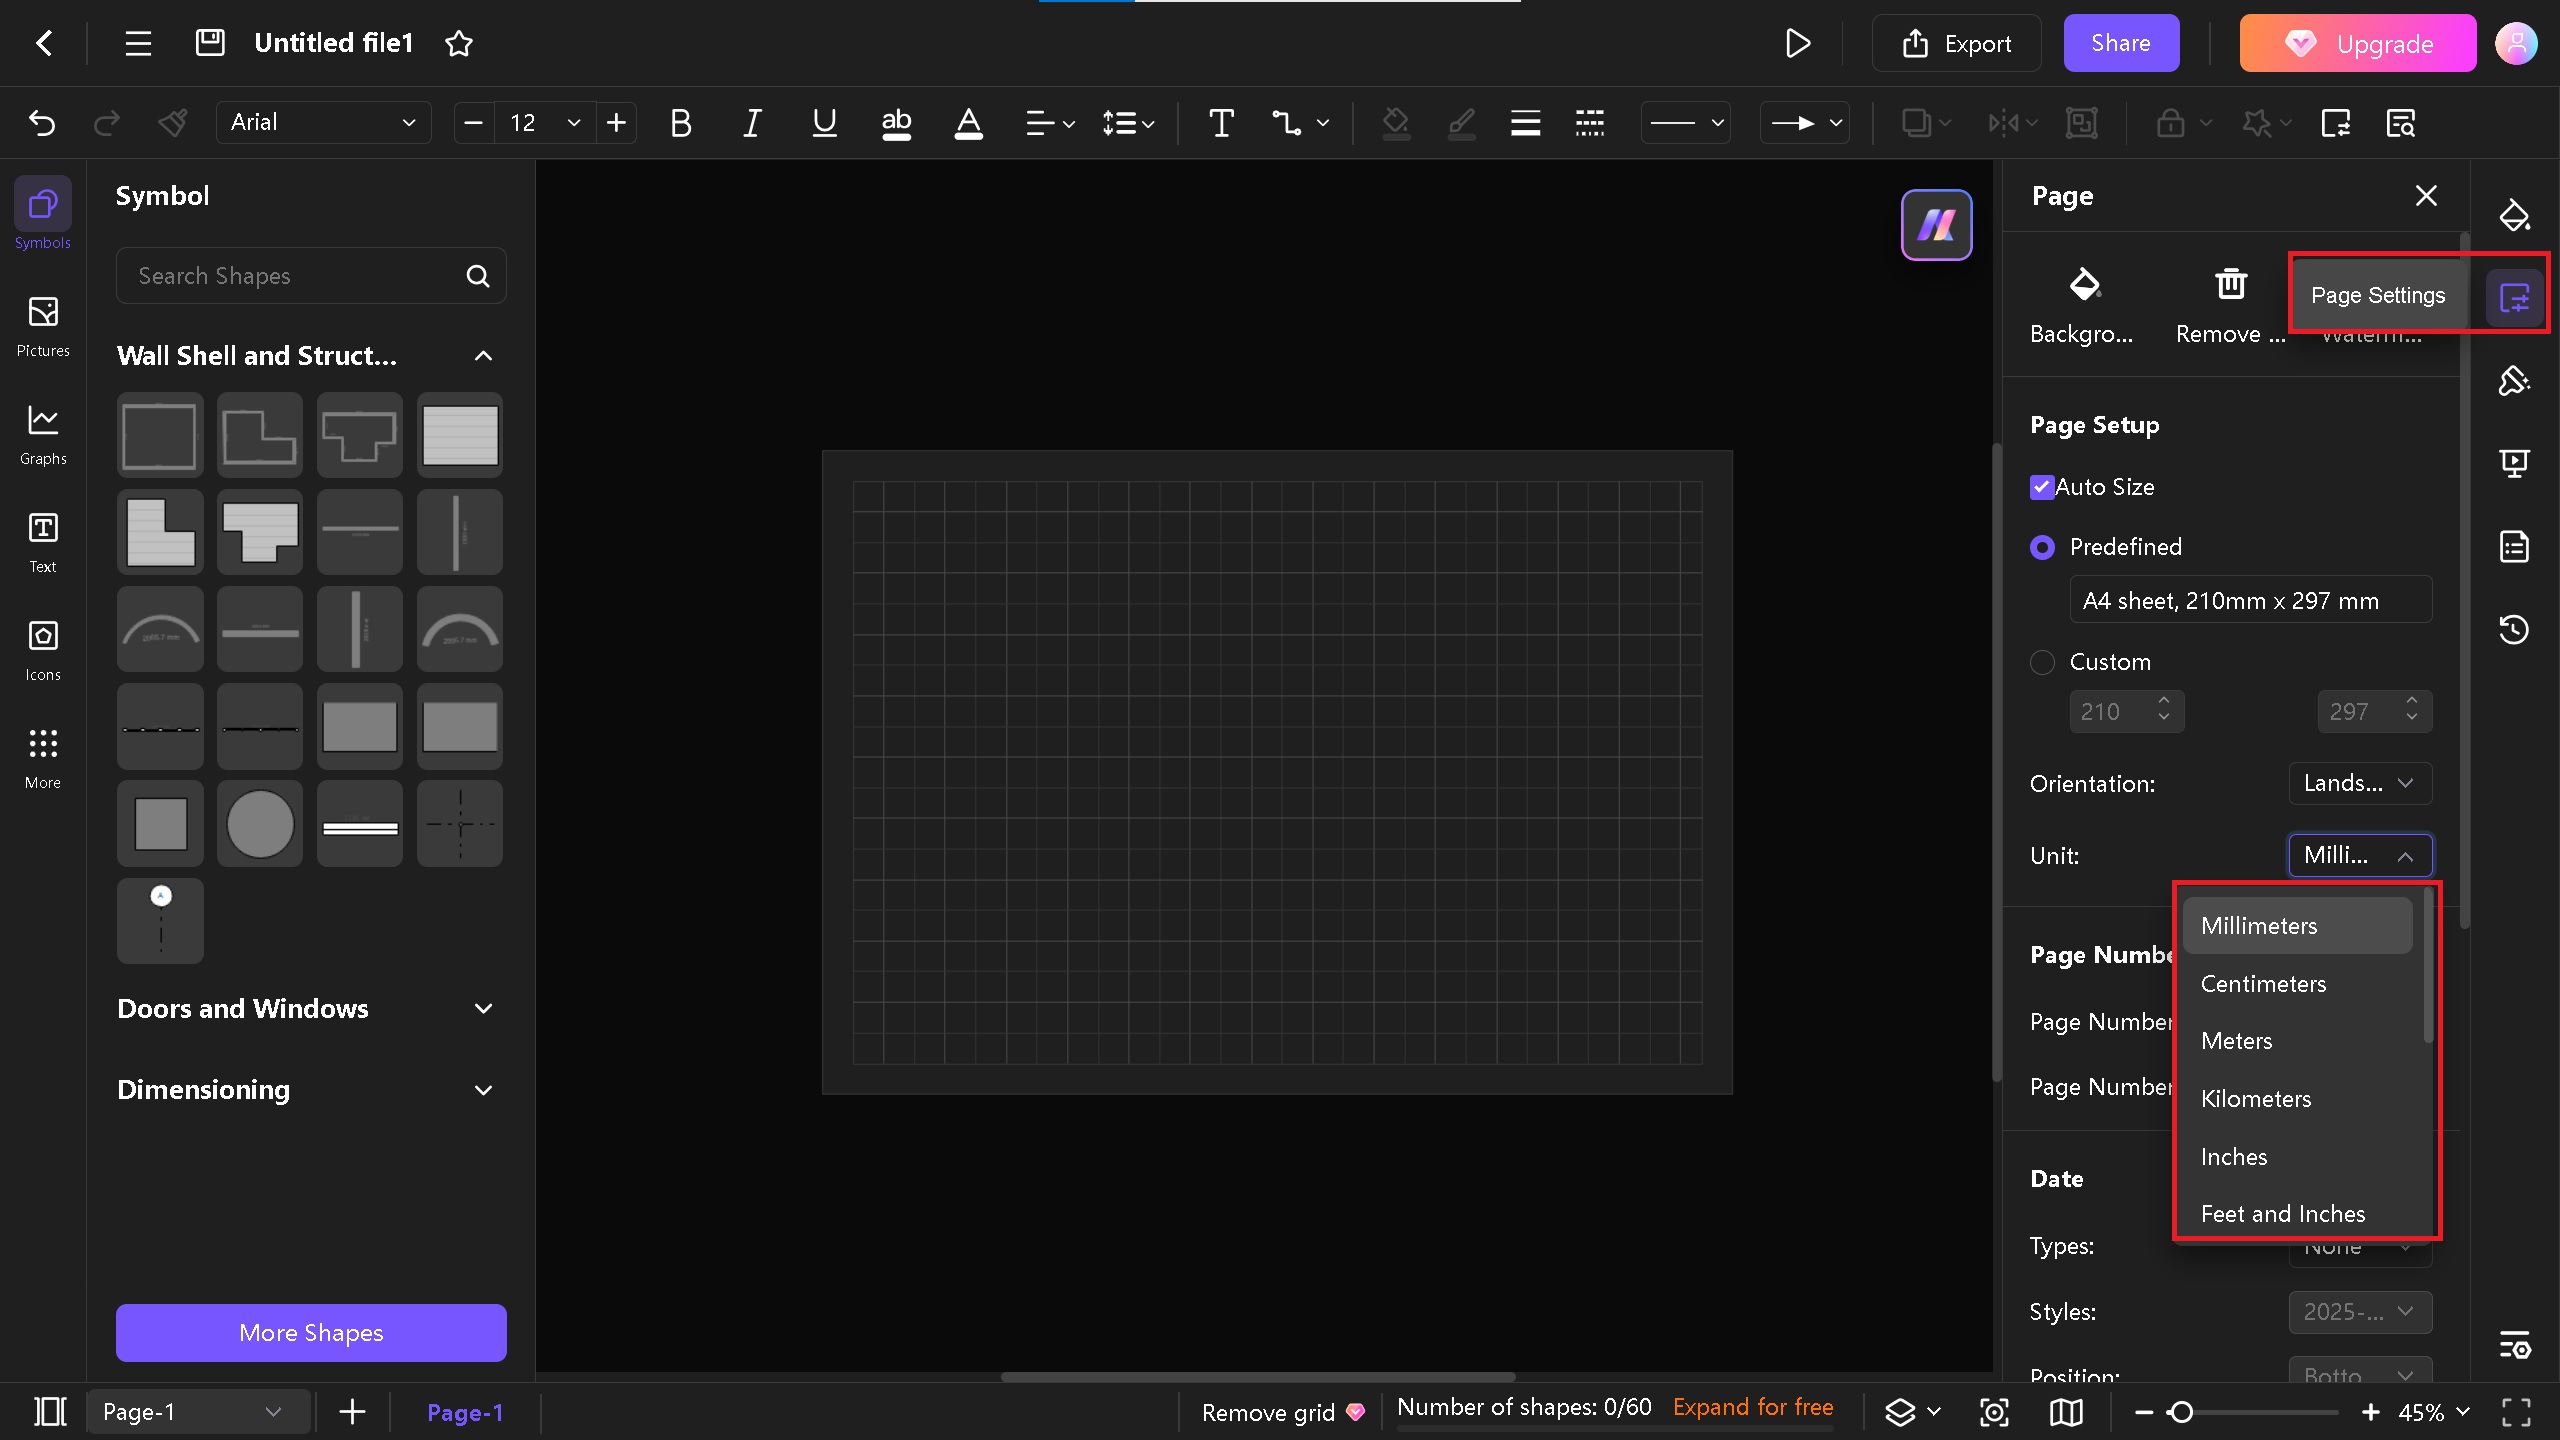
- To begin creating the garden plan, click on the page settings and change the unit from millimeters to Feet and Inches from the right side of the screen. You can also select other units according to your preferences.
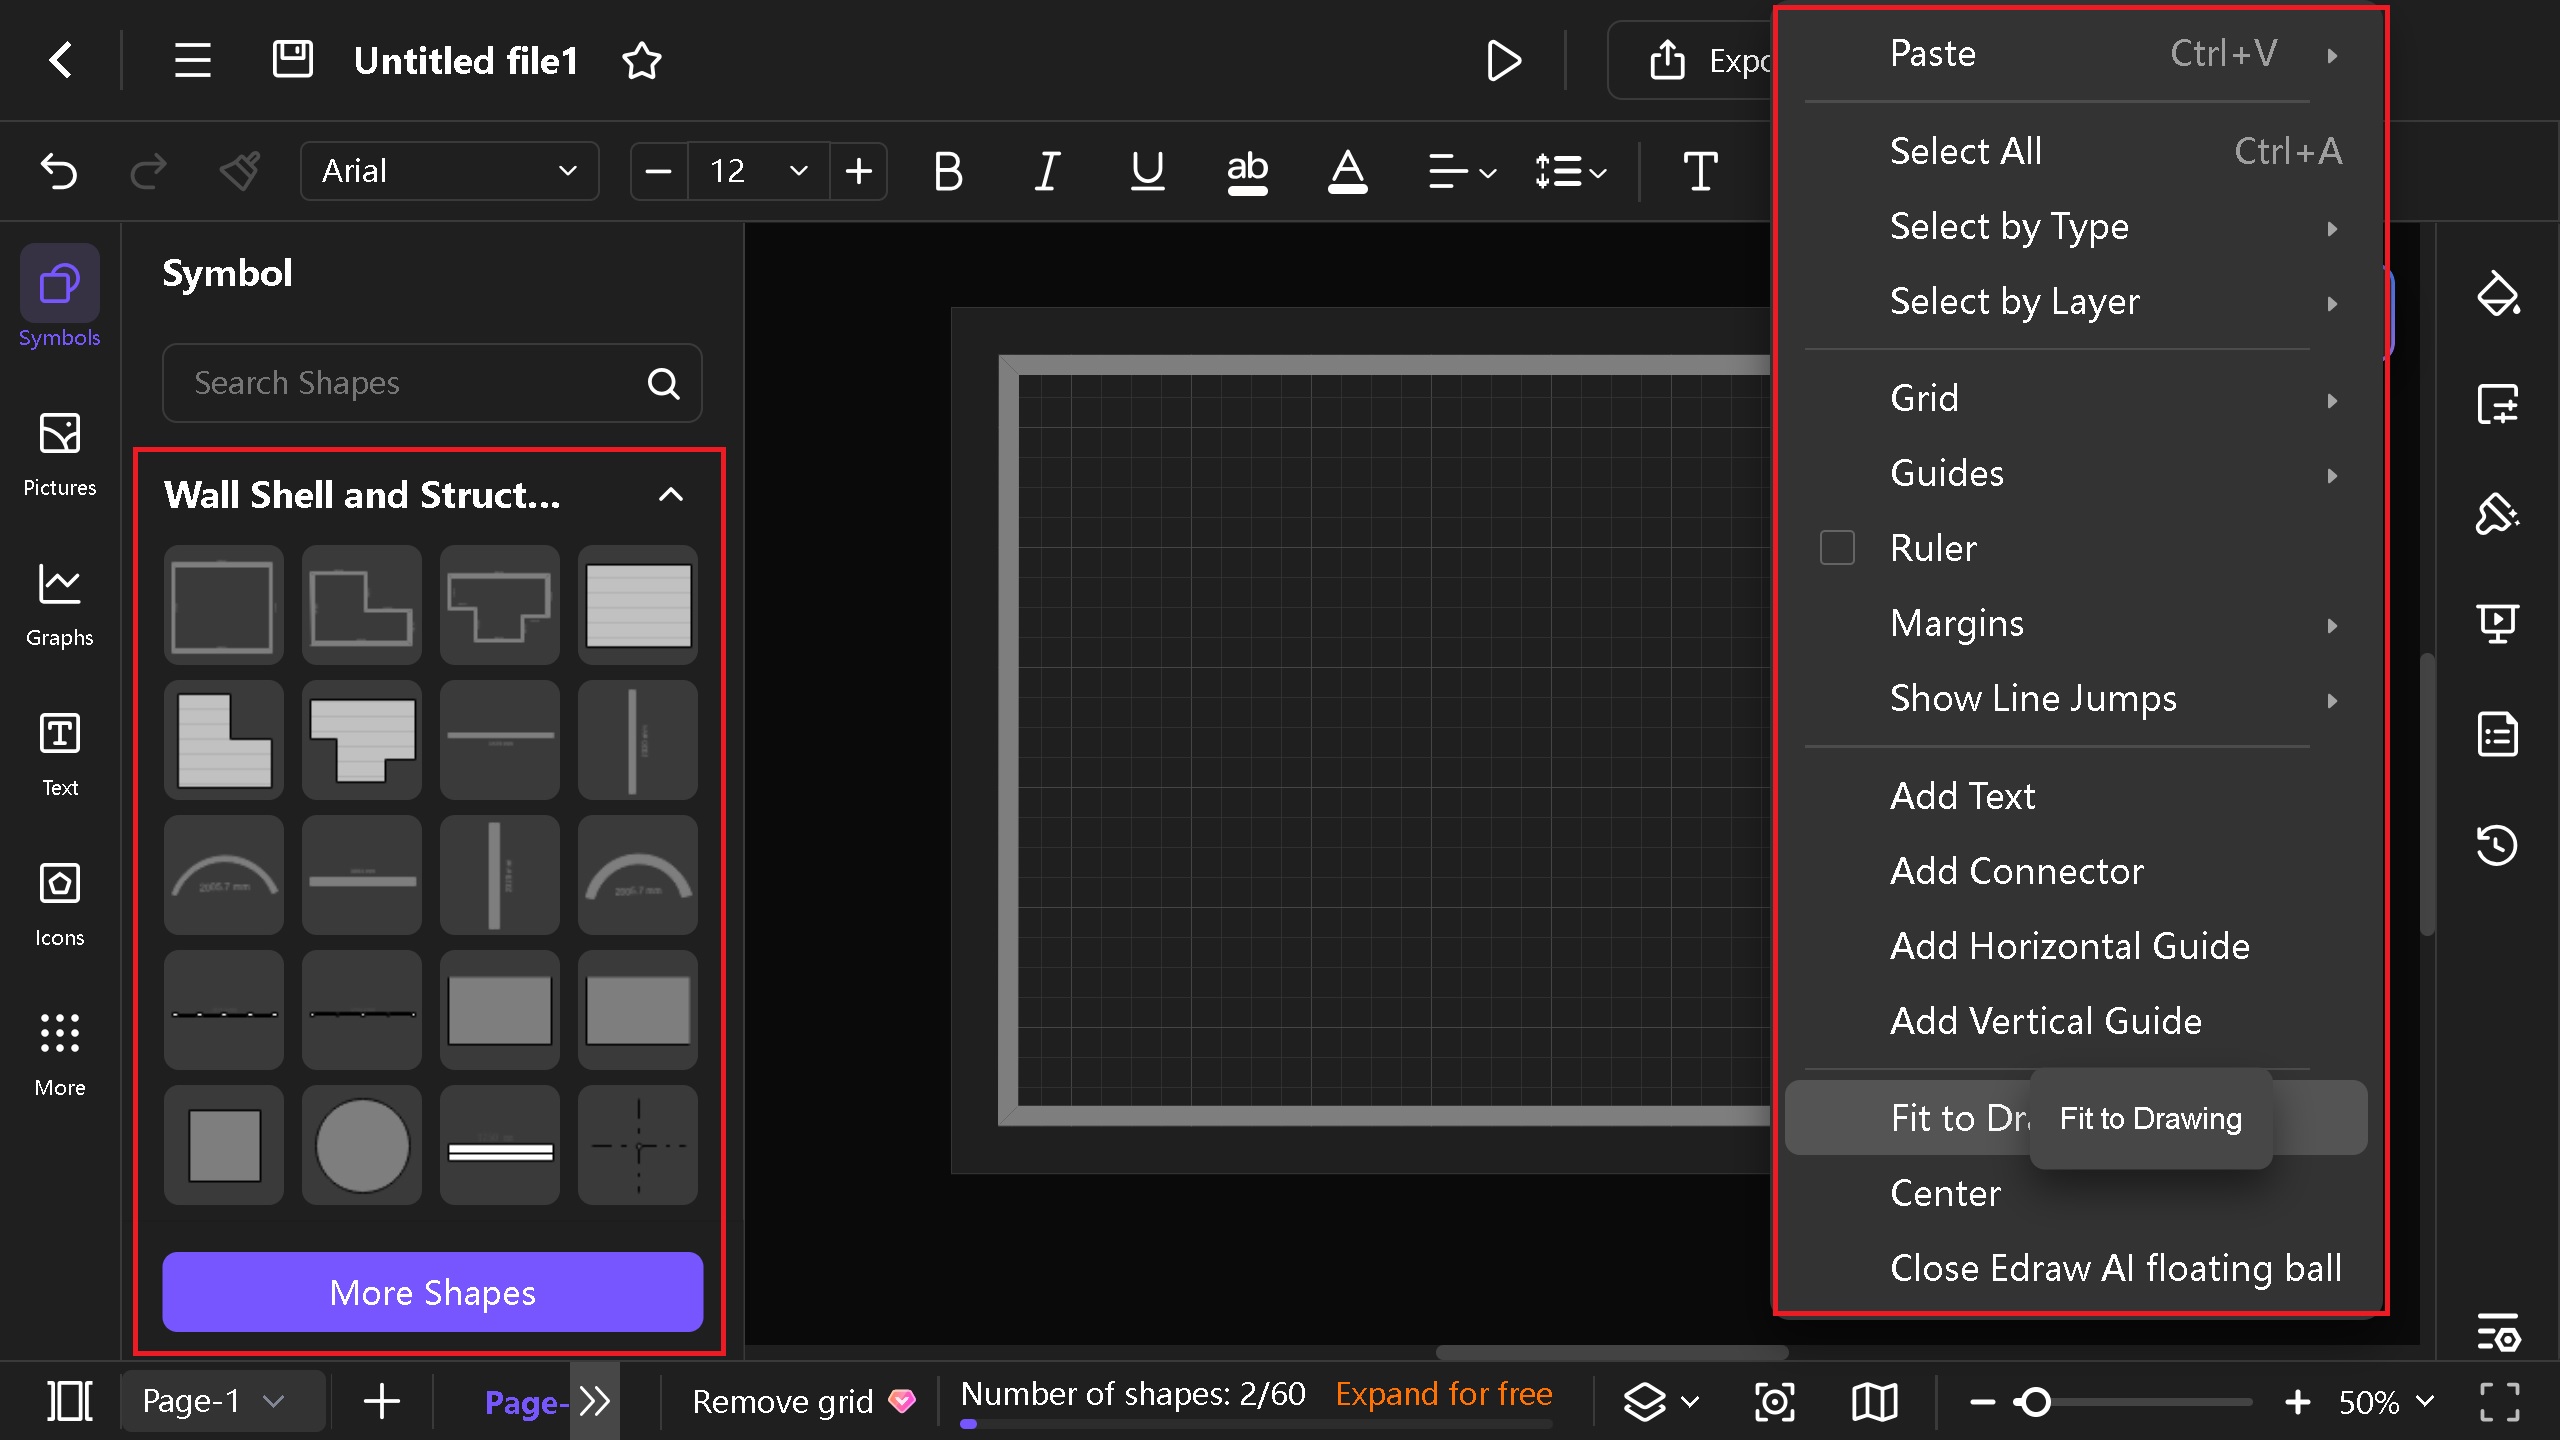
- Drag the walls from the left side of the Wall Shell and Structure symbol library. You can choose a room wall boundary or drag horizontal/vertical walls. We prefer the room wall structure as it saves time.
- To fit the wall boundary into the canvas, tap the right mouse button > Fit to Drawing.
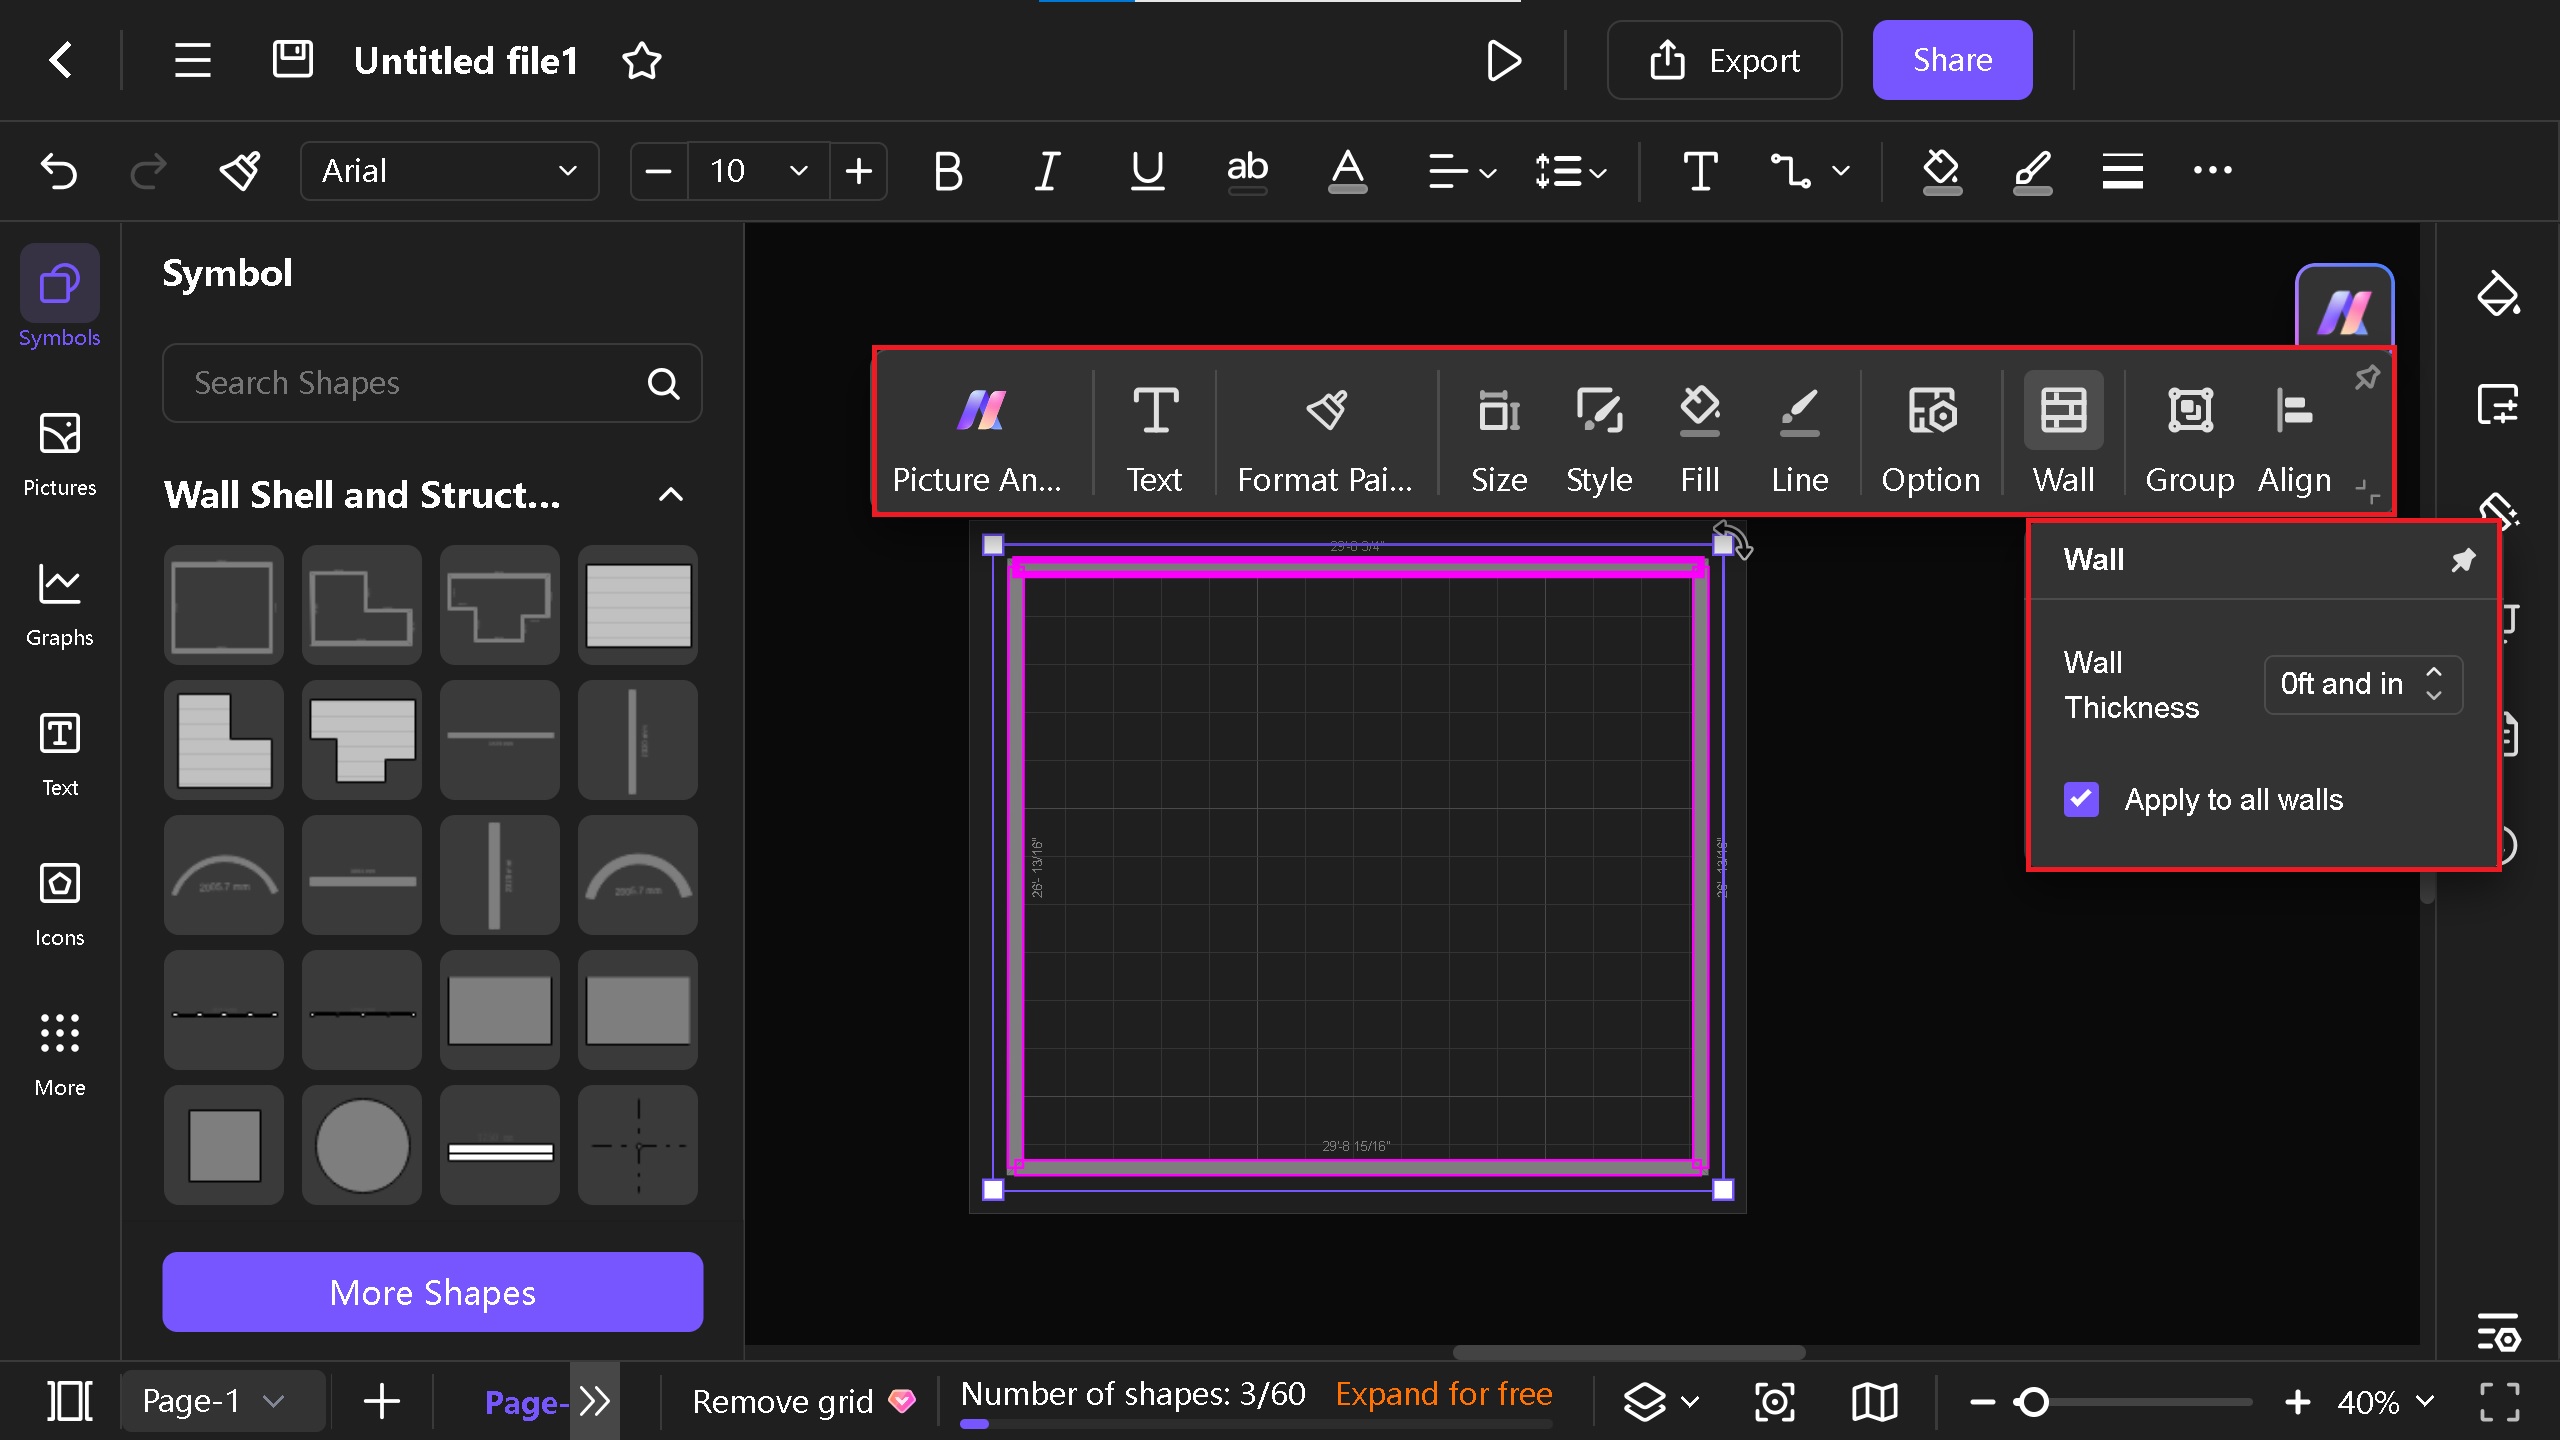
- Press CTRL+A to select all the boundary walls > Wall > Wall Thickness to set the wall thickness.
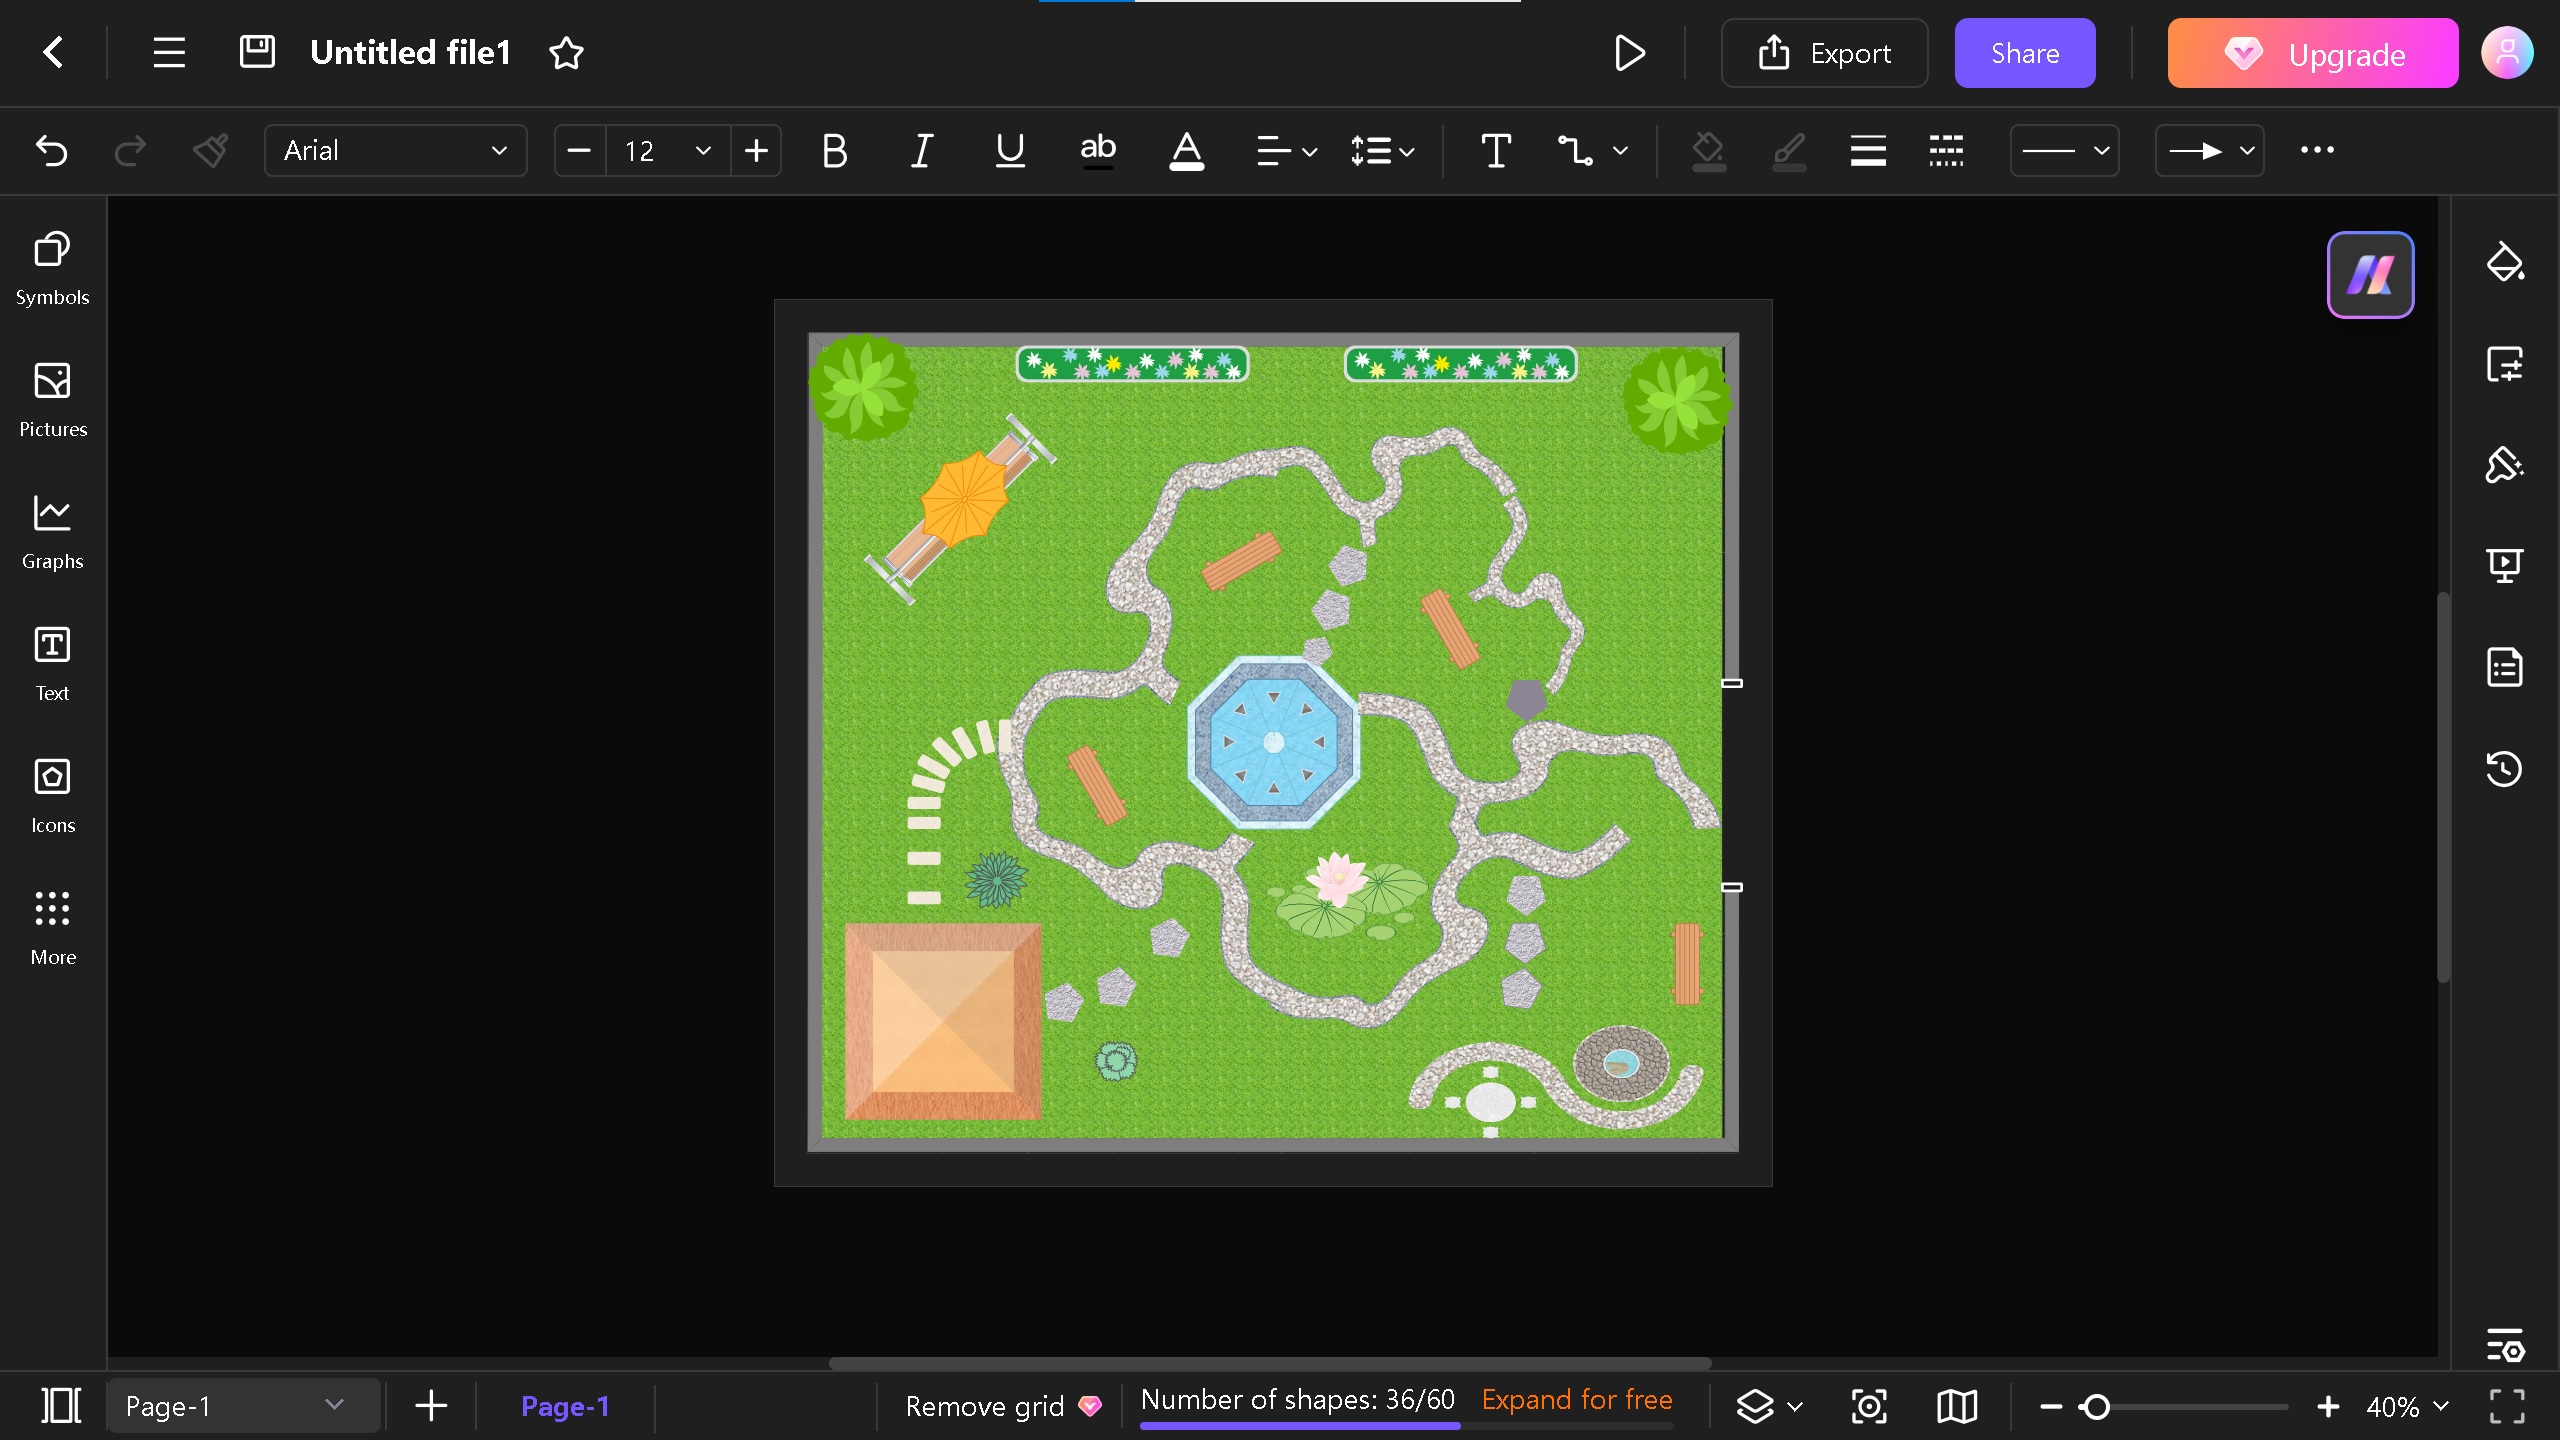
Step 3: Add Softscape Elements
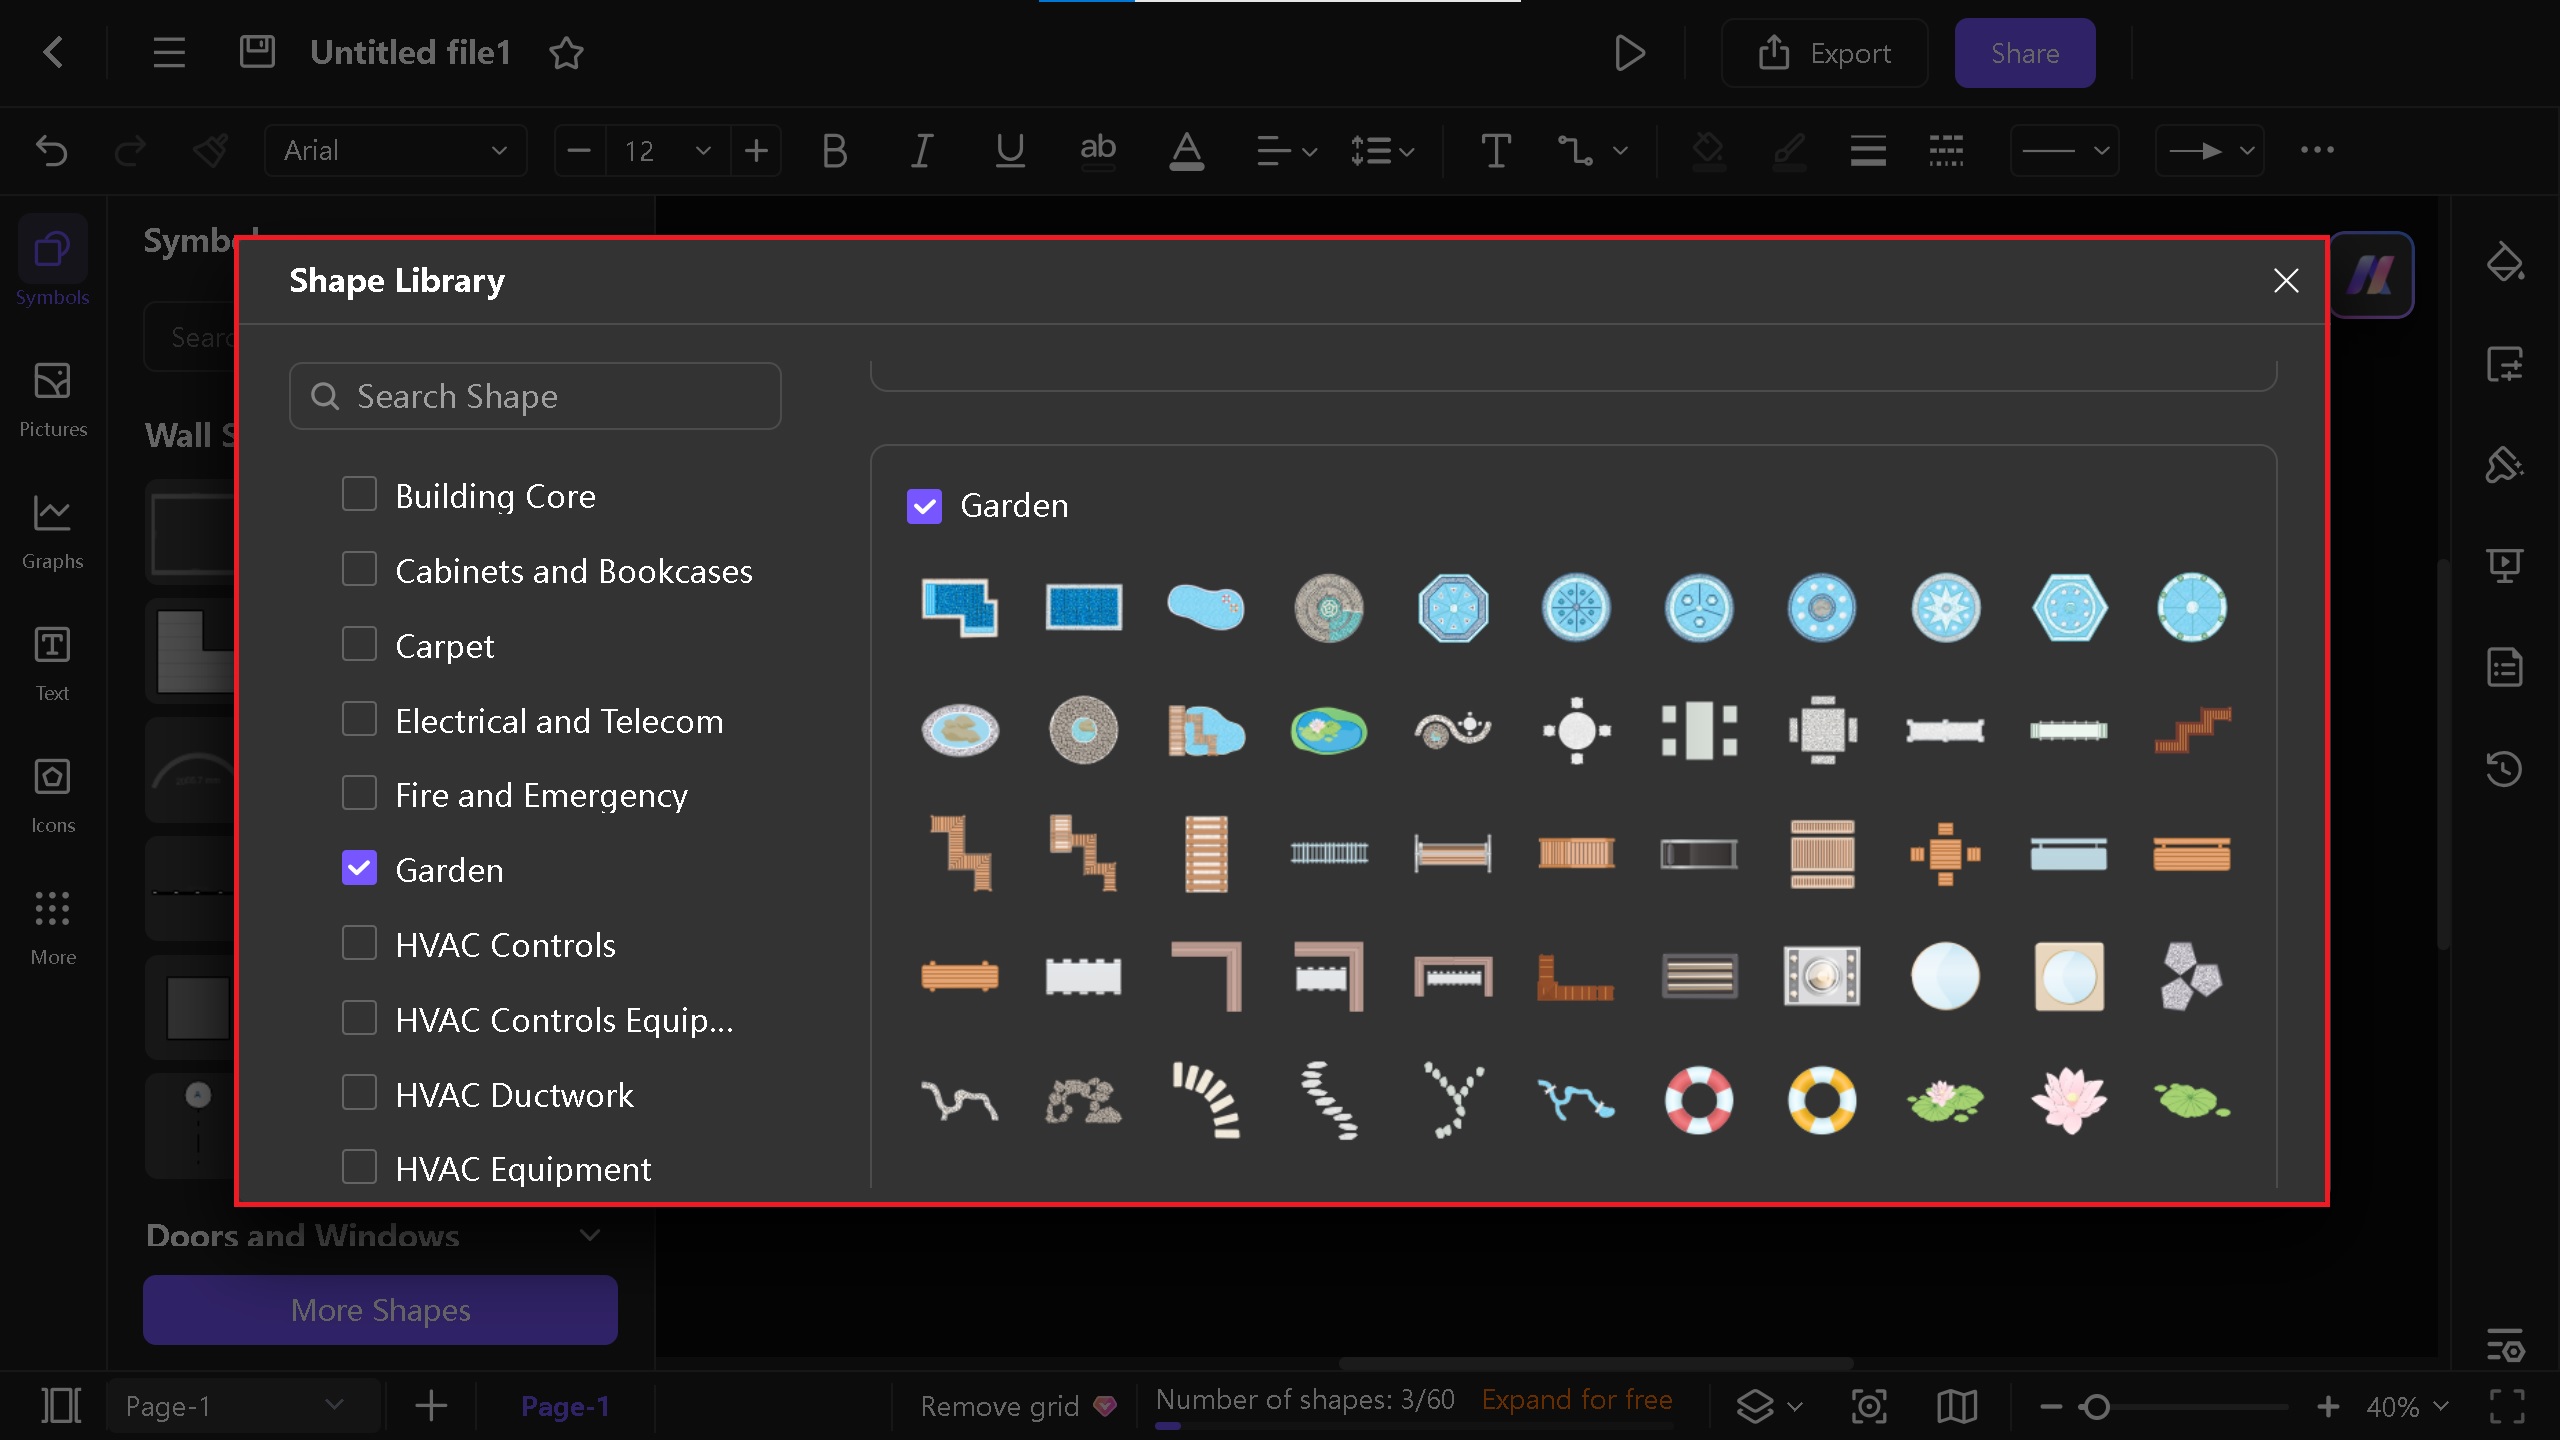
- Click on More Shapes > Floor Plan > Garden Symbols. Add different symbols for the garden, such as trees, fountain pools, grass, bridges, and stone paths.
- Drag and drop the symbols on the canvas and place them according to your style. You also resize them easily with the mouse. In addition, rotate them as you like with the curved arrow.
- Add an open door on any side of the garden for entry. Door symbols can be easily found in the Door and Windows symbols library.
- Design the garden according to your requirements. As for this, we have designed this as a home garden plan.
Step 4: Add Hardscape Elements
- As this is a hospital garden plan, we will add the respective buildings and paths around the garden.
- It is not necessary to draw each building's floor plan separately. You can add spaces and label them for reference. For this, we are only adding the floor plan beside the garden.
- From the Walls and Structure symbol library, select the walls and drag them into the canvas to draw floor plan boundaries.
- Draw rooms, the kitchen, the living room, and the entry gate, and add sofas to make the floor plan unique. Add doors in the bedrooms and bathrooms from the Doors and Windows symbol library.
- You can also do precise settings by clicking on any symbol and selecting options. This will allow you to enable dimensions.
Step 5: Label Your Plan
- You can add related floor plan symbols by following the same process as for the garden by finding associated symbols in the symbols library.
- Once everything is done, it's time to add labels to your plan to make it more concise. Click on the Text icon (T) above or on the left side of the screen. The toolbar above lets you change your label's font, size, and color.
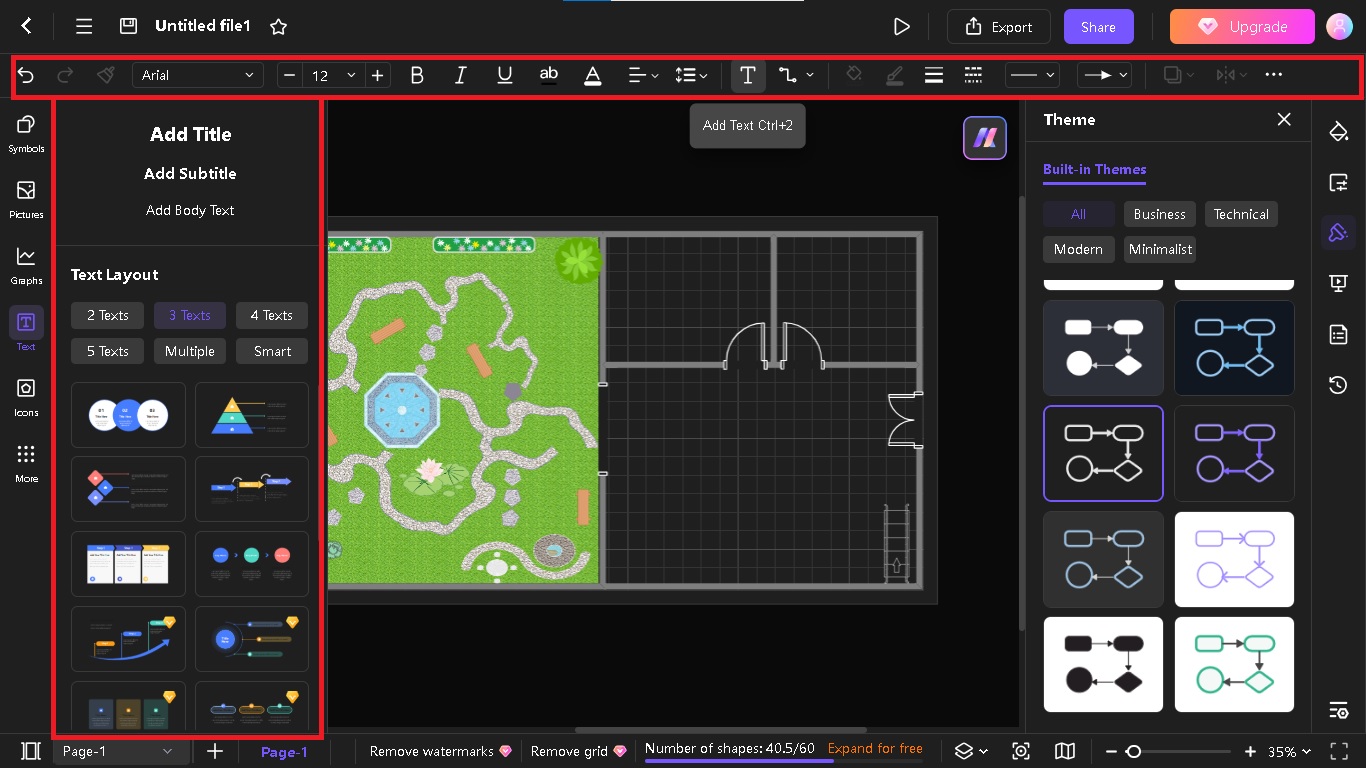
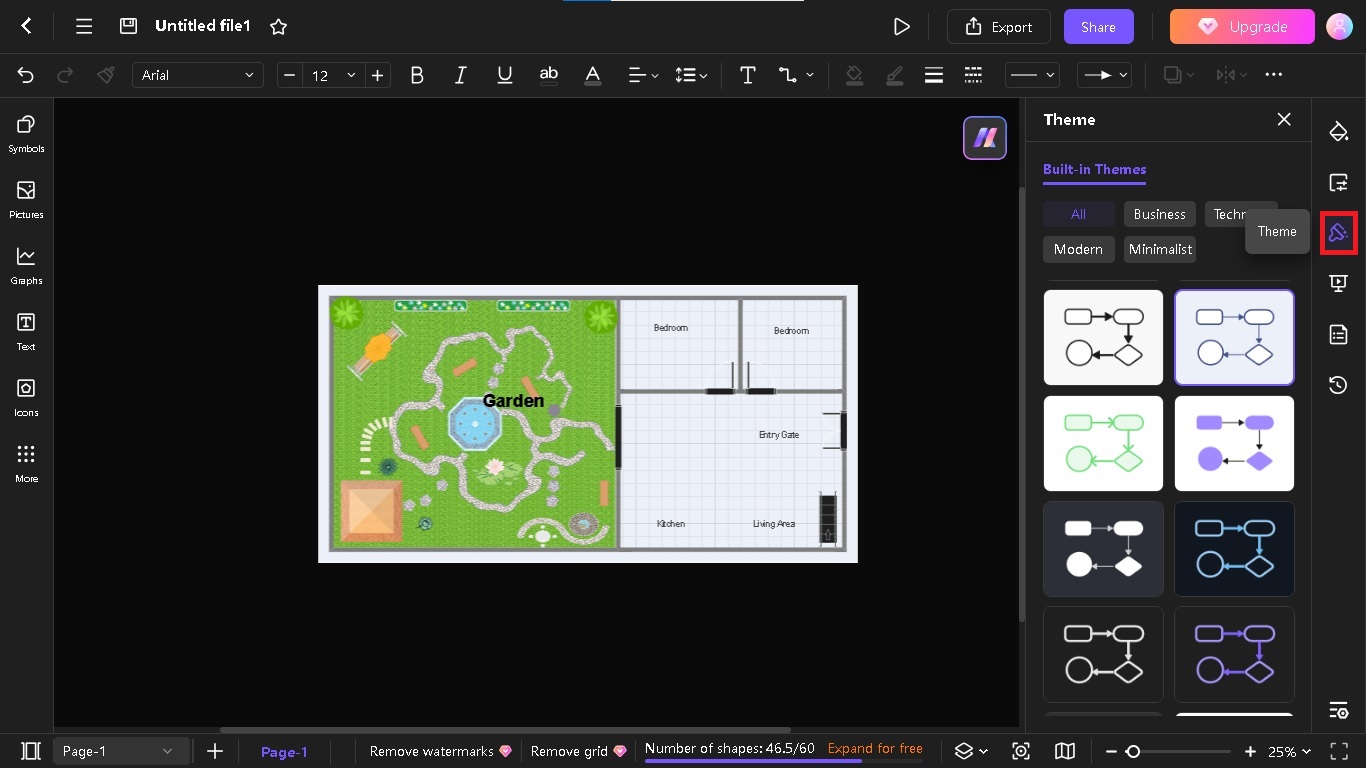
Step 6: Styling with Different Themes
- Change the plan's theme by clicking the Theme option on the right side and choosing different styles. Choose different options such as business, modern, and minimalist.
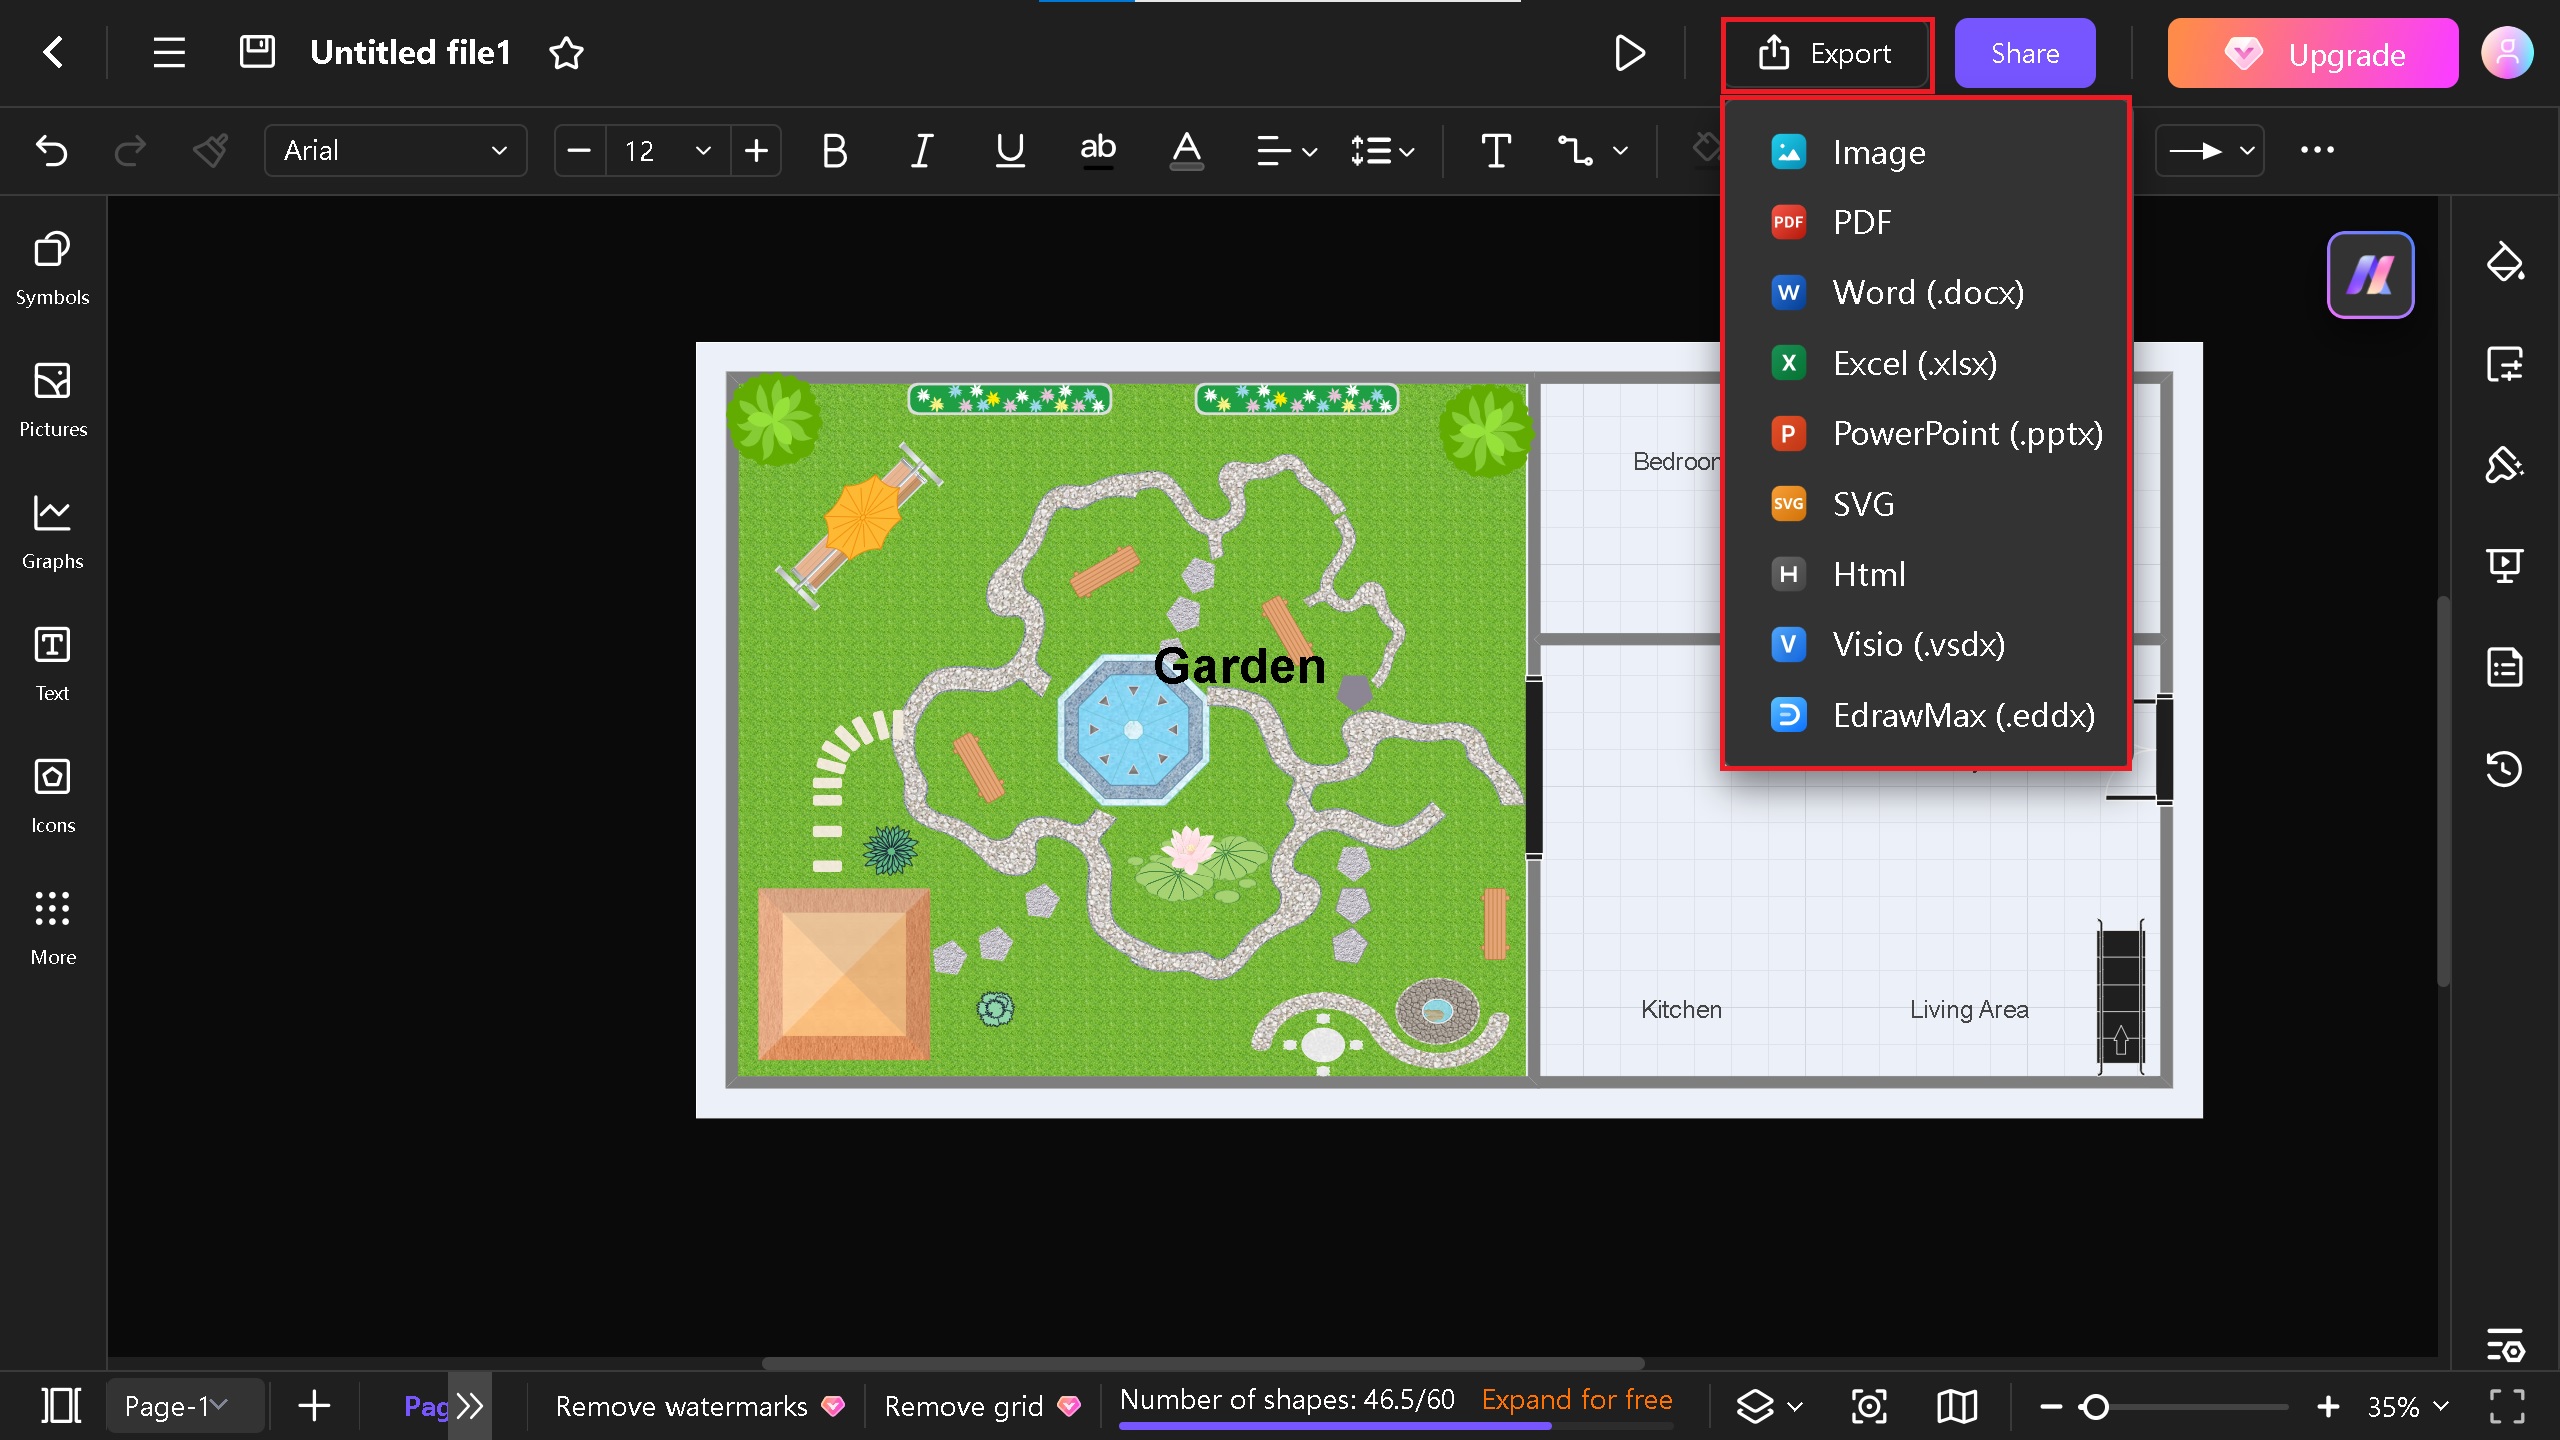
Step 7: Export & Share
- When everything is done, click the export button in the top right corner and export your file in PNG, Word, EDDX, Excel, Visio, and HTML formats.
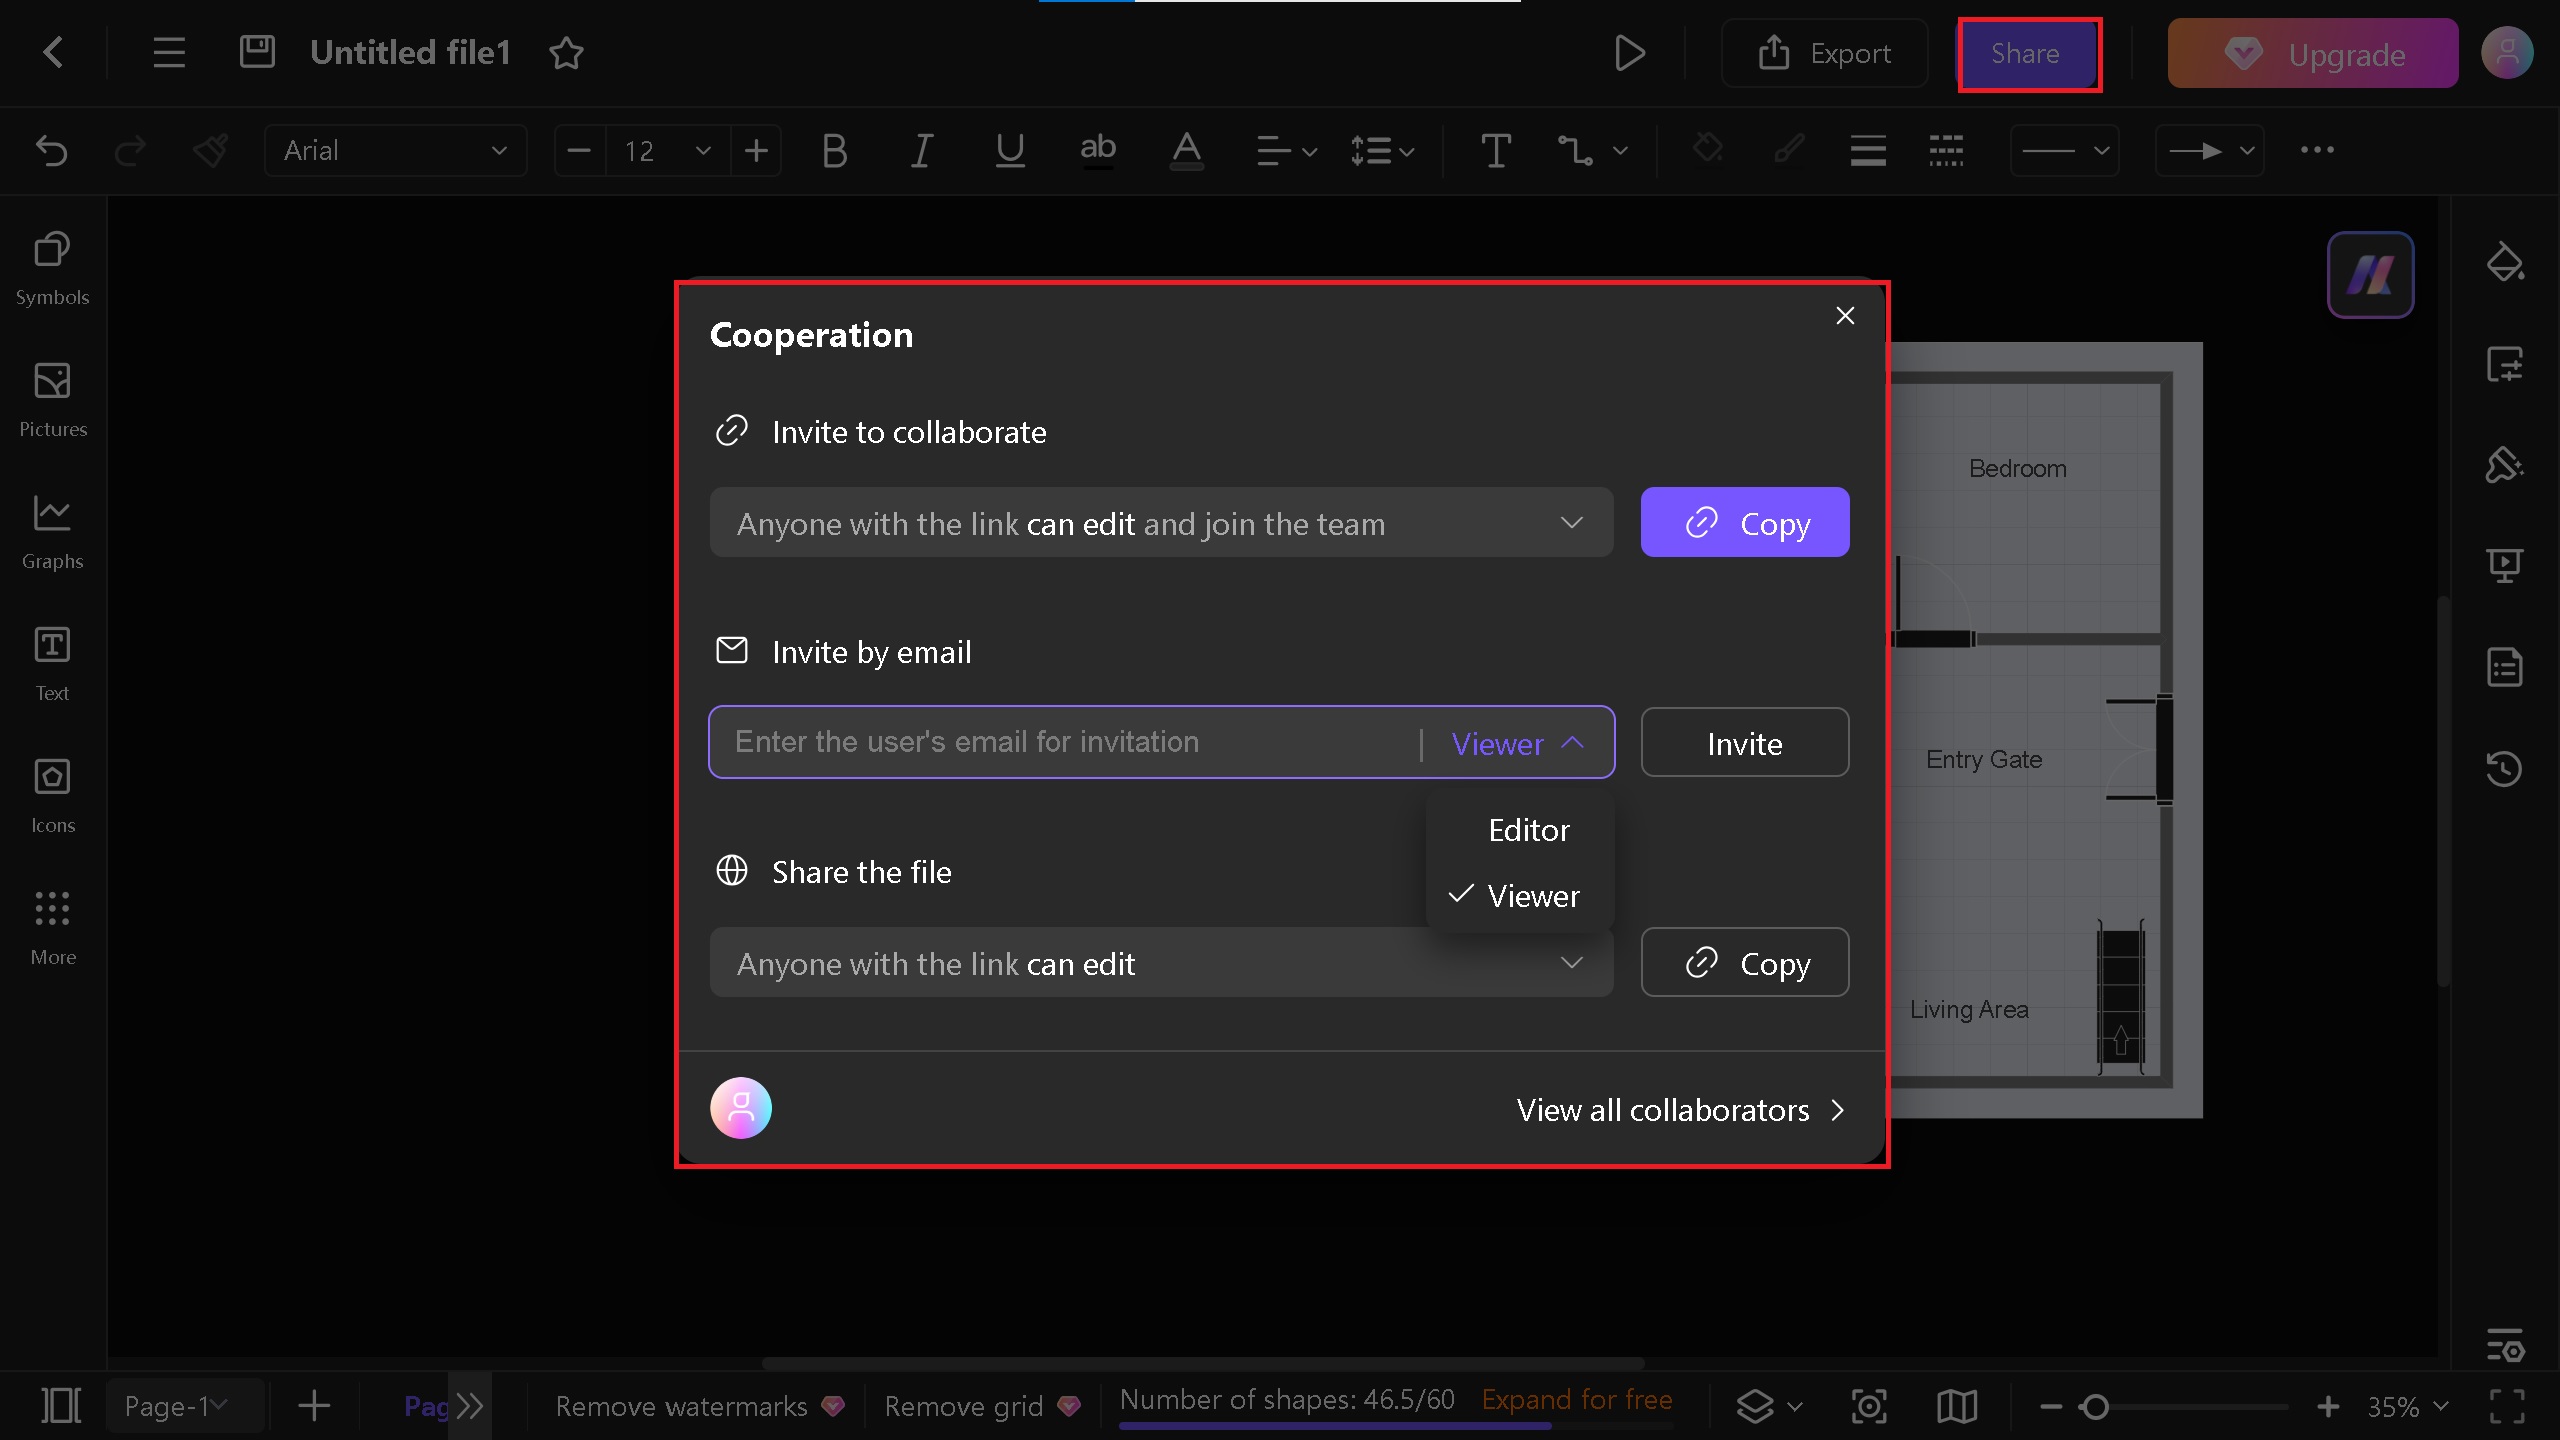
- If you want to collaborate with your teammates to edit the file, click the Share button.
- You can invite them by email, link, or by sharing the file. In addition, you can also change the permission between editor and viewer.
Tips for Different Useful Functions For Making a Garden Plan
Historical Versions
- If you want to change the current version of your garden plan to the previous one, just click on the Historical Version icon on the right side of the screen, choose your version, click on the three dots, and select Revert to this version.
- This way, you can easily change your diagram versions without recreating everything from scratch.

AI Assistant
- If you want to know the size, part, and other information about your symbols or plan, simply right-click on any symbol > AI > Analyze the Selected Part.
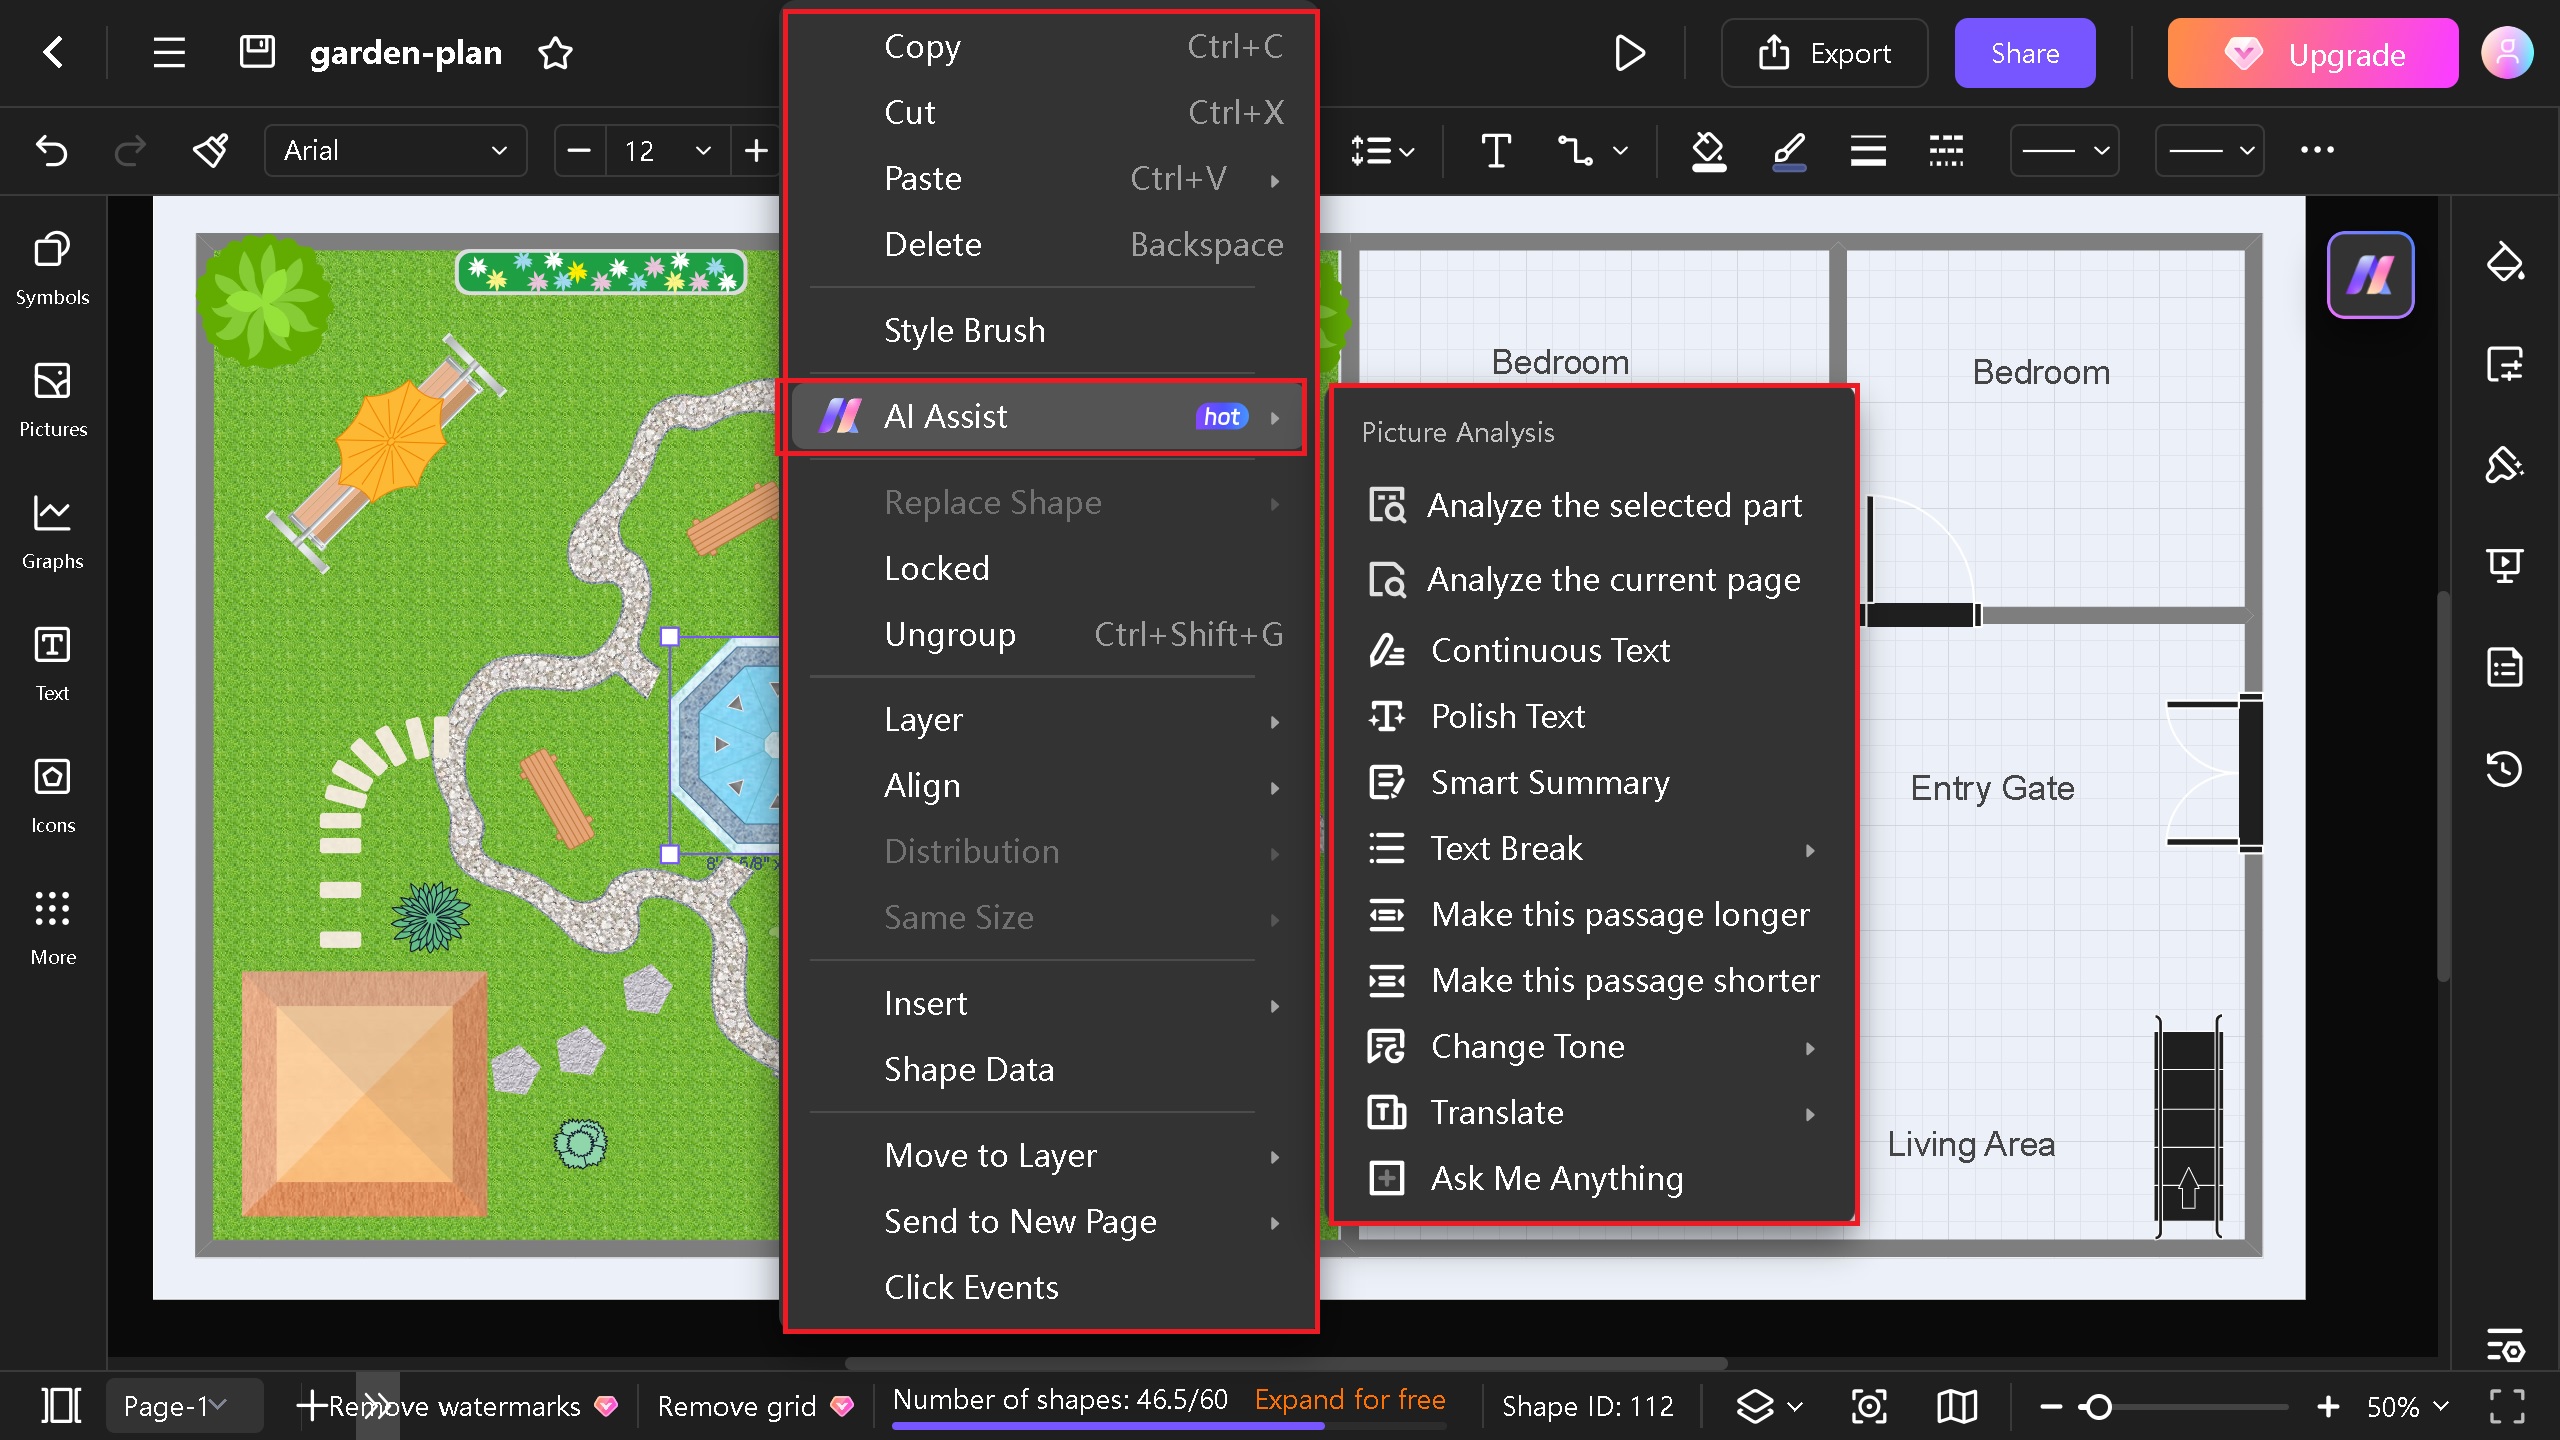
- This method allows you to find the size and type of symbol you have used and its location.
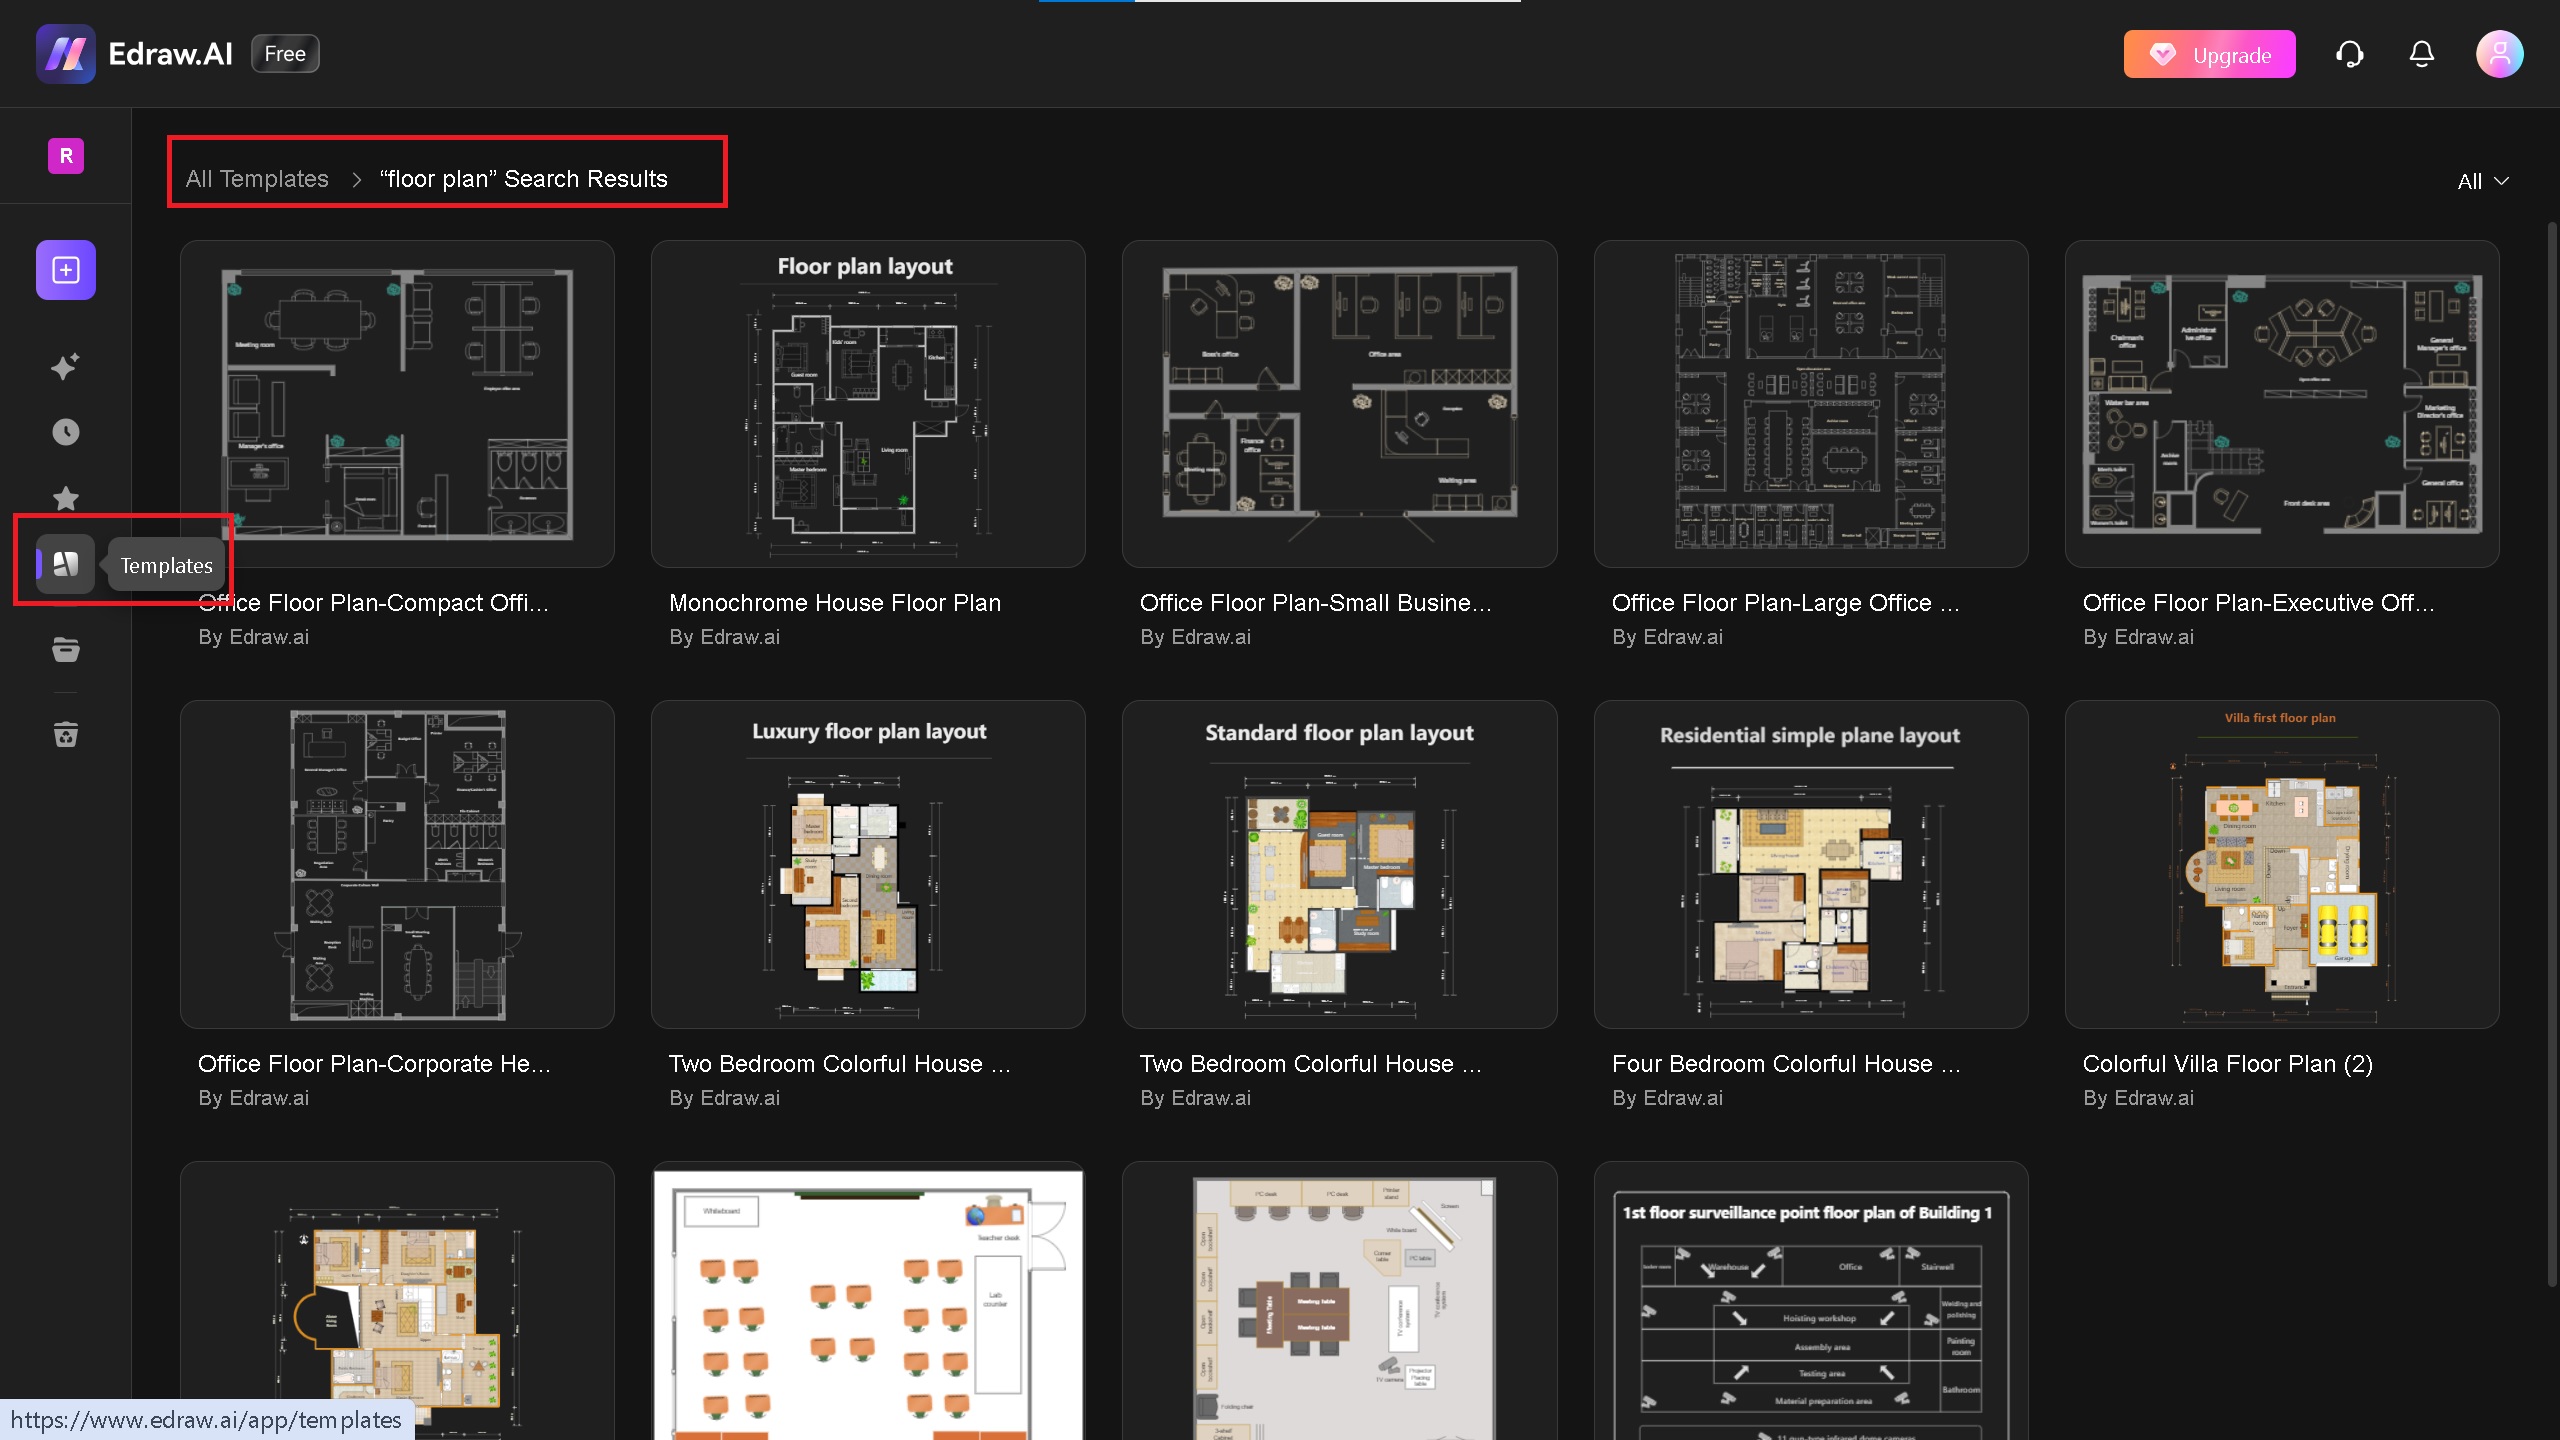
Use Floor Plan Templates
- Templates are a quick and easy way to save time. Using customizable templates on Edraw. AI doesn't require any engineering knowledge. They include pre-made symbols for trees, fences, walkways, and more.
- On the Edraw.AI homepage, click on Templates > Search Floor Plan or Garden Plan > Choose any of your choice.
AI Diagram
- With the AI diagram feature, you don't need to create anything from scratch or edit anything. A single prompt can make your preferred diagram.
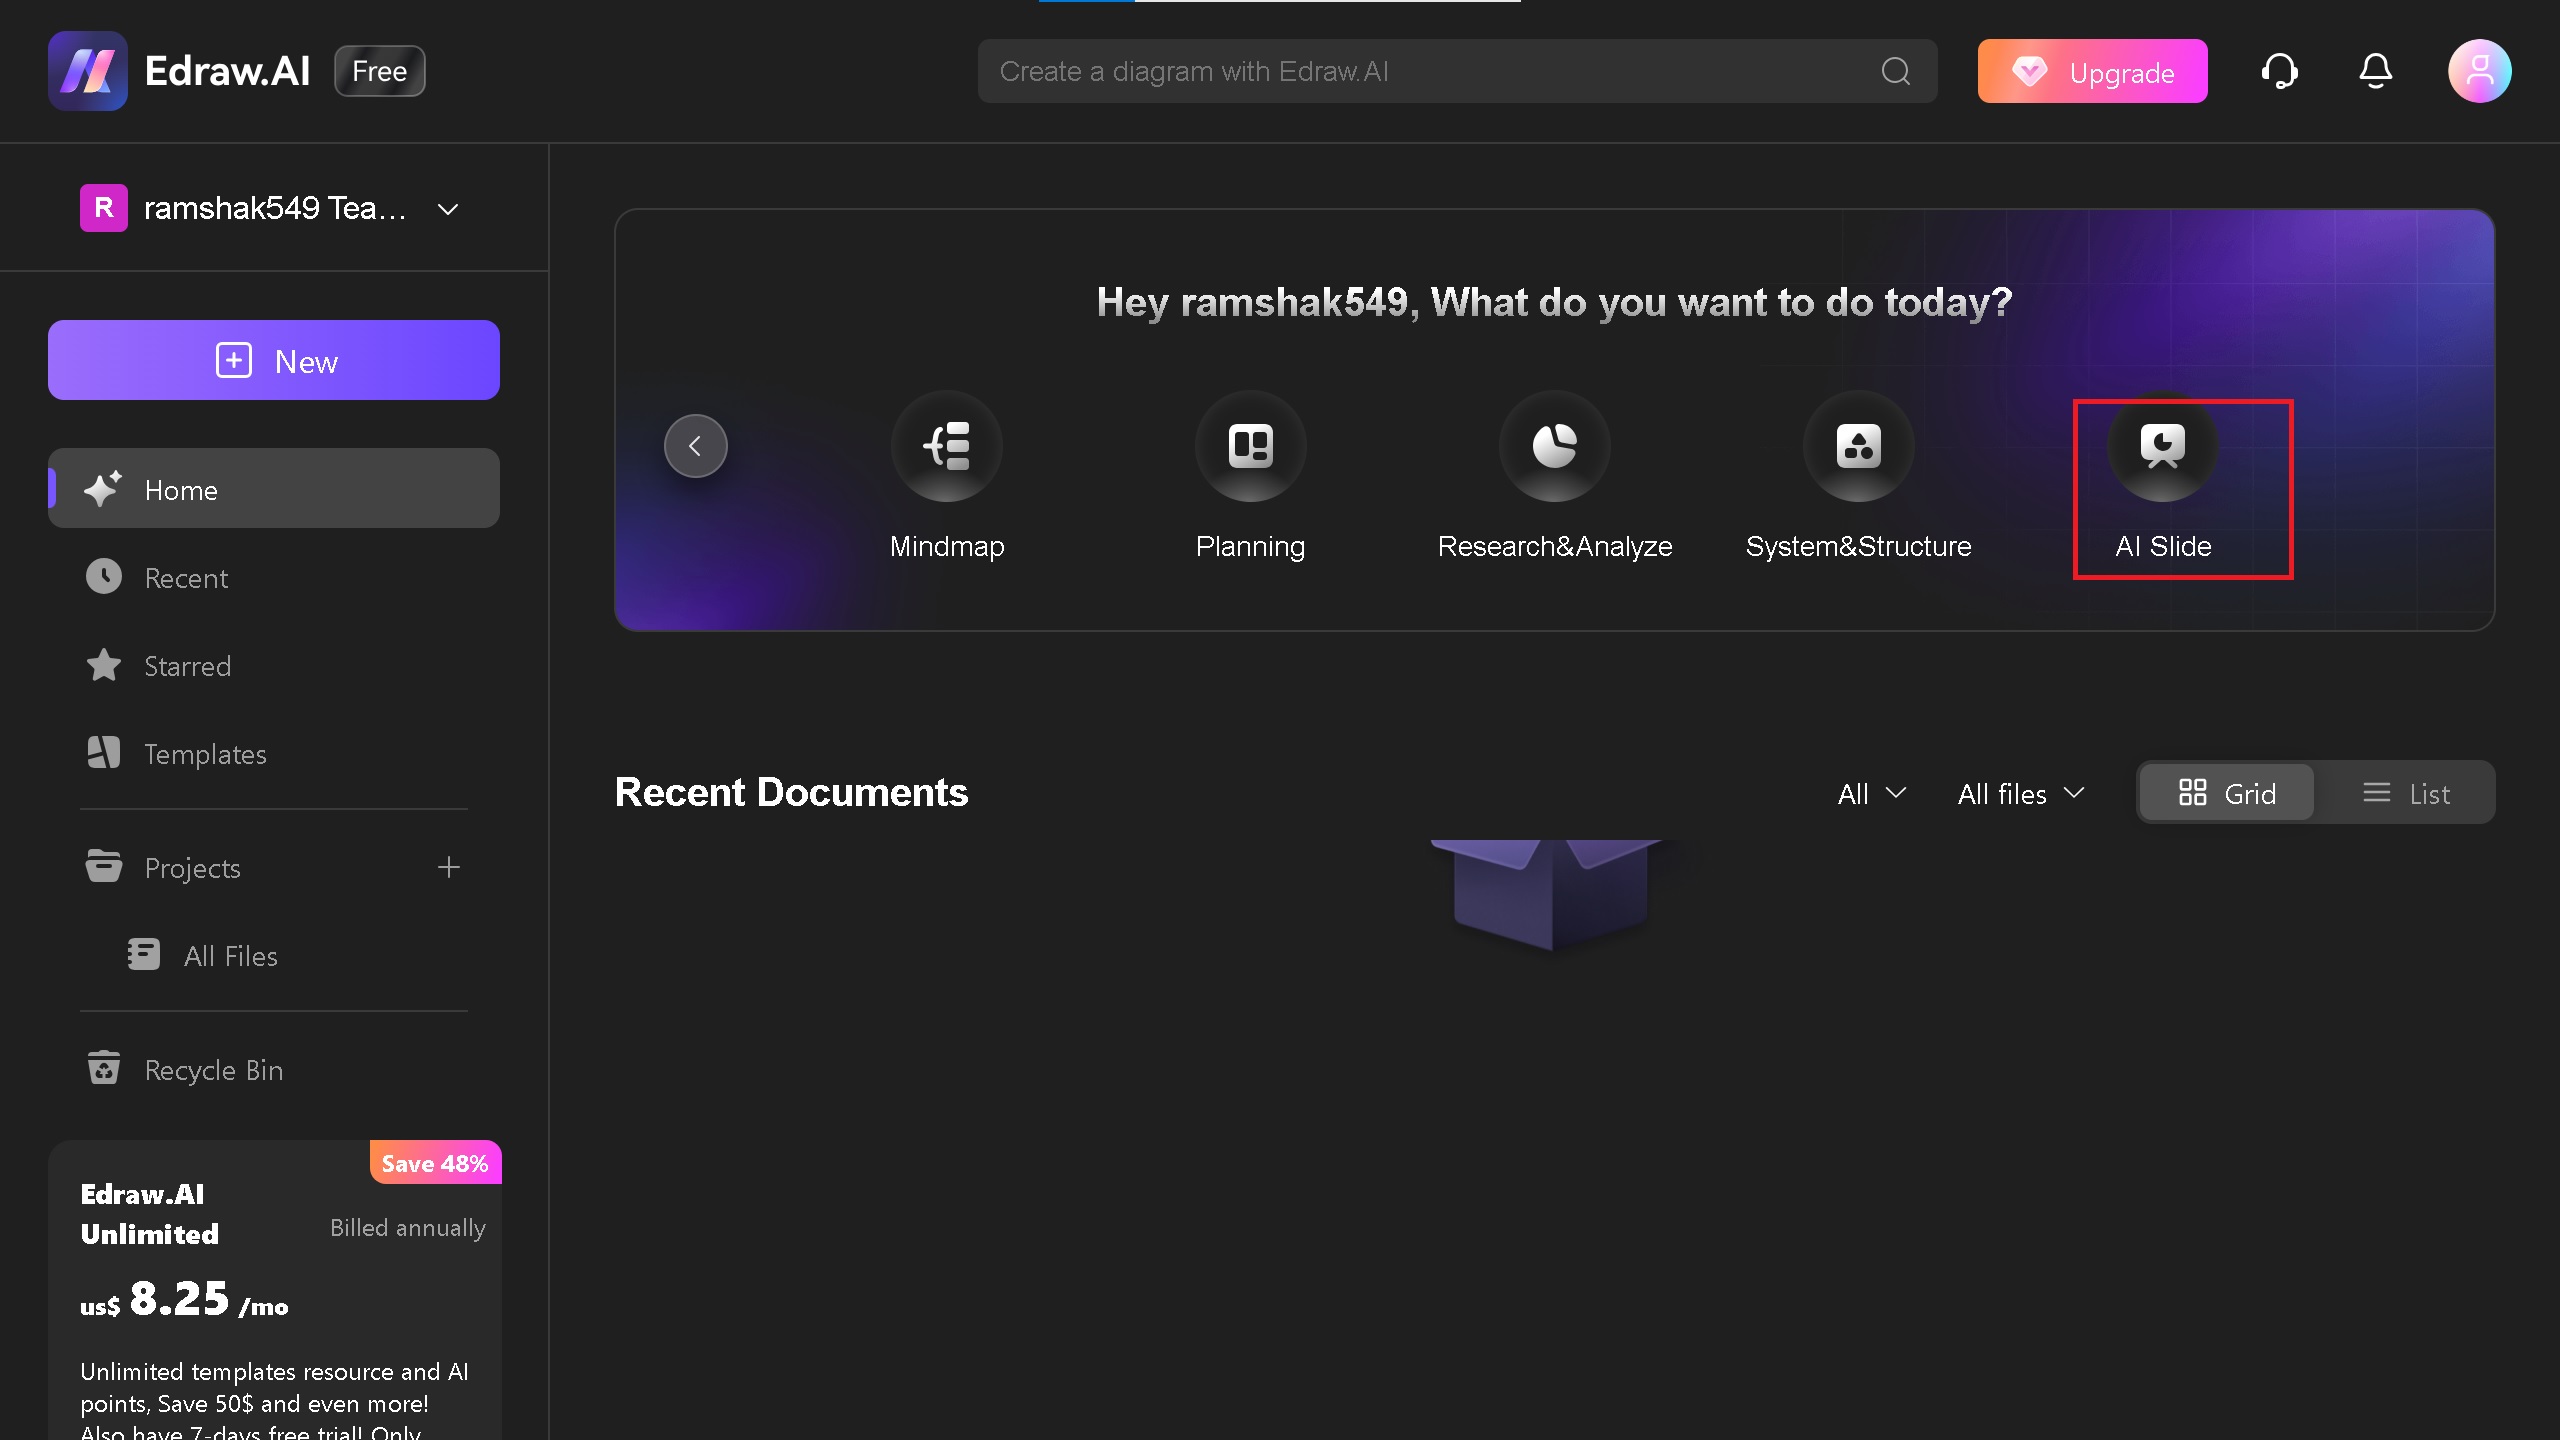
- On the homepage, click AI slide > AI Drawing > Enter your prompt, and your floor plan will be created based on your prompt.
- You can use this prompt and copy it directly into the dialogue box: "Draw me a floor plan with a garden with a fountain, grass, benches, and other symbols."
- Select the size ratio, style, and image quality. After entering the prompt, click the Start button, and AI will generate a floor plan for you.


Mar 19, 26