Traditional floor plan creation methods are often overlooked in today's fast-paced world. As a result, using digital floor plan-making software has become essential to staying competitive. That’s where Edraw.AI becomes a handy tool.
It has over 210 types of diagrams, hundreds of symbols, and advanced functionalities. I’ll give you a detailed guide on how to make a floor plan on Edraw.AI.
Time to dig deeper!
2 Ways to Make a Floor Plan on Edraw.AI: Step-by-Step Guide
In this section, I’ll demonstrate two different methods for drawing a floor plan on Edraw.AI. These methods are vital for beginners.
Method 1: Custom Design from Scratch
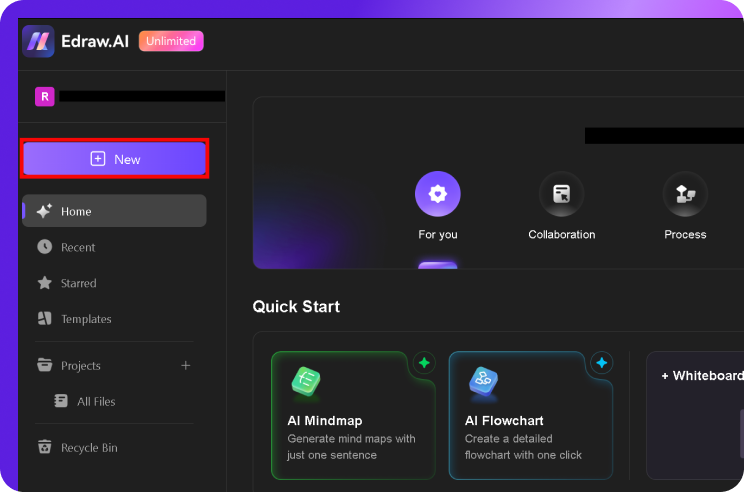
Step 1Create an Account and Blank Canvas
- Create an account on Edraw.AI and start a 7-day free trial.
- On the homepage, click on New.
- Scroll down and click on Floor Plan > New Floor Plan.
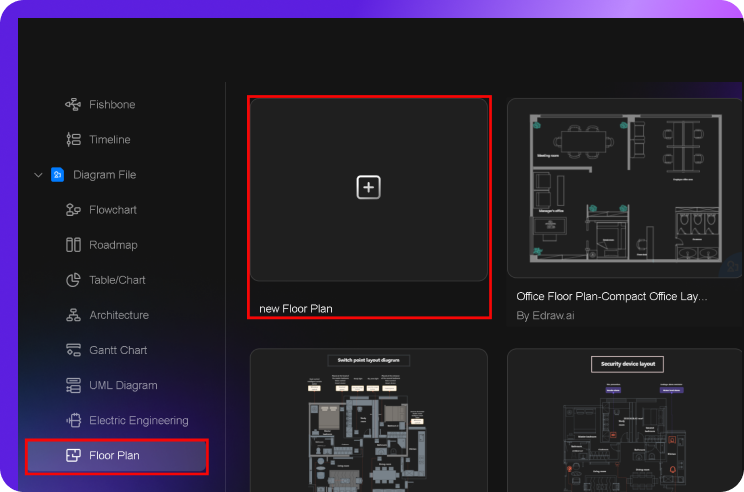
- A blank canvas will open in a new tab.
Step 2Pitching Idea & Creating the Exterior Walls
Right-click on the blank canvas > Grid > Show Grid. This will help in drawing more efficiently.


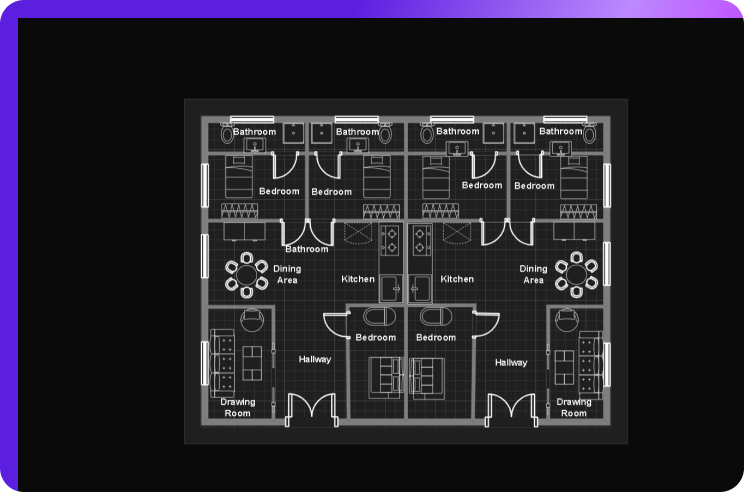
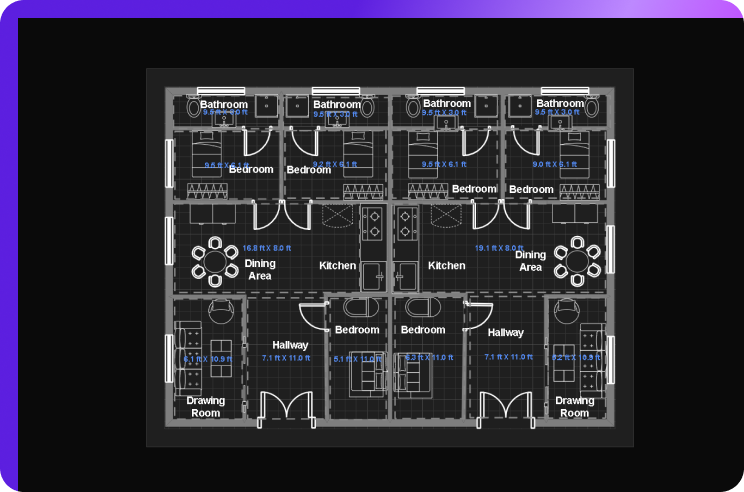
There are various types of floor plans available, each serving different purposes. House floor plans are the most suitable for planning a residential space. In this example, I’ll design a 1200 sq. ft. duplex floor plan to demonstrate the process.
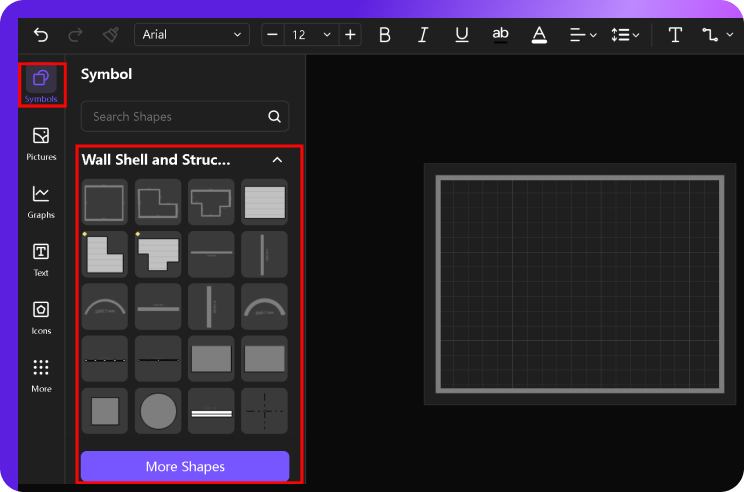
On the left side of the screen, click on symbols > Wall Shell and Structure. Select the exterior walls and drag them on the canvas.
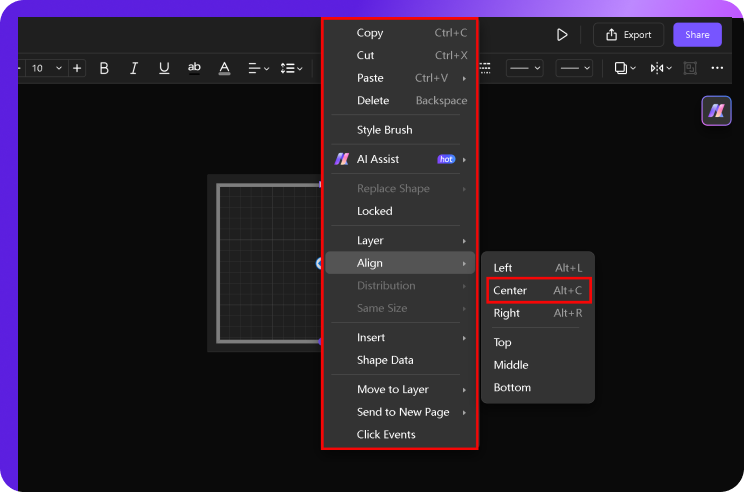
As we all know, duplex floor plans clearly separate two living units. Hence, I’ll draw another wall at the center of the floor plan.
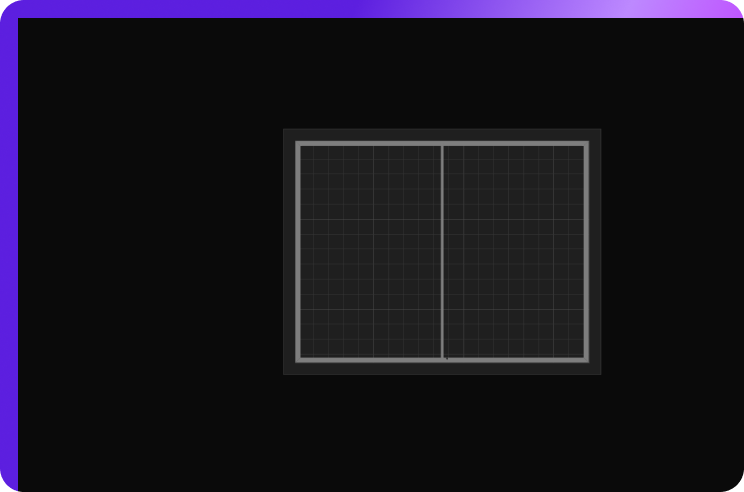
If you are having difficulties aligning the wall in the center, right-click on the center wall > Align > Center.
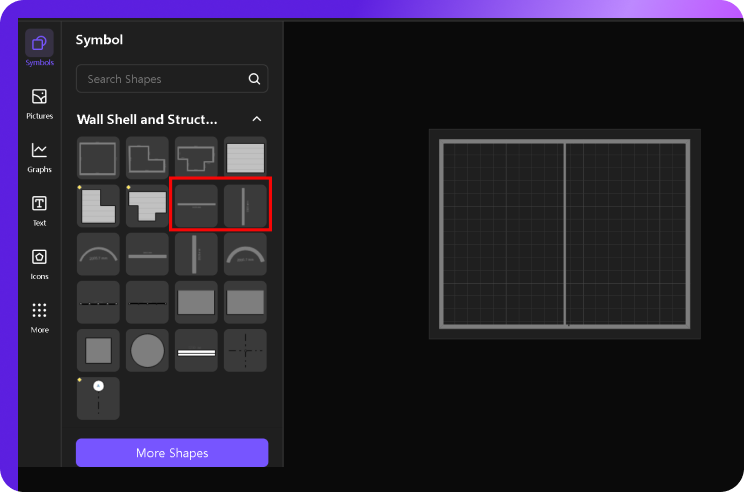
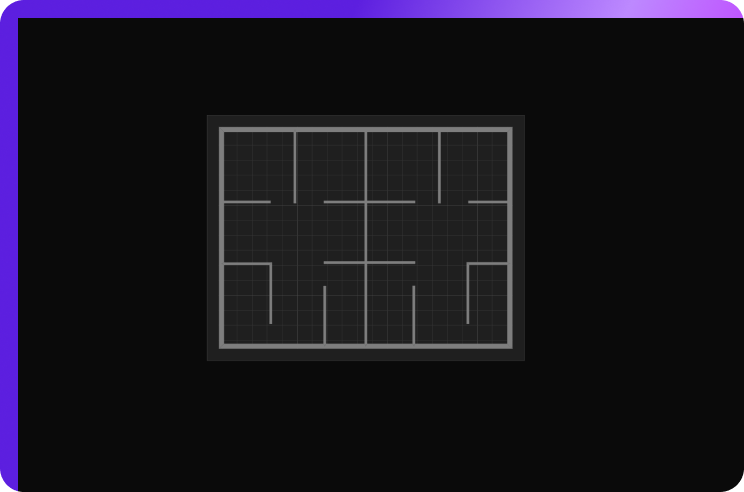
Step 3Draw Interior Walls
It’s time to draw the interior walls. Choose vertical and horizontal walls from the symbol library and drag it into the canvas.
For this duplex floor plan, I’m considering drawing three bedrooms for each unit. You can make it according to your preferences. Add necessities such as a kitchen, living room, and dining area.
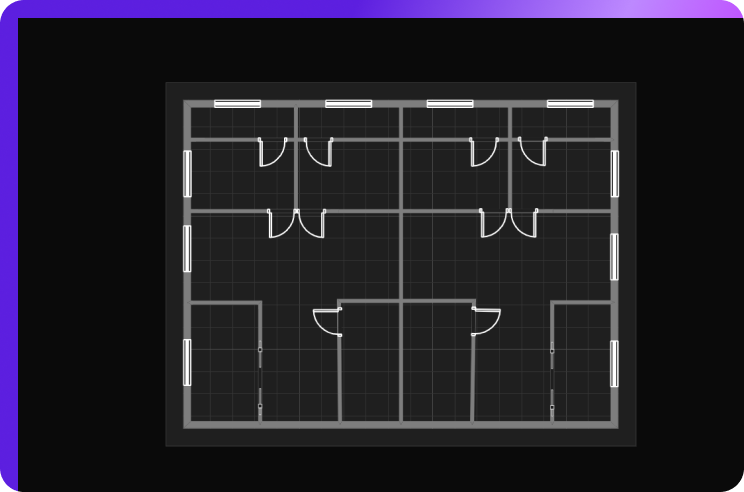
Step 4Adding Doors and Windows
Similarly, drag and drop the doors and windows from the symbol library.
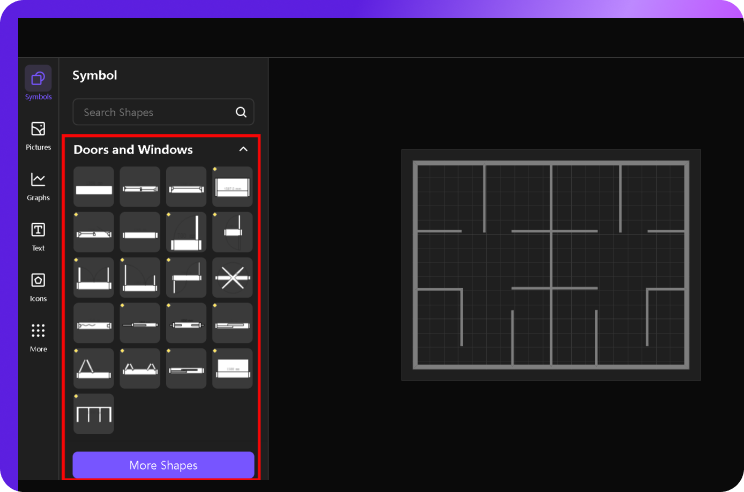
It is important to add windows in every room for proper ventilation. You can easily rotate the door or window symbol for more accuracy. To make your floor plan more appealing, you can also add folding doors in the drawing room area.
Step 5Add Interior Furniture
So, it’s time to add furniture to our duplex floor plan. To do this, we will upload more symbols from the library and drag them into the canvas.
Click on More Shapes> Floor Plan > Select Sofa, bedroom, bathroom, and other related furniture symbols from the library.
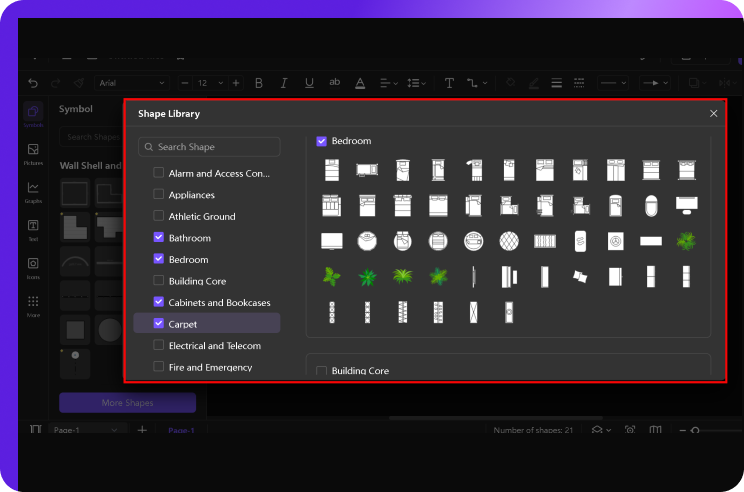
Add sofas in the drawing room, beds in the bedroom, culinary in the kitchen, carpet in the living room, and bathroom equipment in the restroom.
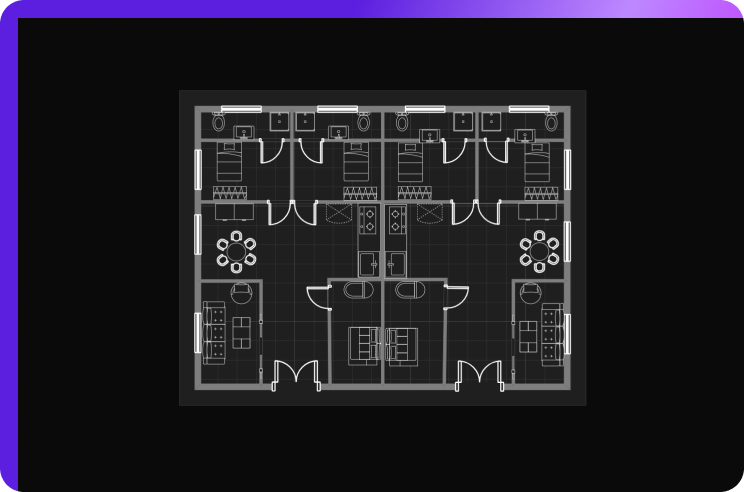
I have added a double door for the entrance in the above diagram. You can replace it with other types of doors for more uniqueness.
Step 6Add Labels for Rooms
Adding labels is essential to provide more clarity, context, and usability. Click on Text on the left side of the screen and add text into the canvas.
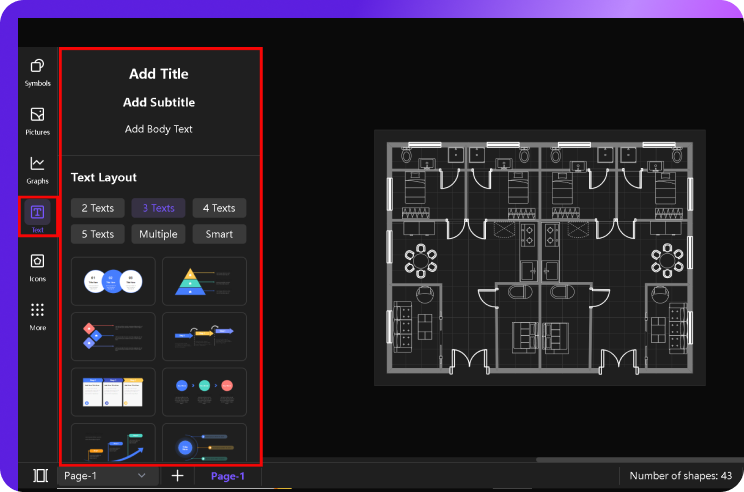
You can change the style, and size and add frames to your labels by simply clicking the text.
Step 7Provide Dimensions
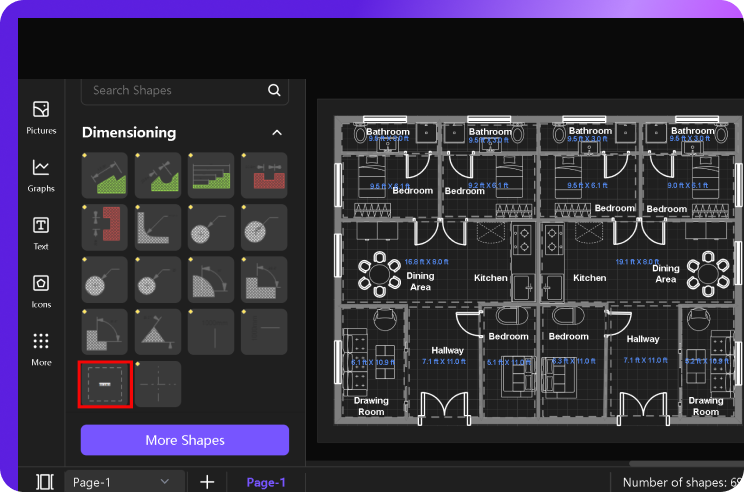
So, we are heading into the final steps of our diagram. It’s time to provide dimensions for each room. To save time, we will use dimension symbols.
Click on More Symbols and enable the Dimensioning in the Floor Plan symbols.
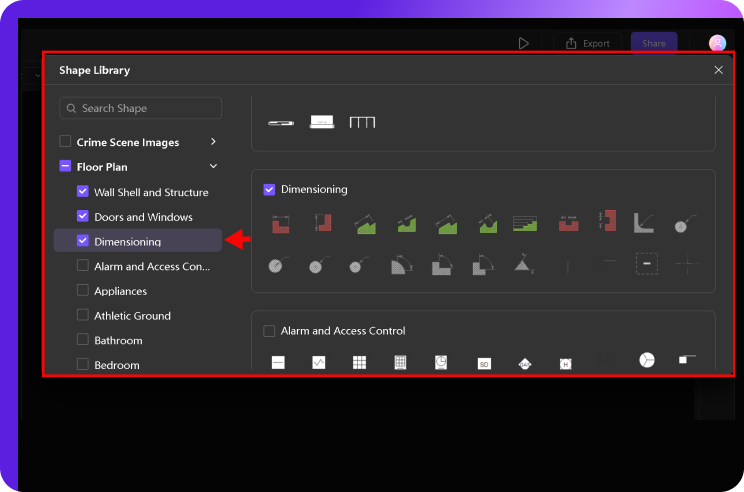
Select the Room Dimension symbol and drag it into every room. To change the units, right-click the dimension > Settings > Precision. I prefer the lengths in feet.
Step 8Export and Share
Our floor plan is now ready. Edraw.AI allows you to export it in different formats, such as PDF, Eddx, Word, and Excel.
Click on the Export button and select the format to download the file.
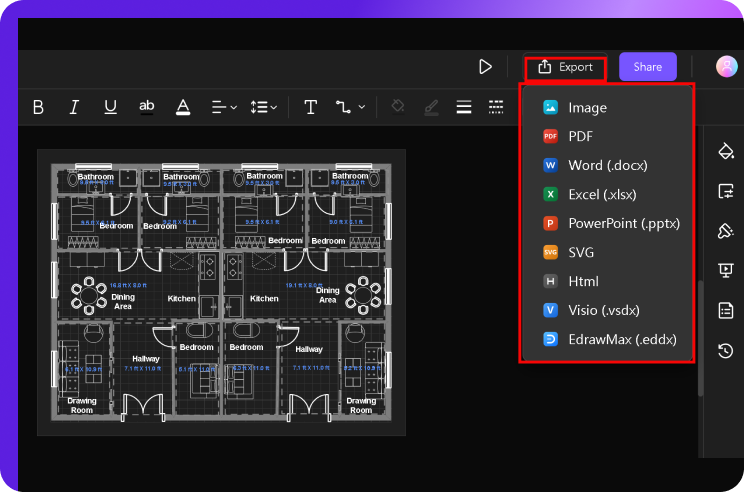
Similarly, click the Share button to invite your teammates or colleagues to work on the same diagram. You can also add them through their emails.

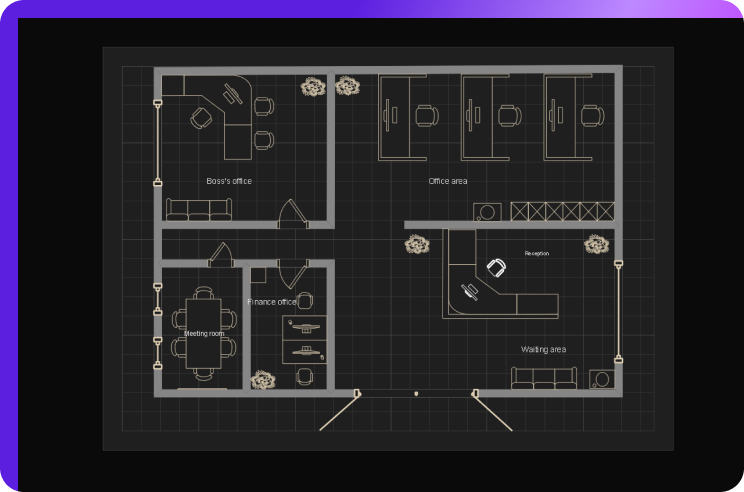
Method 2: Use a Template or Import it
Step 1Search For Preferred Template
In this method, I will show how you can customize a template on Edraw.AI and save time.
Click on Templates on the homepage and search Floor plan.
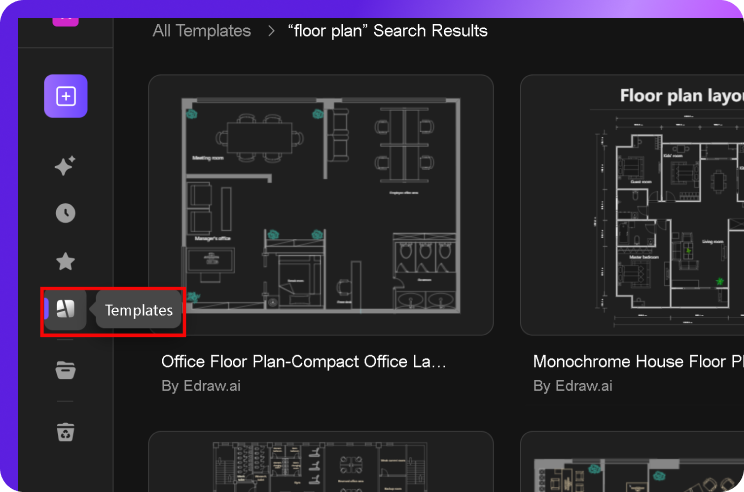
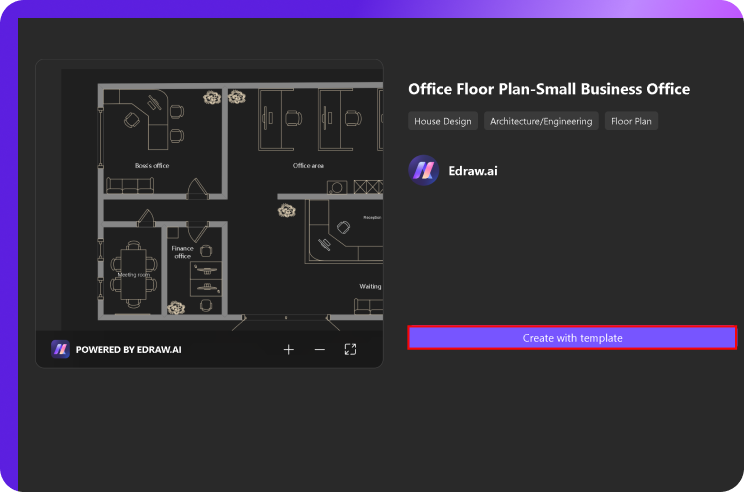
Select any templates you prefer and click the Create with Template button. The template will open in a new tab in your browser.
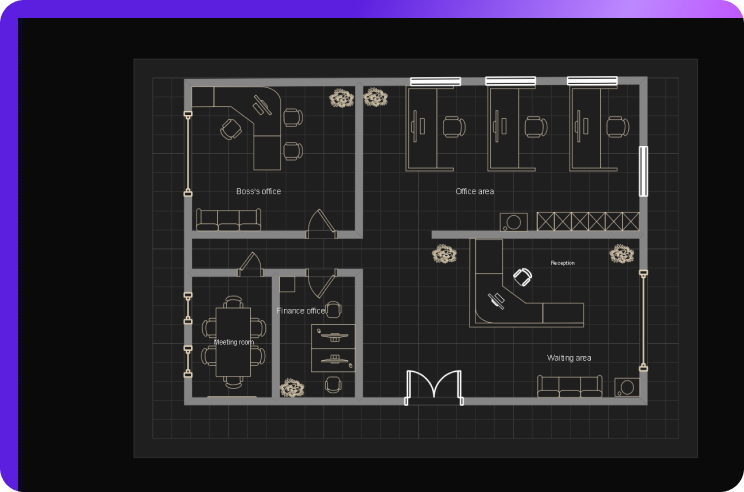
Step 2Make Desire Changes
Edit the template according to your preferences. I’ll replace the entry door with a double door and add extra windows at each cabin.
Step 3Share with Team
As mentioned above, export the file in different formats or invite your team to work on the same diagram.
Conclusion
Designing a floor plan with traditional methods might seem tedious. However, with Edraw.AI, it has become more efficient and seamless. In the above article, I’ve discussed two simple methods for making a floor plan on Edraw.AI. Read till the end to learn more!