Planning an event isn't just about setting a date and sending invitations; a lot is going on behind the scenes. From scheduling to picking a theme to budgeting and even coordinating with the vendors, every aspect plays a crucial role. However, it can be a fun and fulfilling activity as well, especially if you have everything written on an event planning checklist.
In this article
You can count on your fool-proof plan to stay on track and avoid last-minute surprises. Instead of juggling around with sticky notes and Excel sheets, you can just create a professional, all-in-one event plan on Edraw.AI.
Here is the step-by-step guide to making the perfect event plan with the tool— even if you're a complete beginner, let's start:
How to Create an Event Plan with Edraw.AI?
Edraw.AI allows you to create event planning charts in multiple ways, the choice of which depends on your preference and project requirements. I have listed two methods.
Method 1: Create from Template
Edraw.AI provides templates that you can use for various event planning needs. Finding a template and customizing it is probably the fastest and easiest way you can create your plan.
To get started, follow these steps:
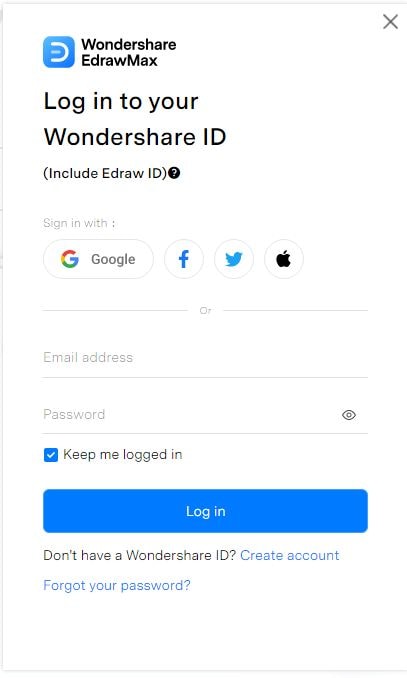
Step 1Log in to Edraw.AI
Log in to Edraw.AI with your credentials, or sign up if you are new to the tool. Make sure to fill in your real details as all your projects are saved on the dashboard, and you can download your event planning example PDF at any time.
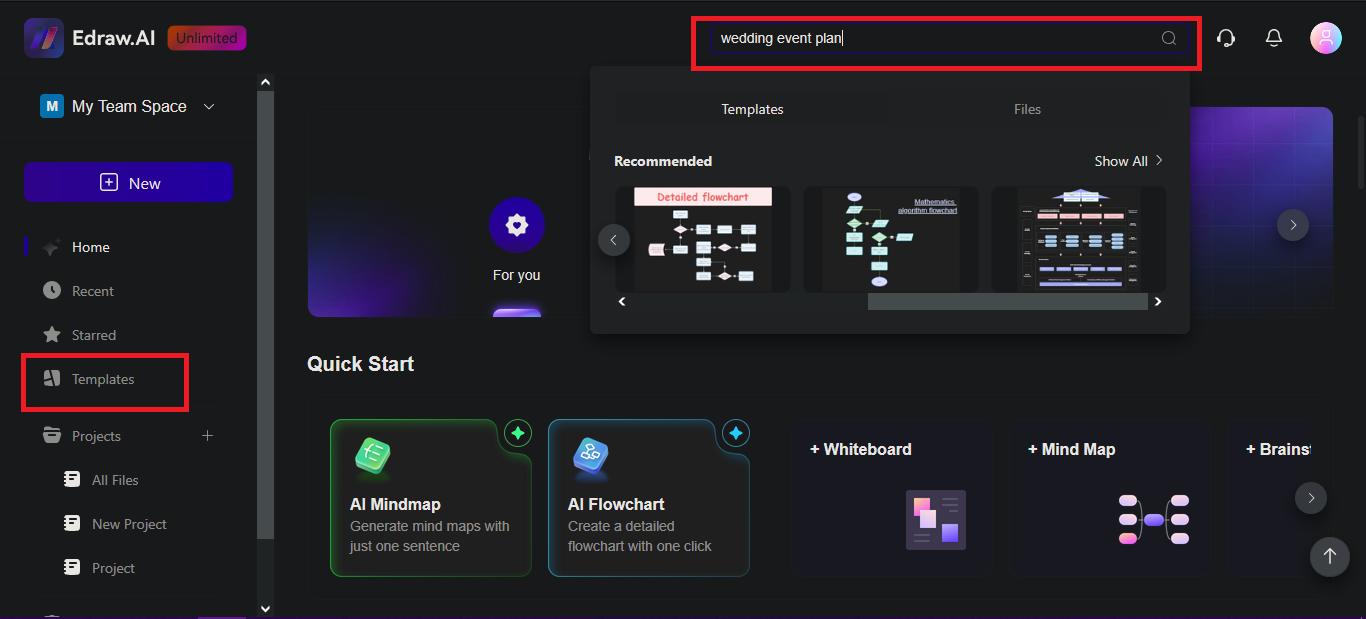
Step 2Select a Template
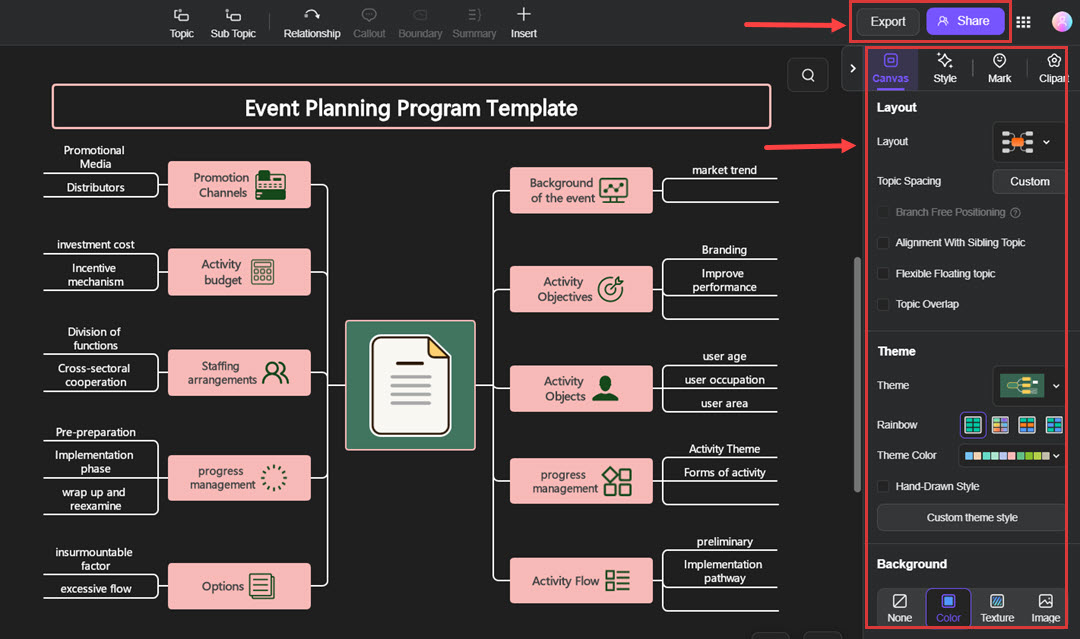
From your dashboard, enter your query in the search bar or click directly on the Templates option in the sidebar. I recommend selecting the Wedding Planning Program and Edraw Event Plan, as they include generic segments such as budget and venue, which can be easily updated for almost any event plan.
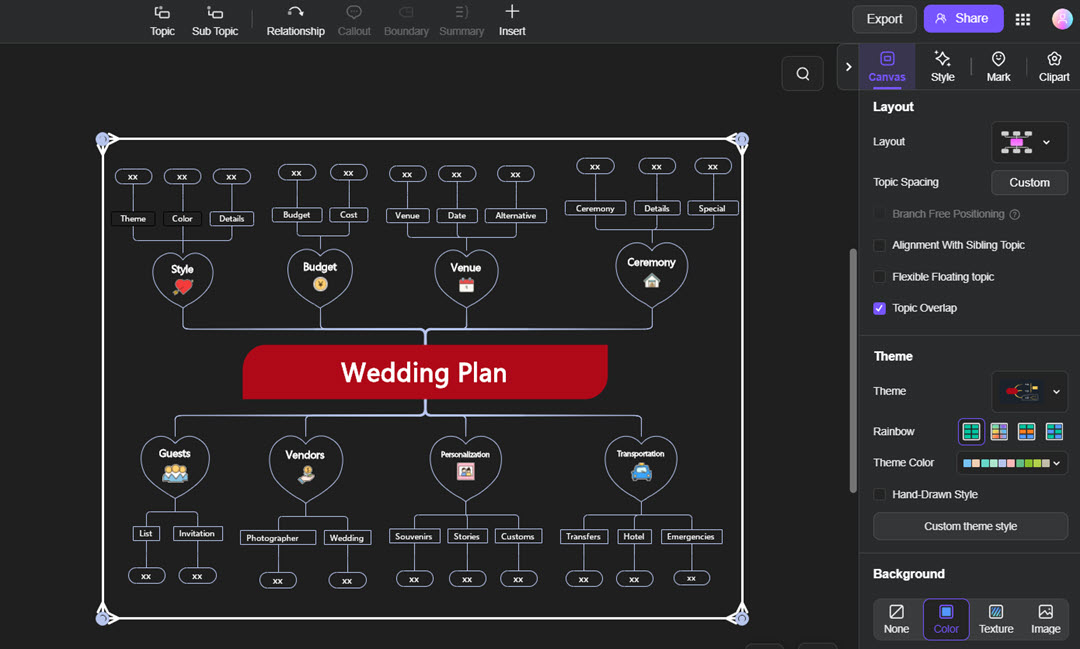
Step 3Edit the Template
Choose the best template that fits your requirements and click on Create with template to start filling in all the details. For the Wedding Planning Program, try populating it gradually as you shortlist different options for each segment. For instance, if the budget is final, put it in. Do you know the photographer? Well, write his name, charges, etc.
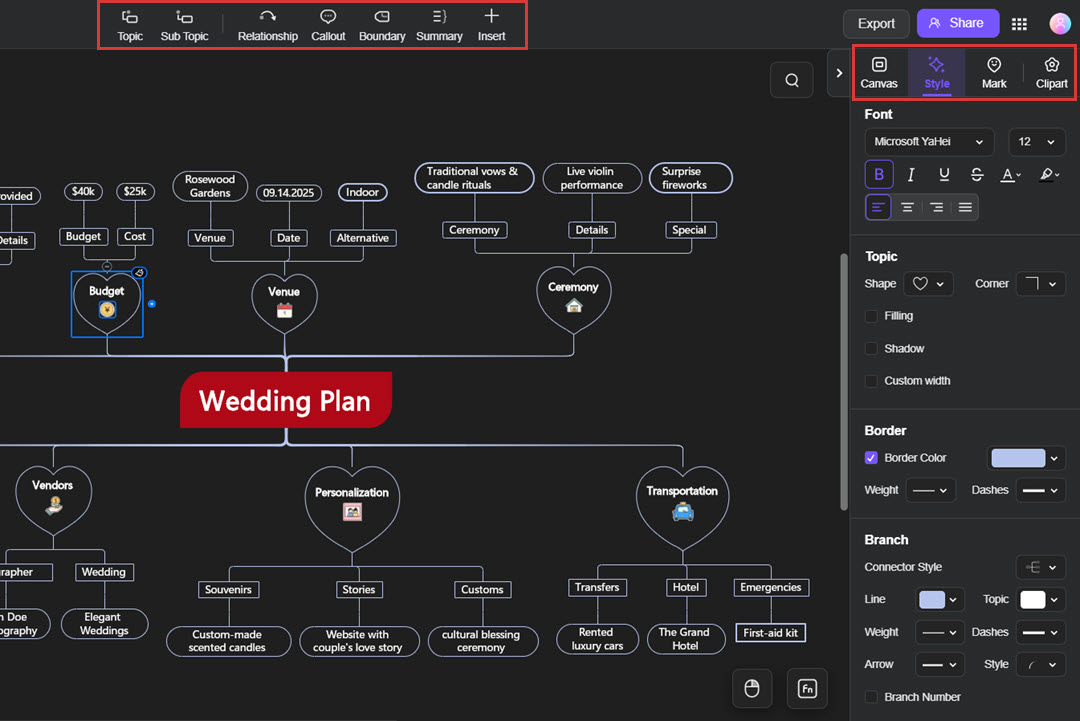
Step 4Personalize the Design
Once you are done with the basic design and have filled in all the details, it is time to personalize the template. While you can use it as is, why not create something tailored to your audience's taste or perhaps the event's theme?
To do this, update the layout, theme, colors, design, fonts, shapes, and everything else with the four options (Canvas, Style, Mark, and Clipart) in the right panel.
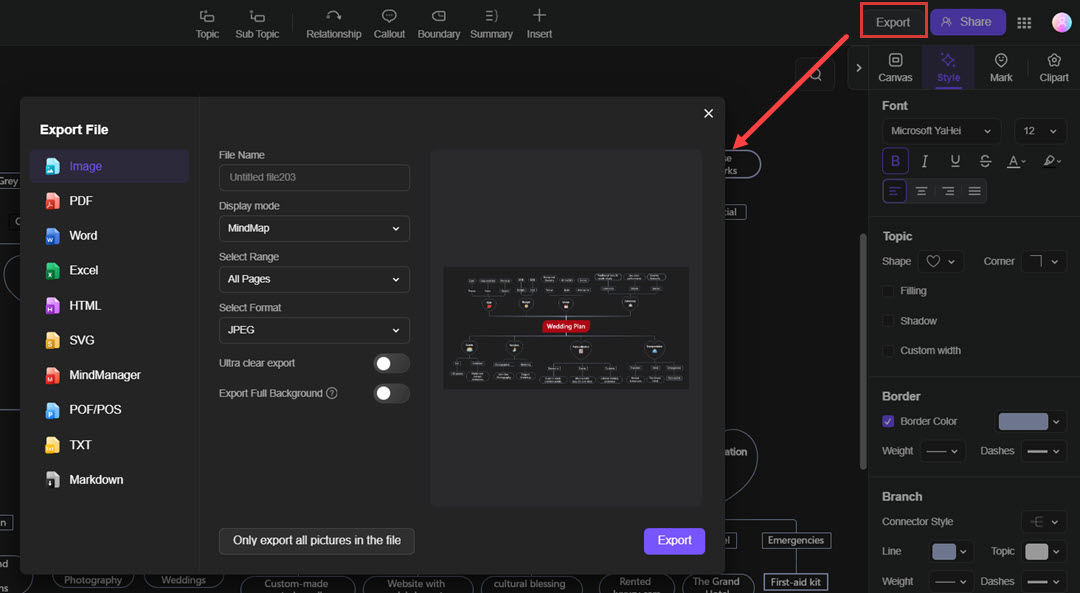
Step 5Save & Export
Click Export or save the plan in multiple formats. If you want to invite others to comment, edit, and interact with your design on Edraw.AI, generate a sharing link from the Share button.
Creating the Event Plan from Scratch
Edraw.AI provides free editable templates for everyone, but what if your plan demands something unique? For example, professional event planners use their plans as business proposals to convince and educate their potential clients.
In such a case, you’ll need to create the design from scratch, and here’s a quick guide on how you do it:
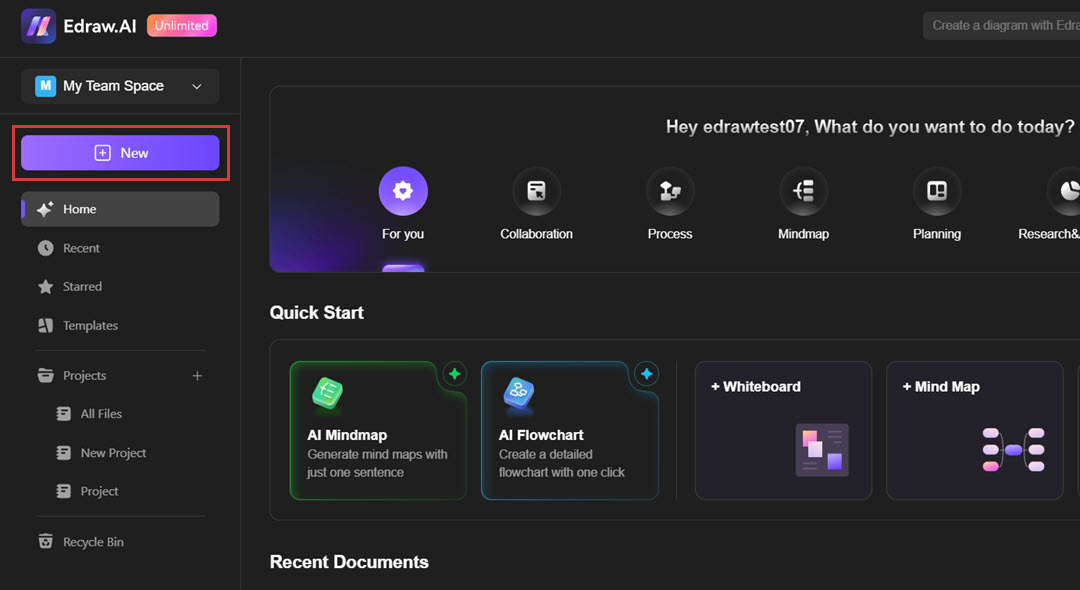
Step 1Log in and Choose New
Log in to Edraw.AI and create a new account if you are new to the tool. Once you enter the dashboard, click on New+ from the left-hand side menu. Select New MindMap from the top menu to start with a blank sheet, and select Frame or press F to create the boundaries for your workspace.
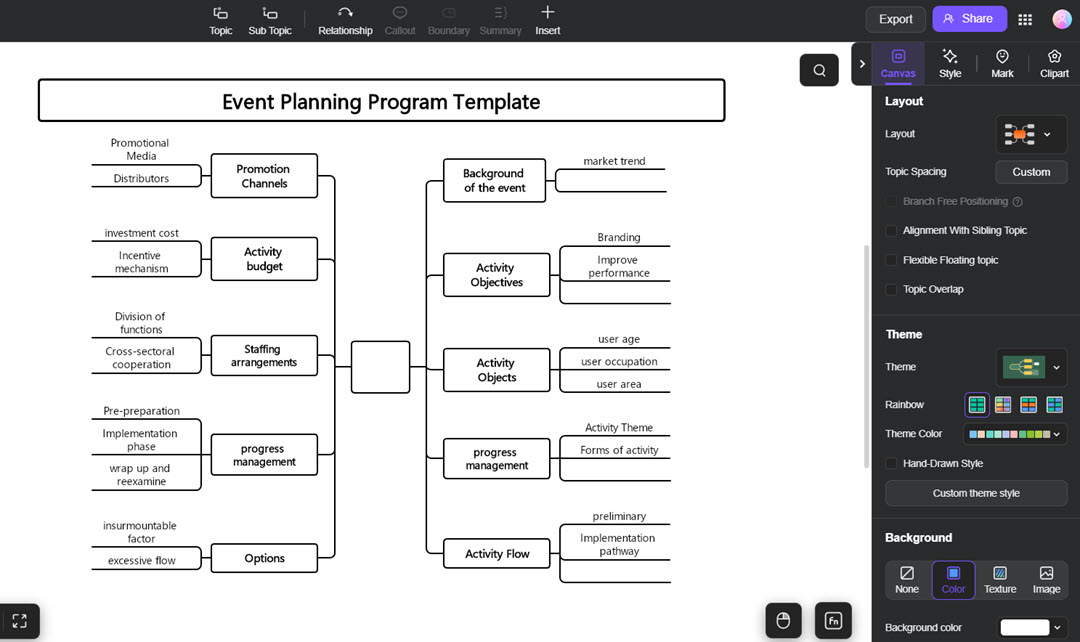
Step 2Design the Layout
Now that you have defined your workspace, add a large shape to the center of the board. Add a text box inside this shape and write your project's name, i.e., Wedding, Meeting, etc.
You can add as many shapes around the central shape as your project's tasks and add sub-categories for complex tasks to make them more manageable. Once you have the perfect layout for the event plan, start populating it with the required information, i.e., task name, budget, vendor, duration, etc.
Step 3Customize the Design and Export
Once the design is ready, you can optimize the theme, layout, and colors of your plan and Export it to different formats.
Best Practices for Creating an Effective Event Plan:
Although I made it sound simple, planning an event involves much more than just creating a checklist of tasks. For instance, everything must run smoothly from start to finish and without any hurdles. The first step is to familiarize yourself with the seven stages of event planning and incorporate them into your plan.
Some other event planning best practices to keep your event well-organized and stress-free include:
- Start early: Ensure you have ample time to refine your work. The sooner you start, the more time you will have at hand to avoid last-minute panic.
- Prioritize flexibility: Even the best plans are bound to change at some point. Therefore, keep your options open in terms of timelines, vendors, venues, and other factors.
- Maintain clear communication: Keep an open communication channel with all stakeholders, including vendors, participants, and organizers.
- Utilize data-driven insights: Adopt the “Build Back Better” approach to leverage past experiences and data, making informed decisions for the present and future.
- Visualize every detail, as this ensures that nothing is missed. Begin with a well-organized event plan and visualize aspects such as seating charts, venue layout, and task flow.
- Test the plan: Rehearse the entire checklist in real-time before the actual event. Such reviews can highlight potential issues in advance, giving you enough time to resolve them.
- Document everything: Record every detail, from expenditures to vendor information, contact details, schedules, and budgets. Doing so will help you out in post-event analysis and planning future events.
Why Use Edraw.AI To Create an Event Plan?
You can easily master the art of event planning with the right tools. Edraw.AI offers hundreds of editable templates, complete with numerous customization features, making event planning feel effortless. Some of its amazing features include free editable templates, drag-and-drop functionality, collaboration tools, etc.
And the best thing is, you don’t have to pay until you’re fully satisfied with its features. You can download/sign up for its free version first to explore these options and then opt for a pro plan to unlock additional features like:
- Access to premium templates and symbols
- Watermark-free export and printing
- Increased cloud storage
- Unlimited design elements
- Extensive AI tokens
- AI-assisted diagram creation
- AI file analysis
- AI chat
Conclusion
A sensibly planned event goes a long way. It provides the right directions, offers an overview of the entire project, and breaks down the big picture into smaller chunks. However, rather than creating everything from scratch, you can rely on Edraw.AI to craft professional plans with just a few clicks.
Now that you have the right tool and a clear roadmap, you are all set to plan your next event with confidence!